crwdns2915892:0crwdne2915892:0
Use this guide to replace the DDR3 RAM (Random Access Memory) Cards within the four different locations in your Dell Precision M4800 computer.
The RAM on a computer stores information and allows for this memory to be received and read instantaneously. It is imperative to know the correct type and size of the RAM Cards used within the computer. The DDR3 Ram cards may need to be replaced or upgraded within your computer due to excessive heat exposure, manufacturing defects, electrostatic exposure, or needing more memory to improve performance.
Before beginning, make sure to shut down your computer entirely and disconnect it from any power source.
crwdns2942213:0crwdne2942213:0
-
-
Unplug the charger from the computer.
-
Flip the computer, so the bottom is facing upwards.
-
Slide the release latch to release the battery.
-
Lift and remove the battery from the computer.
-
-
-
Using a Phillips #1 screwdriver, remove the two 5 mm screws fastening the backplate.
-
Slide the base cover towards the rear of the computer.
-
Lift the base cover and remove it from the computer,
-
-
-
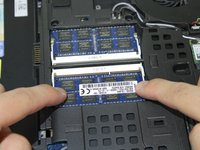
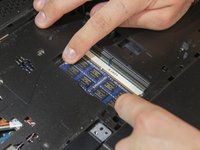
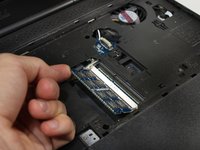
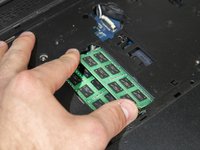
Pull the retention clips away from the RAM card simultaneously.
-
Lift the RAM card upwards.
-
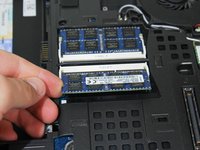
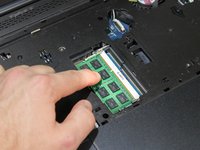
Pull the first RAM card away from the slot.
-
Repeat this step to remove the second RAM card.
-
-
-
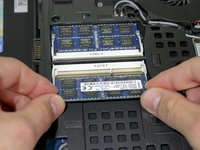
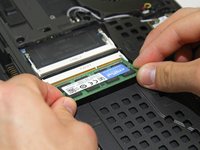
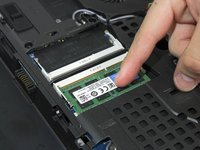
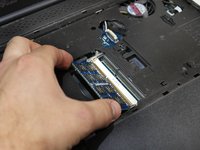
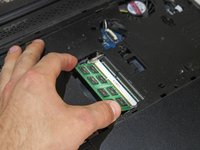
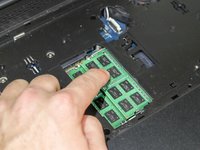
Insert the replacement RAM card back into the slot diagonally.
-
Lightly press the RAM card into the computer.
-
-
-
-
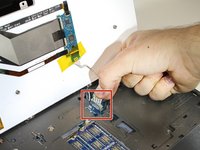
Using a guitar pick or an iFixit Opening Pick, pry a section of the keyboard trim.
-
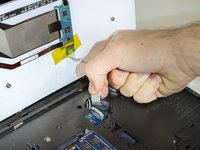
Gently lift the trim with your finger until multiple tabs of the keyboard trim are unclipped. Go around the trim and unclip all tabs one by one.
-
Once all the tabs are unclipped, remove the keyboard trim from the device.
-
-
-
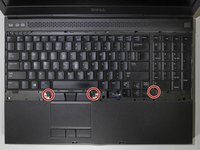
Using the Phillips #1 screwdriver, remove the three 3 mm screws.
-
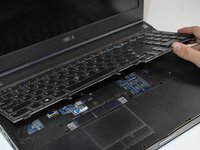
Lift the keyboard gently from retaining clips.
-
-
-
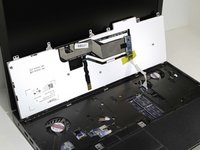
Disconnect the ribbon connector that attaches the keyboard to the motherboard.
-
Remove the keyboard.
-
-
-
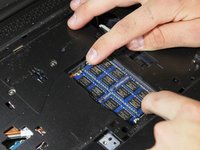
Pull the retention clips away from the first RAM card simultaneously.
-
Lift the first RAM card upwards.
-
Pull the first RAM card away from the slot.
-
-
-
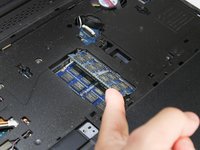
Pull the retention clips away from the second RAM card simultaneously.
-
Lift the second RAM card upwards.
-
Pull the second RAM card away from the slot.
-
-
-
Insert the first replacement RAM card into the slot at an angle.
-
Lightly press the RAM card into the computer.
-
-
-
Insert the second replacement RAM card into the slot at an angle.
-
Lightly press the RAM card into the computer.
-


To reassemble your device, follow these instructions in reverse order.
crwdns2935221:0crwdne2935221:0
crwdns2935229:04crwdne2935229:0

crwdns2935287:0crwdne2935287:0

Embry-Riddle Aeronautical University, Team S7-G2, Rauch Spring 2021 crwdns2935289:0Embry-Riddle Aeronautical University, Team S7-G2, Rauch Spring 2021crwdne2935289:0
ERAU-RAUCH-S21S7G2
crwdns2931471:03crwdne2931471:0
crwdns2935303:01crwdne2935303:0
crwdns2947410:01crwdne2947410:0
Posting in case this helps anyone else. I was donated 2 Dell Precision M4800 laptops with i7 processors. Both had newest BIOS I could find, A26 Dec 2019.
I put 4x4 GB RAM for a total of 16 GB in the laptop with i7 4710M and all was recognized.
When I put 4x4 GB RAM for a total of 16 GB in the laptop with i7 4610M, only slots AB (bottom of laptop) were recognized, for a total of 8 GB. If I removed the RAM sticks from slots AB, then slots CD (under keyboard) were recognized for a total of 8 GB. I could not get all 4 slots (ABCD) to be recognized.
I think the problem is the CPU i7 4610 is dual core, and only recognizes a maximum of 2 slots of RAM. The CPU i7 4710M is quad core and can recognize all 4 slots of RAM.
I tested with 2x 8GB sticks in i7 4610M and it recognized 16 GB RAM.