crwdns2933423:0crwdne2933423:0

Dell Precision 7560 Speaker Replacement

crwdns2942213:0crwdne2942213:0

  1. Dell Precision 7560 Speaker Replacement, Battery: crwdns2935265:01crwdnd2935265:01crwdnd2935265:03crwdne2935265:0 Dell Precision 7560 Speaker Replacement, Battery: crwdns2935265:01crwdnd2935265:02crwdnd2935265:03crwdne2935265:0 Dell Precision 7560 Speaker Replacement, Battery: crwdns2935265:01crwdnd2935265:03crwdnd2935265:03crwdne2935265:0
    • The screws holding the back cover in place can not be removed.

    • Use a Phillips #0 screwdriver to loosen the the eight 5 mm captive screws in the bottom cover.

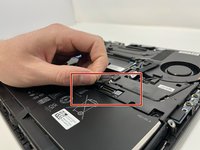
    • Remove the back cover by lifting at the corners.

  2. Dell Precision 7560 Speaker Replacement: crwdns2935265:02crwdnd2935265:01crwdnd2935265:03crwdne2935265:0 Dell Precision 7560 Speaker Replacement: crwdns2935265:02crwdnd2935265:02crwdnd2935265:03crwdne2935265:0 Dell Precision 7560 Speaker Replacement: crwdns2935265:02crwdnd2935265:03crwdnd2935265:03crwdne2935265:0
    • Unscrew and remove the five 2 mm screws that secure the battery.

    • Locate the battery connector.

  3. Dell Precision 7560 Speaker Replacement: crwdns2935265:03crwdnd2935265:01crwdnd2935265:03crwdne2935265:0 Dell Precision 7560 Speaker Replacement: crwdns2935265:03crwdnd2935265:02crwdnd2935265:03crwdne2935265:0 Dell Precision 7560 Speaker Replacement: crwdns2935265:03crwdnd2935265:03crwdnd2935265:03crwdne2935265:0
    • Pull the connector towards you to disconnect it.

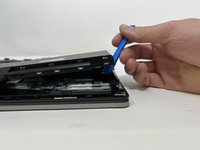
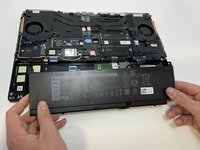
    • Use your fingers or a plastic opening tool to pry the battery up and remove it from the laptop.

  4. Dell Precision 7560 Speaker Replacement, Solid-State Drive (SSD): crwdns2935265:04crwdnd2935265:01crwdnd2935265:02crwdne2935265:0 Dell Precision 7560 Speaker Replacement, Solid-State Drive (SSD): crwdns2935265:04crwdnd2935265:02crwdnd2935265:02crwdne2935265:0
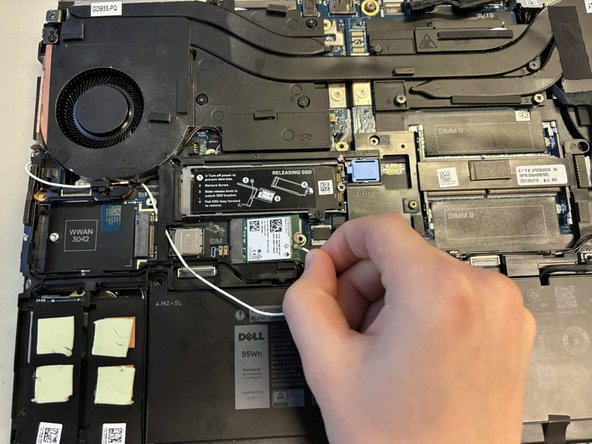
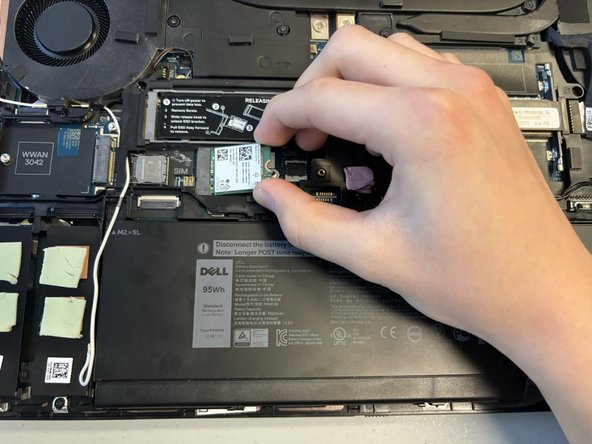
    • Unscrew and remove the two 3 mm screws that secure the solid-state drive.

  5. Dell Precision 7560 Speaker Replacement: crwdns2935265:05crwdnd2935265:01crwdnd2935265:02crwdne2935265:0 Dell Precision 7560 Speaker Replacement: crwdns2935265:05crwdnd2935265:02crwdnd2935265:02crwdne2935265:0
    • Remove the top cover of the Solid State Drive by lifting up from the corners.

    • Notice that the Solid State Drive is located underneath the cover.

    • Pull the Solid State Drive gently towards you from its exposed end to disconnect it.

    • With an appropriate replacement part, exchange the old SSD with a new one.

  6. Dell Precision 7560 Speaker Replacement, Speaker: crwdns2935265:06crwdnd2935265:01crwdnd2935265:03crwdne2935265:0 Dell Precision 7560 Speaker Replacement, Speaker: crwdns2935265:06crwdnd2935265:02crwdnd2935265:03crwdne2935265:0 Dell Precision 7560 Speaker Replacement, Speaker: crwdns2935265:06crwdnd2935265:03crwdnd2935265:03crwdne2935265:0
    • Loosen the eight captive screws that secure the fan assembly using a Phillips #0 screwdriver.

    • Lifting from the bottom, carefully remove the fan.

  7. Dell Precision 7560 Speaker Replacement: crwdns2935265:07crwdnd2935265:01crwdnd2935265:03crwdne2935265:0 Dell Precision 7560 Speaker Replacement: crwdns2935265:07crwdnd2935265:02crwdnd2935265:03crwdne2935265:0 Dell Precision 7560 Speaker Replacement: crwdns2935265:07crwdnd2935265:03crwdnd2935265:03crwdne2935265:0
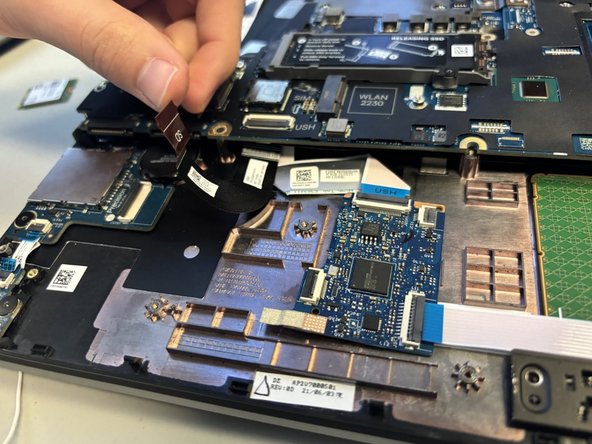
    • Remove the 5 mm screw holding the Wi-Fi card in place using a Phillips #0 screwdriver.

    • Remove the metal overlay.

    • Disconnect the wires attached to the Wi-Fi card.

    • Remove the Wi-Fi card.

  8. Dell Precision 7560 Speaker Replacement: crwdns2935265:08crwdnd2935265:01crwdnd2935265:02crwdne2935265:0 Dell Precision 7560 Speaker Replacement: crwdns2935265:08crwdnd2935265:02crwdnd2935265:02crwdne2935265:0
    • Remove the 2 mm screws holding the metal frame in place using a Phillips #0 screwdriver.

    • Remove, carefully and completely, any wires running over the frame.

    • Lift the metal frame.

  9. Dell Precision 7560 Speaker Replacement: crwdns2935265:09crwdnd2935265:01crwdnd2935265:02crwdne2935265:0 Dell Precision 7560 Speaker Replacement: crwdns2935265:09crwdnd2935265:02crwdnd2935265:02crwdne2935265:0
    • Flip up the metal edge holding down the SD connection.

    • Gently pull to disconnect the metal connecting wire.

  10. Dell Precision 7560 Speaker Replacement: crwdns2935265:010crwdnd2935265:01crwdnd2935265:03crwdne2935265:0 Dell Precision 7560 Speaker Replacement: crwdns2935265:010crwdnd2935265:02crwdnd2935265:03crwdne2935265:0 Dell Precision 7560 Speaker Replacement: crwdns2935265:010crwdnd2935265:03crwdnd2935265:03crwdne2935265:0
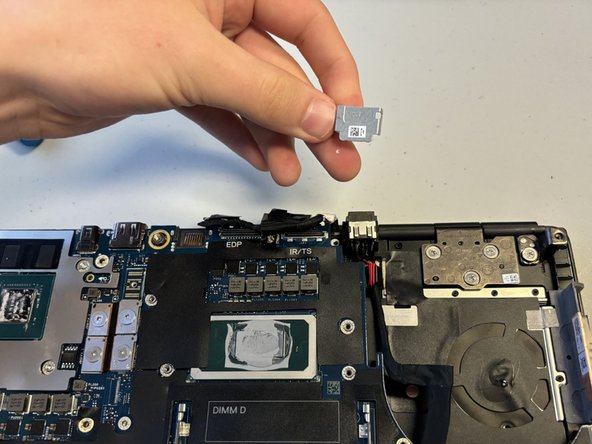
    • Remove the 5 mm screw holding the metal cap over the wire connection using a Phillips #0 screwdriver.

    • Remove the metal cap.

    • Disconnect the wire bundle.

  11. Dell Precision 7560 Speaker Replacement: crwdns2935265:011crwdnd2935265:01crwdnd2935265:03crwdne2935265:0 Dell Precision 7560 Speaker Replacement: crwdns2935265:011crwdnd2935265:02crwdnd2935265:03crwdne2935265:0 Dell Precision 7560 Speaker Replacement: crwdns2935265:011crwdnd2935265:03crwdnd2935265:03crwdne2935265:0
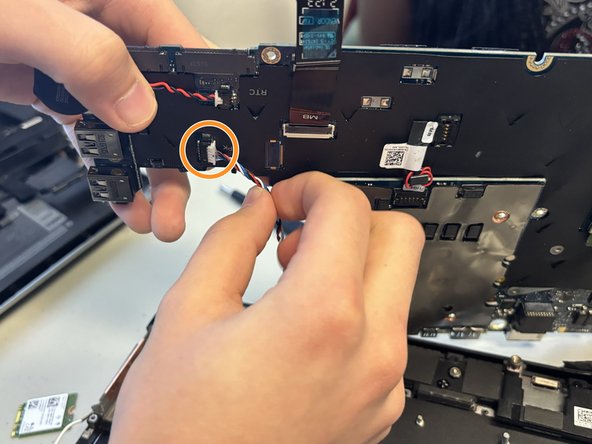
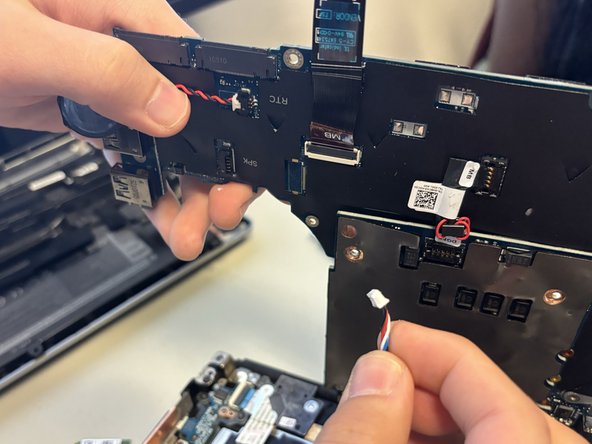
    • Using a Phillips #0 screwdriver, remove the eight 2 mm screws holding the motherboard.

    • Carefully remove the speaker wire from the motherboard.

  12. Dell Precision 7560 Speaker Replacement: crwdns2935265:012crwdnd2935265:01crwdnd2935265:02crwdne2935265:0 Dell Precision 7560 Speaker Replacement: crwdns2935265:012crwdnd2935265:02crwdnd2935265:02crwdne2935265:0
    • Using both hands, carefully lift and remove the speaker.

crwdns2915888:0crwdne2915888:0

To reassemble your device, follow these instructions in reverse order.

Neevia Vinod

crwdns2935283:002/08/24crwdne2935283:0

145 crwdns2915208:0crwdne2915208:0

crwdns2935295:0crwdne2935295:0

crwdns2915084:0crwdne2915084:0

University of North Texas, Team 5-4, Coppersmith Spring 2024 crwdns2935289:0University of North Texas, Team 5-4, Coppersmith Spring 2024crwdne2935289:0

UNT-COPPERSMITH-S24S5G4

crwdns2931471:04crwdne2931471:0

crwdns2935297:04crwdne2935297:0

crwdns2947412:00crwdne2947412:0

crwdns2917038:0crwdne2917038:0

crwdns2936625:0crwdne2936625:0:

crwdns2936751:024crwdne2936751:0 0

crwdns2936753:07crwdne2936753:0 0

crwdns2936753:030crwdne2936753:0 8

crwdns2942667:0crwdne2942667:0 138