crwdns2933423:0crwdne2933423:0
crwdns2947577:0crwdnd2947577:0crwdne2947577:0

Dell Photo Printer 540 LCD Panel Replacement

crwdns2942213:0crwdne2942213:0

  1. Dell Photo Printer 540 LCD Panel Replacement, Case: crwdns2935265:01crwdnd2935265:01crwdnd2935265:01crwdne2935265:0
    • Rotate the photo printer so that the bottom of the case faces upward.

    crwdns2952109:0crwdne2952109:0

    crwdns2917038:0crwdne2917038:0

  2. Dell Photo Printer 540 LCD Panel Replacement: crwdns2935265:02crwdnd2935265:01crwdnd2935265:01crwdne2935265:0
    • Use a Phillips #2 screwdriver to remove the three 5.65 mm screws on the bottom panel of the case in a counter-clockwise fashion.

    crwdns2952109:0crwdne2952109:0

    crwdns2917038:0crwdne2917038:0

  3. Dell Photo Printer 540 LCD Panel Replacement: crwdns2935265:03crwdnd2935265:01crwdnd2935265:01crwdne2935265:0
    • Rotate the device so that it is upright again. Under the LCD Panel there is a 9.62 mm screw, unscrew using a Phillips #2 screwdriver.

    crwdns2952109:0crwdne2952109:0

    crwdns2917038:0crwdne2917038:0

  4. Dell Photo Printer 540 LCD Panel Replacement: crwdns2935265:04crwdnd2935265:01crwdnd2935265:01crwdne2935265:0
    • Remove the back panel of the case by pulling directly back.

    • Some carefully applied force may be required to remove this part.

    crwdns2952109:0crwdne2952109:0

    crwdns2917038:0crwdne2917038:0

  5. Dell Photo Printer 540 LCD Panel Replacement: crwdns2935265:05crwdnd2935265:01crwdnd2935265:01crwdne2935265:0
    • Rotate the photo printer so that the bottom panel faces up once again. Now lift off the bottom panel of the case to access all internal components.

    crwdns2952109:0crwdne2952109:0

    crwdns2917038:0crwdne2917038:0

  6. Dell Photo Printer 540 LCD Panel Replacement: crwdns2935265:06crwdnd2935265:01crwdnd2935265:02crwdne2935265:0 Dell Photo Printer 540 LCD Panel Replacement: crwdns2935265:06crwdnd2935265:02crwdnd2935265:02crwdne2935265:0
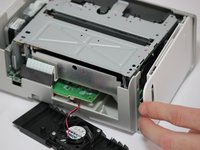
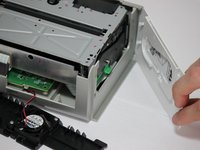
    • Finally remove the side panel with the ink-cartridge door by holding the right side and pulling backwards with the left side.

    • Caution! The side panel is held in by tabs; don't break these.

    crwdns2952109:0crwdne2952109:0

    crwdns2917038:0crwdne2917038:0

  7. Dell Photo Printer 540 LCD Panel Replacement, Cooling Fan: crwdns2935265:07crwdnd2935265:01crwdnd2935265:01crwdne2935265:0
    • Carefully remove the inner components of the device by lifting the inner components up and out of the casing.

    crwdns2952109:0crwdne2952109:0

    crwdns2917038:0crwdne2917038:0

  8. Dell Photo Printer 540 LCD Panel Replacement: crwdns2935265:08crwdnd2935265:01crwdnd2935265:01crwdne2935265:0
    • Locate the red and black cable that is connecting the fan to the top of the logic board.

    crwdns2952109:0crwdne2952109:0

    crwdns2917038:0crwdne2917038:0

  9. Dell Photo Printer 540 LCD Panel Replacement: crwdns2935265:09crwdnd2935265:01crwdnd2935265:01crwdne2935265:0
    • Carefully, remove the red and black cable from the logic board by pulling gently in order to isolate the cooling fan from the device.

    crwdns2952109:0crwdne2952109:0

    crwdns2917038:0crwdne2917038:0

  10. Dell Photo Printer 540 LCD Panel Replacement, LCD Panel: crwdns2935265:010crwdnd2935265:01crwdnd2935265:01crwdne2935265:0
    • Locate the data ribbon that connects the LCD panel to the mother board.

    • Carefully unclip the ribbon from the mother board.

    • Separate top cover from bottom base and flip upright so that the LCD panel is facing up for the next step

    crwdns2952109:0crwdne2952109:0

    crwdns2917038:0crwdne2917038:0

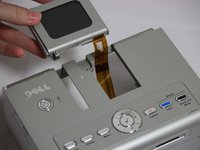
  11. Dell Photo Printer 540 LCD Panel Replacement: crwdns2935265:011crwdnd2935265:01crwdnd2935265:02crwdne2935265:0 Dell Photo Printer 540 LCD Panel Replacement: crwdns2935265:011crwdnd2935265:02crwdnd2935265:02crwdne2935265:0
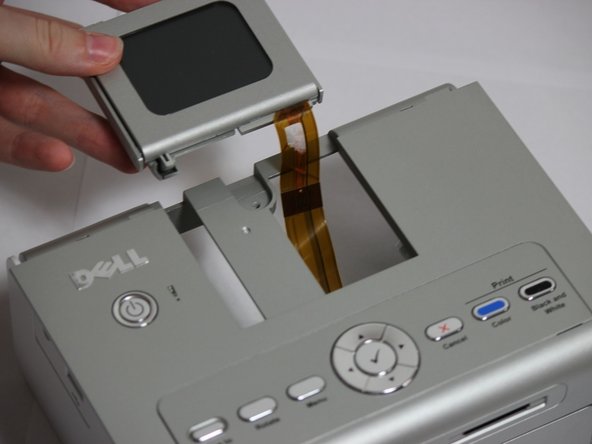
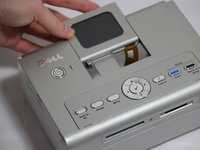
    • Slide the LCD panel out and away from the printer case.

    • Hold bottom of LCD panel and lift the screen 70 degrees. Set the screen face down for the next step

    crwdns2952109:0crwdne2952109:0

    crwdns2917038:0crwdne2917038:0

  12. Dell Photo Printer 540 LCD Panel Replacement: crwdns2935265:012crwdnd2935265:01crwdnd2935265:01crwdne2935265:0
    • Use a Phillips 00 screwdriver to remove the four 5.4 mm screws behind where the LCD screen is.

    crwdns2952109:0crwdne2952109:0

    crwdns2917038:0crwdne2917038:0

  13. Dell Photo Printer 540 LCD Panel Replacement: crwdns2935265:013crwdnd2935265:01crwdnd2935265:01crwdne2935265:0
    • You can now separate the individual pieces from each other, allowing the screen to be accessible to replace.

    crwdns2952109:0crwdne2952109:0

    crwdns2917038:0crwdne2917038:0

crwdns2915888:0crwdne2915888:0

To reassemble your device, follow these instructions in reverse order.

crwdns2935221:0crwdne2935221:0

Ashley Lopez

crwdns2935283:004/04/12crwdne2935283:0

1 crwdns2915208:0crwdne2915208:0

crwdns2935295:0crwdne2935295:0

crwdns2935287:0crwdne2935287:0

Cal Poly, Team 14-7, Forte Spring 2012 crwdns2935289:0Cal Poly, Team 14-7, Forte Spring 2012crwdne2935289:0

CPSU-FORTE-S12S14G7

crwdns2931471:04crwdne2931471:0

crwdns2935297:012crwdne2935297:0

crwdns2947412:00crwdne2947412:0

crwdns2917038:0crwdne2917038:0

crwdns2936625:0crwdne2936625:0:

crwdns2936751:024crwdne2936751:0 0

crwdns2936753:07crwdne2936753:0 5

crwdns2936753:030crwdne2936753:0 32

crwdns2942667:0crwdne2942667:0 820