
Dell Optiplex GX620 Optical Drive Replacement

crwdns2959932:0crwdnd2959932:0Kristinacrwdnd2959932:0crwdnd2959932:0crwdnd2959932:05crwdnd2959932:0crwdne2959932:0
crwdns2959936:0N'w 11, 2017crwdne2959936:0
crwdns2869540:0crwdne2869540:0: 3.7K
crwdns2959988:0crwdne2959988:0
- crwdns2959990:0crwdne2959990:0
- 3
- crwdns2959992:0crwdne2959992:0
- 20
- crwdns2959994:0crwdne2959994:0
- 107
- crwdns2959996:0crwdne2959996:0
- 3,725
crwdns2955950:0crwdne2955950:0: 0
crwdns2959998:0crwdne2959998:0
crwdns2960000:0crwdne2960000:0crwdns2959984:0crwdne2959984:0: 0 1
crwdns2959956:0crwdne2959956:0
crwdns2959968:01crwdne2959968:0
crwdns2959986:0crwdne2959986:0: 0 1
crwdns2959958:0crwdne2959958:0
crwdns2959976:01crwdne2959976:0
crwdns2944444:0crwdne2944444:0
crwdns2944446:0crwdne2944446:0
crwdns2862611:0crwdne2862611:0
crwdns2862612:0crwdne2862612:0
crwdns2915892:0crwdne2915892:0
crwdns2959928:0crwdne2959928:0 ↓The optical drive should be replaced if the computer no longer recognizes the device, or if the disc reader is faulty.
crwdns2959930:0crwdne2959930:0
crwdns2943215:0crwdne2943215:0


-
-
-
Power down your PC and remove the power cord from the back.
 crwdns2952109:0crwdne2952109:0
-
-
-
Press and hold the power button for about 10 seconds, then release.
-
-
-
-
-
With the computer standing upright, firmly pull on the tab at the back of the computer.
-
When the side panel pops free, gently pull the panel away from the computer.
-
-
-
-
-
Slide the blue latch downward until the panel can be removed from it's hinges.
-
-
-
Gently remove the CD/DVD and power cables from the back of the optical drive
-
-
-
-
Using a Phillips #1 screwdriver, remove the screw connecting the optical drive to the drive bay.
-
-
-
To remove the optical drive from the drive bay, slide the drive towards the front of the computer.
-
-


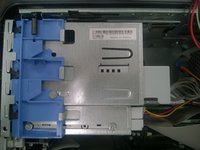
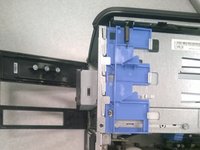
To reassemble your device, follow these instructions in reverse order.

crwdns2935287:0crwdne2935287:0

Pasco Hernando, Team 5-1, Prince Fall 2014 crwdns2935289:0Pasco Hernando, Team 5-1, Prince Fall 2014crwdne2935289:0
PHSC-PRINCE-F14S5G1
crwdns2931471:010crwdne2931471:0
crwdns2935297:084crwdne2935297:0
