crwdns2933423:0crwdne2933423:0
crwdns2947577:0crwdnd2947577:0crwdne2947577:0

Dell Latitude D600 RAM (Main Memory) Replacement

crwdns2869540:0crwdne2869540:0: 3,6 B

crwdns2959988:0crwdne2959988:0

crwdns2959990:0crwdne2959990:0
3
crwdns2959992:0crwdne2959992:0
16
crwdns2959994:0crwdne2959994:0
93
crwdns2959996:0crwdne2959996:0
3.564
crwdns2955950:0crwdne2955950:0: 1

crwdns2960006:01crwdne2960006:0

crwdns2960000:0crwdne2960000:0
crwdns2959984:0crwdne2959984:0: 6

crwdns2959974:06crwdne2959974:0

crwdns2959986:0crwdne2959986:0: 4

crwdns2959982:04crwdne2959982:0

crwdns2955944:0crwdne2955944:0: crwdns2931287:05crwdne2931287:0
crwdns2955970:0crwdne2955970:0: crwdns2937799:0crwdne2937799:0
crwdns2944444:0crwdne2944444:0

crwdns2944446:0crwdne2944446:0

Dell Latitude D600 RAM (Main Memory) Replacement

crwdns2915892:0crwdne2915892:0

crwdns2959928:0crwdne2959928:0 ↓

This guide will show how to add RAM or replace existing RAM on the Latitude D600

crwdns2959930:0crwdne2959930:0

crwdns2943215:0crwdne2943215:0

    1. Dell Latitude D600 RAM (Main Memory) Replacement, Battery: crwdns2935265:01crwdnd2935265:01crwdnd2935265:01crwdne2935265:0
      • Find the battery

      crwdns2952109:0crwdne2952109:0

      crwdns2917038:0crwdne2917038:0

    2. Dell Latitude D600 RAM (Main Memory) Replacement: crwdns2935265:02crwdnd2935265:01crwdnd2935265:02crwdne2935265:0 Dell Latitude D600 RAM (Main Memory) Replacement: crwdns2935265:02crwdnd2935265:02crwdnd2935265:02crwdne2935265:0
      • Pull the tab to release the battery

      crwdns2952109:0crwdne2952109:0

      crwdns2917038:0crwdne2917038:0

    3. Dell Latitude D600 RAM (Main Memory) Replacement: crwdns2935265:03crwdnd2935265:01crwdnd2935265:01crwdne2935265:0
      • Pull the battery out

      crwdns2952109:0crwdne2952109:0

      crwdns2917038:0crwdne2917038:0

    1. Dell Latitude D600 RAM (Main Memory) Replacement, RAM (Main Memory): crwdns2935265:04crwdnd2935265:01crwdnd2935265:02crwdne2935265:0 Dell Latitude D600 RAM (Main Memory) Replacement, RAM (Main Memory): crwdns2935265:04crwdnd2935265:02crwdnd2935265:02crwdne2935265:0
      • Find the panel underneath the microsoft product key sticker, the panel is labeled with an M

      • Unscrew the single screw above the M

      crwdns2952109:0crwdne2952109:0

      crwdns2917038:0crwdne2917038:0

    2. Dell Latitude D600 RAM (Main Memory) Replacement: crwdns2935265:05crwdnd2935265:01crwdnd2935265:03crwdne2935265:0 Dell Latitude D600 RAM (Main Memory) Replacement: crwdns2935265:05crwdnd2935265:02crwdnd2935265:03crwdne2935265:0 Dell Latitude D600 RAM (Main Memory) Replacement: crwdns2935265:05crwdnd2935265:03crwdnd2935265:03crwdne2935265:0
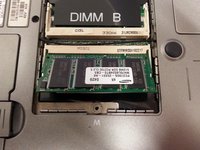
      • Pull off the panel to reveal the RAM

      • RAM is held in by two tabs, pull each tab to the side and the RAM will pop up

      crwdns2952109:0crwdne2952109:0

      crwdns2917038:0crwdne2917038:0

    3. Dell Latitude D600 RAM (Main Memory) Replacement: crwdns2935265:06crwdnd2935265:01crwdnd2935265:01crwdne2935265:0
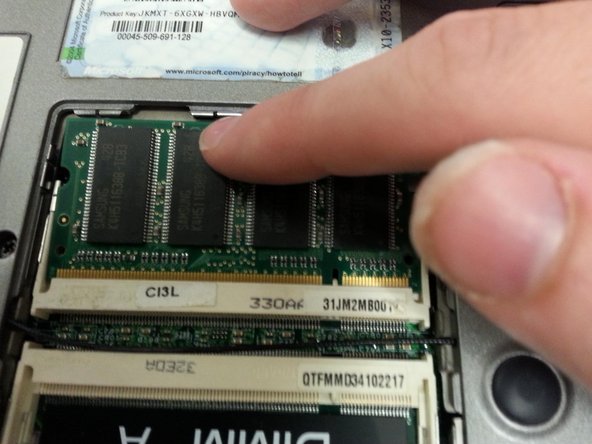
      • Once the RAM is popped up, slowly pull it out of the slot

      crwdns2952109:0crwdne2952109:0

      crwdns2917038:0crwdne2917038:0

    4. Dell Latitude D600 RAM (Main Memory) Replacement: crwdns2935265:07crwdnd2935265:01crwdnd2935265:03crwdne2935265:0 Dell Latitude D600 RAM (Main Memory) Replacement: crwdns2935265:07crwdnd2935265:02crwdnd2935265:03crwdne2935265:0 Dell Latitude D600 RAM (Main Memory) Replacement: crwdns2935265:07crwdnd2935265:03crwdnd2935265:03crwdne2935265:0
      • To add or replace RAM, place the memory into the slot at an angle

      • Make sure you line it up correctly

      • If it is in correctly it should stay up at an angle by itself

      • Then push down in the middle until it clicks into place

      crwdns2952109:0crwdne2952109:0

      crwdns2917038:0crwdne2917038:0

    5. Dell Latitude D600 RAM (Main Memory) Replacement: crwdns2935265:08crwdnd2935265:01crwdnd2935265:01crwdne2935265:0
      • The RAM should be secured by the tabs where the two semi circles are on the RAM

      • If it is not secure, just gently pull it out and try again, use the images to help you out

      crwdns2952109:0crwdne2952109:0

      crwdns2917038:0crwdne2917038:0

crwdns2915888:0crwdne2915888:0

To reassemble your device, follow these instructions in reverse order.

crwdns2935221:0crwdne2935221:0

crwdns2935229:06crwdne2935229:0

Joseph

crwdns2935283:007/16/14crwdne2935283:0

1.497 crwdns2915208:0crwdne2915208:0

crwdns2935297:05crwdne2935297:0

crwdns2947410:01crwdne2947410:0

Almost perfect: easy; clear;

Herman - crwdns2934203:0crwdne2934203:0 crwdns2950251:0crwdne2950251:0

crwdns2917038:0crwdne2917038:0

crwdns2936625:0crwdne2936625:0:

crwdns2936751:024crwdne2936751:0 3

crwdns2936753:07crwdne2936753:0 16

crwdns2936753:030crwdne2936753:0 93

crwdns2959996:0crwdne2959996:0 3,564