crwdns2915892:0crwdne2915892:0
This guide will help you to replace a full or faulty hard drive in a Dell Latitude D430 laptop.
A hard drive is a storage device that allows a computer to read and write data. Hard drives contain files on your computer and can also include your operating system (such as Windows). The symptoms of a failing hard drive include frequent crashes, failed start-ups, noticeably slower processes, corrupted data, strange sounds coming from the hard drive, and frequent errors and messages when performing simple actions such as saving, moving, or deleting files.
Before replacing the hard drive, visit the troubleshooting page. Some of the symptoms of a faulty hard drive may be caused by other issues that are easier to implement. Such as a corrupt operating system that may only require booting from the operating system disk.
If you’re running low on storage, there are easier solutions available than replacing the hard drive. Cheap external drives can be bought and plugged in via the USB (Universal Serial Bus) port, which can be found on Amazon.com or your local computer hardware store. This is recommended for the Dell Latitude D430 because of discontinuation of the parts and the compatibility issues you may run into by buying a new aftermarket hard drive.
If you have reached the point to replace the hard drive itself, make sure the replacement hard drive is compatible with your laptop. Visit the Parts People and enter your service tag to be sure to know which parts are compatible. If your hard drive is still accessible, back up your hard drive before replacing it. Before starting, shut down and disconnect any power source from the laptop.
crwdns2942213:0crwdne2942213:0
-
-
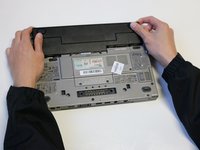
Turn the laptop over and make the bottom of the laptop face up.
-
-
-
Place your fingers on the black latches indicated in the picture.
-
-
-
-
Place both hands over the edge of the battery and pull up.
-
-
-
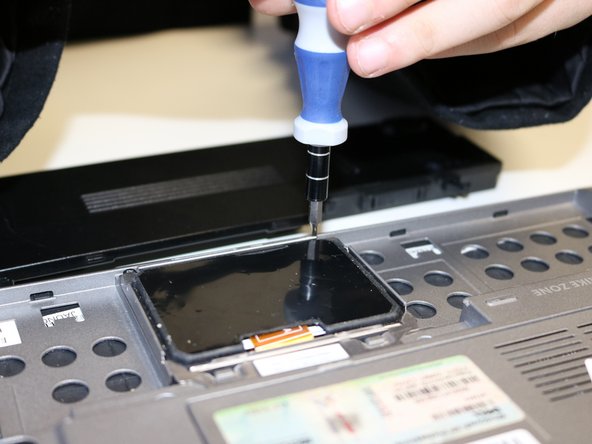
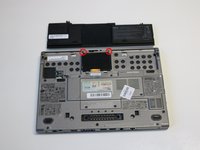
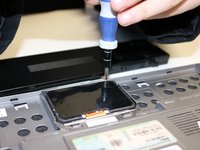
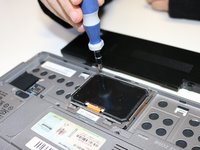
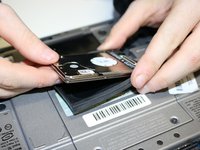
Remove the screws keeping the hard drive in place using a PH00 Philips screwdriver.
-
-
-
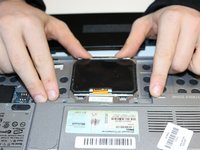
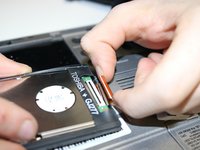
Remove the silver plate by pushing it towards the back of the laptop.
-
Remove the plate.
-
-
-
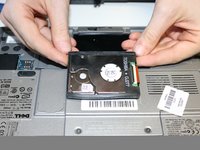
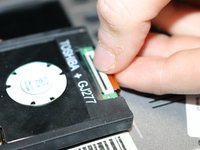
Flip the hard drive upside down.
-
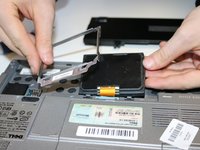
Pull the switch locking the tape cord in place up.
-
Pull on the tape to remove it.
-


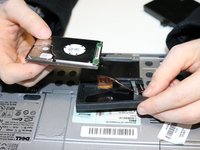
To reassemble your device, follow these instructions in reverse order.
crwdns2935221:0crwdne2935221:0
crwdns2935229:05crwdne2935229:0

crwdns2935287:0crwdne2935287:0

University of North Texas, Team S2-G1, Riccardelli Fall 2018 crwdns2935289:0University of North Texas, Team S2-G1, Riccardelli Fall 2018crwdne2935289:0
UNT-RICCARDELLI-F18S2G1
crwdns2931471:03crwdne2931471:0
crwdns2935297:04crwdne2935297:0