crwdns2915892:0crwdne2915892:0
Utilize this step-by-step manual for swapping out the screen on your Dell Latitude 3520 laptop. If you are experiencing frequent screen blackouts or visibility issues, it might be the right moment for a replacement.
crwdns2942213:0crwdne2942213:0
-
-
Push the microSD-card to eject it from the slot.
-
Remove the microSD-card from the computer.
-
-
-
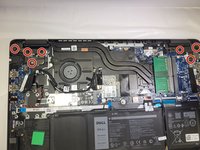
Loosen the nine screws 2mm Phillips #0 that secure the base cover to the assembly.
-
Using a plastic scribe, pry open the base cover starting from the recesses located in the indents near the hinges at the top edge of the base cover.
-
Carefully lift and remove the base cover.
-
-
-
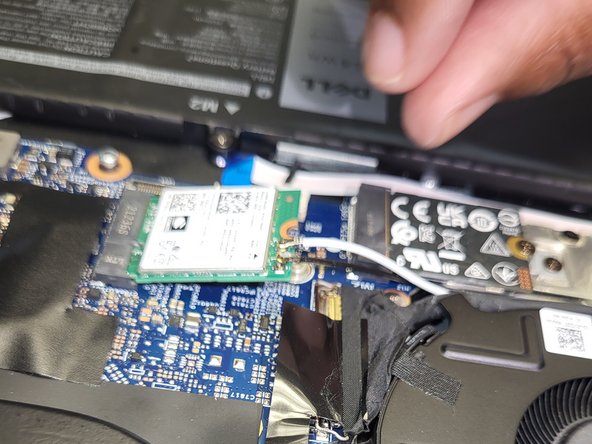
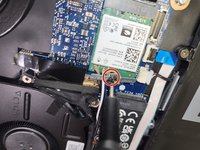
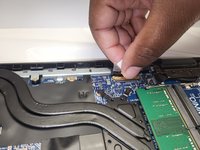
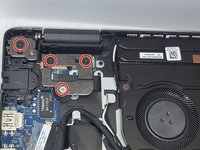
Remove the 2mm Phillip #0 screw that secures the WLAN card bracket to the WLAN card on the system board.
-
Lift and remove the WLAN card bracket from the WLAN card that secures the two antenna cables.
-
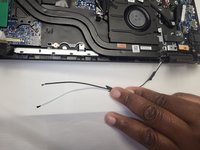
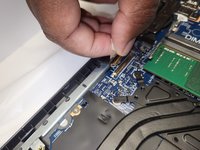
Disconnect the antenna cables from the connectors on the WLAN card.
-
Disconnect and remove the WLAN card from the WLAN card slot.
-
-
-
-
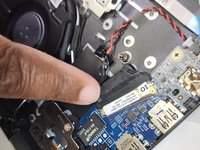
Peel the adhesive tape, open the latch, and disconnect the I/O cable from the connector on the system board.
-
Lift and remove the I/O cable from the assembly.
-
-
-
Unroute the display cable from the routing guides in the assembly.
-
Peel the adhesive tape that secures the display cable in place.
-
-
-
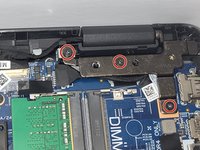
Remove the one 4.55mm Phillip # 0 screw and six 2.5mm Phillip #0 screws that secure the display hinges to the system.
-
-
-
Lift the left and right hinges in an upward direction away from the assembly.
-
-
-
Lift the assembly off the display assembly.
-


To reassemble your device, follow these instructions in reverse order.
To reassemble your device, follow these instructions in reverse order.
crwdns2935221:0crwdne2935221:0
crwdns2935227:0crwdne2935227:0
crwdns2915084:0crwdne2915084:0

University of New Orleans, Team 4-2, McDonald Fall 2023 crwdns2935289:0University of New Orleans, Team 4-2, McDonald Fall 2023crwdne2935289:0
UNO-MCDONALD-F23S4G2
crwdns2931471:04crwdne2931471:0
crwdns2935297:07crwdne2935297:0
crwdns2947412:02crwdne2947412:0
The part that is recommended is the screen only, it does not come with the metal brackets attached to the back of the screen with adhesive. You can remove those brackets and put them on the new screen, however I've found it pretty difficult to do that without bending those brackets, so I recommend ordering replacement hinges as well, which have those metal brackets attached.
As Ben says, the real issue doing this is that none of the replacement screens bought from Amazon, etc. come with the hinges. Dell, in their wisdom, have made these darned near impossible to remove from even a broken screen without either bending the brackets or doing yourself an injury. What happened to 'right to repair'? I've been happily replacing laptop screens for decades but this is a tall order!