crwdns2915892:0crwdne2915892:0
Before disassembling this device further, have a screwdriver and a plastic opening tool nearby. This section of the guide involves removing the keyboard, so make sure you carefully pull the keyboard cable to prevent damaging it.
crwdns2942213:0crwdne2942213:0
-
-
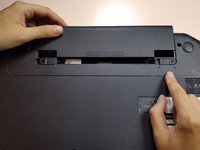
Flip your laptop over to view the bottom and the two locks.
-
-
-
Slide the two locks away from each other.
-
-
-
-
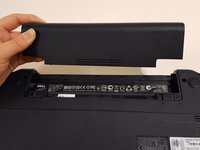
Remove the eleven 5mm palmrest screws from the bottom of the laptop with a Phillips #PH00 screw.
-
Remove the two 3mm hard drive screws from the bottom of the laptop with a Phillips #PH00 screw.
-
-
-
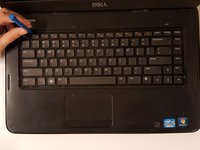
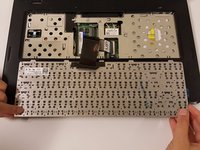
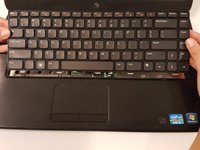
Flip over and open the laptop to view the keyboard.
-
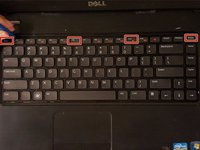
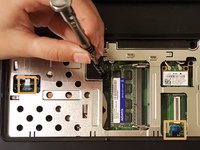
Use a plastic opening tool to press down on four clips, one by one.
-
Press down on the clips and pull the tool towards you to pry the keyboard loose.
-
-
-
Remove the keyboard carefully.
-
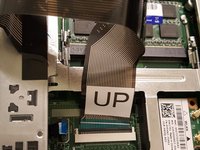
Flip the keyboard over to find the keyboard cable.
-
Pull the cable labeled "UP" out to disconnect it from the laptop.
-
-
-
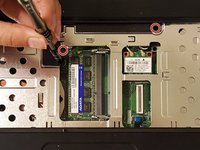
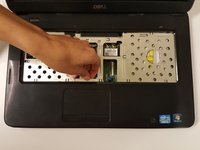
Unscrew the two palmrest screws.
-
Lift the two, blue palmrest cables up and out of their sockets.
-
-
-
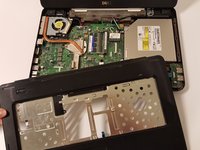
Lift the entire surface (palmrest casing) to expose the motherboard underneath.
-
-
-
Slide the hard drive right and up to remove it from the laptop.
-


To reassemble your device, follow these instructions in reverse order.
To reassemble your device, follow these instructions in reverse order.
crwdns2935221:0crwdne2935221:0
crwdns2935229:011crwdne2935229:0
crwdns2915084:0crwdne2915084:0

University of North Texas, Team 1-3, Campbell Fall 2016 crwdns2935289:0University of North Texas, Team 1-3, Campbell Fall 2016crwdne2935289:0
UNT-CAMPBELL-F16S1G3
crwdns2931471:02crwdne2931471:0
crwdns2935297:03crwdne2935297:0
crwdns2947412:04crwdne2947412:0
Thanks again. This guide was made straightforward and clear.
Thanks you - The clear instructions make this guide easy to follow.
wouldnt turn on after i re-assembled it
Sehr gute Arbeit