crwdns2915892:0crwdne2915892:0
Does your hard drive appear to be failing or need a replacement? This guide will help you replace the hard drive in several simple steps.
crwdns2942213:0crwdne2942213:0
-
-
Locate the battery on the underside of the laptop.
-
Push the two battery clips following the direction of the arrows.
-
-
-
Push upward from the base of the battery.
-
-
-
Pull battery away from computer until it is fully removed.
Don’t forget to remove the two screws in the battery compartment before attempting to pry off the top case!
-
-
-
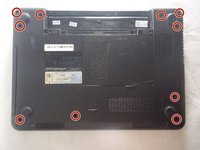
Remove the 10 2.5x5 mm screws from the base of the laptop.
-
-
-
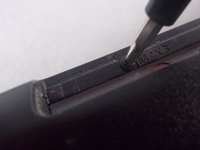
Unscrew the final 2.5x5 mm screw attached to the cover.
-
-
-
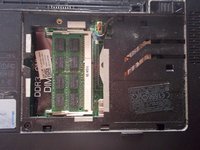
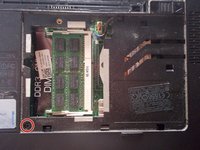
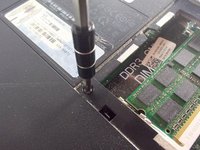
Unscrew the 2.5x5 mm screw inside the RAM compartment.
-
-
-
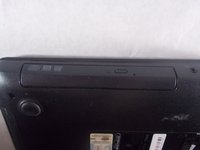
Remove the disk drive from the side of the computer.
-
-
-
-
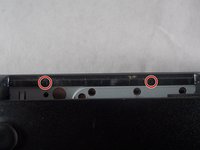
Unscrew the two 2x3 mm screws inside the disk drive compartment.
-
-
-
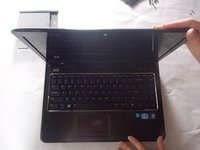
Flip the computer over, and open the laptop.
-
Use a plastic opening tool to begin to remove the keyboard.
-
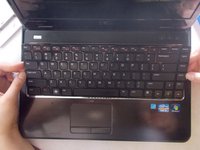
Use your hands to finish separating the keyboard from the laptop.
-
-
-
Lift the black clip from the tan connection for the keyboard.
-
Pull the the connection away from the clip.
-
Move the keyboard away from the laptop.
-
-
-
Lift the black clips from the tan connections for all 3 locations marked.
-
Remove the connections from the clips.
-
-
-
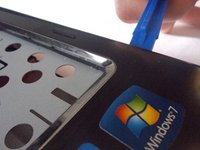
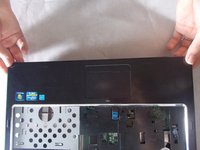
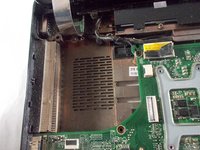
Use plastic opening tools to remove base cover.
-
Use your hands to fully remove cover from the base.
-
-
-
Disconnect the two cables that connect the speaker and the fan.
-
-
-
Disconnect the ribbon cable over the screw to reveal it. Flip up the latch and pull gently on the ribbon to remove it from the connector.
-
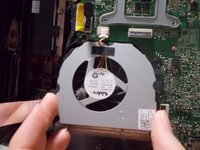
Unscrew the 2.5x5 mm screw from the fan.
Disconnect the ribbon cable over the crew to reveal it. Flip up the latch and pull gently on the ribbon to remove it from the connector.
-
-
-
Pull up and remove the fan from the laptop.
-
-
-
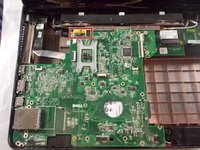
Unscrew the six 2.5x5mm screws from the motherboard.
-
Note that this screw may be "retained" by the loop at the end of the grounding wire.
This step is also incorrect. The screw sizes here are not 2.5x3 mm, they are all 2.5x5 mm.
-
-
-
Disconnect the black and yellow cable from the motherboard.
Also remove the grounding screw next to it.
The grounding cable was already removed in the previous step it was one of the six screws he said to remove
-
-
-
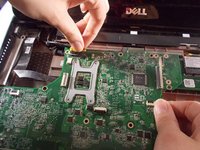
Begin to separate the motherboard from the laptop
When reinstalling motherboard, Insure the two connectors under back RH corner of MB are precisely aligned with the daughterboard below. If slightly misaligned, you will bend pins.
-
-
-
Remove the final cable from the motherboard
-
-
-
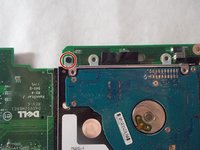
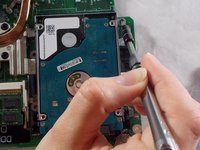
Unscrew the one 2x3 mm screw.
-
-
-
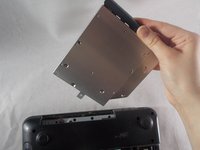
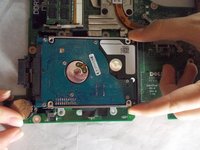
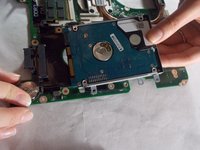
Use your hands to carefully pry out the hard drive.
While your in there, consider changing the CMOS battery, and blow the dust out of the heat exchanger radiator
-


To reassemble your device, follow these instructions in reverse order.
To reassemble your device, follow these instructions in reverse order.
crwdns2935221:0crwdne2935221:0
crwdns2935229:015crwdne2935229:0
crwdns2915084:0crwdne2915084:0

UMass Dartmouth, Team S5-G1, Peak Spring 2018 crwdns2935289:0UMass Dartmouth, Team S5-G1, Peak Spring 2018crwdne2935289:0
UMASSD-PEAK-S18S5G1
crwdns2931471:03crwdne2931471:0
crwdns2935297:06crwdne2935297:0
crwdns2947412:05crwdne2947412:0
Hello. I believe that between step 3 and 4 You should add another step - “Remove the two 2x3 mm screws in the laptop battery compartment (below the battery)“.
I second this! Critical omission! Good catch!
Wils -
Separating the motherboard from the daughterboard in step 20 is quite challenging.
Probably THE worst design ever! Thank you Dell for allowing easy access to the RAM sticks, but burying the most volatile and data-critical part of the laptop.
Thank u for guide for opening procedure