crwdns2915892:0crwdne2915892:0
This guide will show you how to remove the palm rest bracket which holds the supports the hard drive bay and the palm rest. This part may need to be removed to access other components of the device including the motherboard and RAM module.
crwdns2942213:0crwdne2942213:0
-
-
Slide the release latches out toward the edges to unlock the battery.
-
-
-
Remove the battery by pulling it up and out.
-
-
-
Remove the three 8mm Philips 0 screws securing the keyboard.
-
-
-
Turn over the device and open the display.
-
Gently pry open the keyboard with the plastic opening tool, working under the edges to release the clips.
-
-
-
-
Push the clips out on either side of the ribbon cable to release it.
-
Gently disconnect the ribbon cable by pulling on the clear tab.
-
Remove the keyboard.
-
-
-
Close the device and turn over.
-
Remove the five 8mm Phillips 0 screws.
-
-
-
Turn the device over and open the display.
-
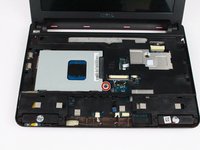
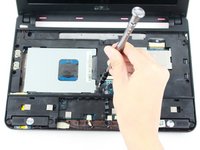
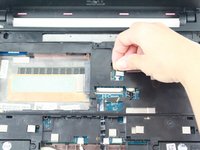
Remove the single 8mm Phillips 0 screw attaching the hard-drive cage to the body of the device.
-
-
-
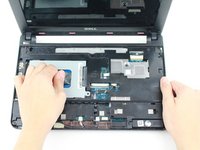
Pull on the black tab and slide the hard-drive cage toward the USB port on the left side of the device until its comes free and carefully lift out of device.
-
-
-
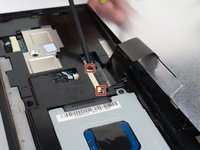
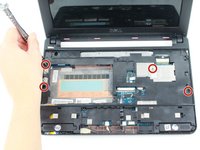
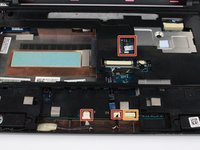
Remove the four 6mm Philips 0 screws securing the bracket.
-
-
-
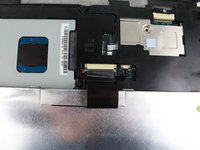
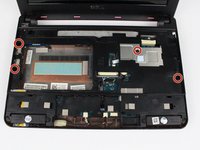
Disconnect the following:
-
Power button cable
-
Speaker cable
-
Power status light cable
-
Bluetooth cable (if installed)
-
-
-
Gently pry off the bracket using the prying tool.
-


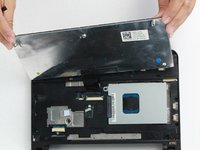


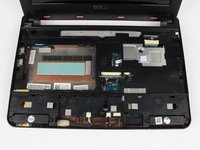

To reassemble your device, follow these instructions in reverse order.
To reassemble your device, follow these instructions in reverse order.
crwdns2915084:0crwdne2915084:0

UW Tacoma, Team 1-4, Rose Fall 2016 crwdns2935289:0UW Tacoma, Team 1-4, Rose Fall 2016crwdne2935289:0
UWT-ROSE-F16S1G4
crwdns2931471:04crwdne2931471:0
crwdns2935297:010crwdne2935297:0