crwdns2942213:0crwdne2942213:0
-
-
Slide both arrow tabs towards the outer edge of the computer to release the battery.
-
-
-
Remove Keyboard retaining screw from bottom of laptop.
-
-
-
Insert the 6 inch metal ruler, or another flat object into the holes in the top left of the keyboard, the top middle of the keyboard, and the top right of the keyboard to release the keyboard from the computer.
-
There are a number of screws on the bottom that required to be removed prior to the keyboard being able to be lifted up.
-
-
-
Lift the keyboard up slightly and push forward in order to release bottom tabs.
-
-
-
Pull the black tab up and then pull left on keyboard plug to release keyboard.
-
-
-
Flip the laptop, so the bottom of the laptop is facing up.
-
Remove the seven 6.0mm Phillip #000 screws indicated using the Phillips #000 screwdriver.
-
-
-
Flip the laptop back over, so that the top of the laptop is facing up.
-
Open the laptop.
-
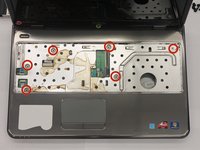
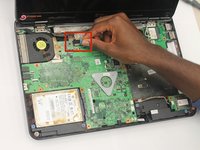
Remove all of the indicated 6.0 mm screws with the Phillips #000 screwdriver.
-
-
-
-
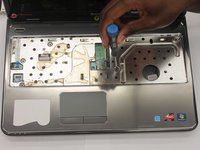
Unplug the palm rest cables by lifting the black tab up and then pulling on the blue tabs.
-
-
-
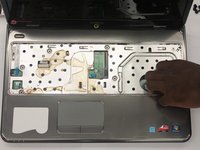
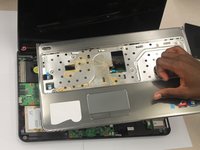
Carefully unsnap and remove the palm rest.
-
-
-
Flip the laptop over to its backside.
-
Using the Phillips #000 Screwdriver remove the six indicated 6.0mm Phillips #000 screws.
-
-
-
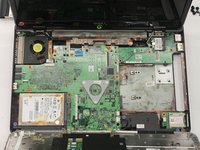
Flip the laptop over to its front side and open the laptop.
-
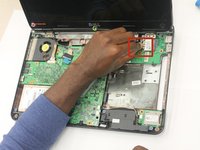
Remove the four 6.0mm Phillips #000 screws holding the screen to the base of the laptop using a Phillips #000 Screwdriver.
-
-
-
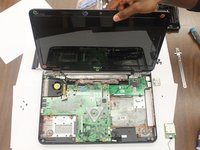
Pull up both the black and white chords to completely detach the screen.
-
-
-
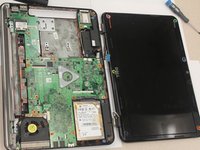
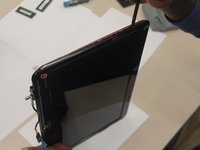
Lift the screen from the base of the laptop.
-
-
-
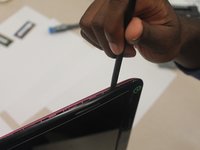
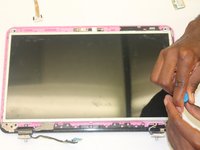
Use a spudger to separate and remove the plastic frame on the front of the screen.
-
-
-
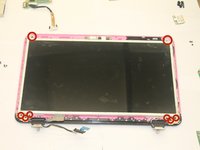
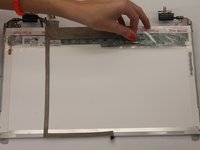
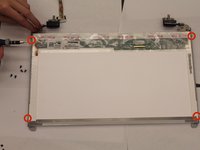
Use a Phillips #000 Screwdriver to remove the 8 6.0mm Phillips #000 screws marked in the image.
-
-
-
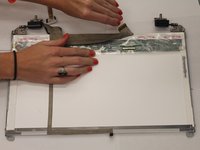
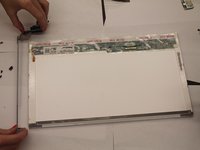
Lift LCD screen from the plastic frame.
-
-
-
Flip LCD screen over to view the backside.
-
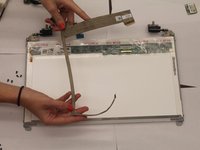
Lift brown tab in the middle of the screen and pull to remove the entire piece.
-
-
-
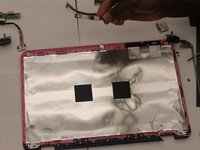
Use a Phillips #000 Screwdriver to remove the four screws indicated (two on each side).
-
Pull metal frames away from LCD screen.
-
-
-
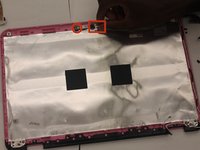
Using a Phillips #000 Screwdriver, remove the indicated 6.0 mm screw on the left side of the camera.
-
Pull the tab and release the ribbon on the right side of the camera.
-
Pull the camera away from the plastic frame.
-


To reassemble your device, follow these instructions in reverse order.
To reassemble your device, follow these instructions in reverse order.
crwdns2915084:0crwdne2915084:0

Clemson, Team 1-5, Benson Fall 2014 crwdns2935289:0Clemson, Team 1-5, Benson Fall 2014crwdne2935289:0
CLEM-BENSON-F14S1G5
crwdns2931471:04crwdne2931471:0
crwdns2935297:011crwdne2935297:0