crwdns2933423:0crwdne2933423:0

Dell Inspiron 7586 2-in-1 SSD Replacement

crwdns2942213:0crwdne2942213:0

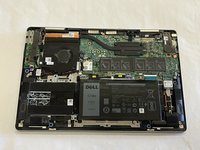
  1. Dell Inspiron 7586 2-in-1 SSD Replacement, SSD: crwdns2935265:01crwdnd2935265:01crwdnd2935265:03crwdne2935265:0 Dell Inspiron 7586 2-in-1 SSD Replacement, SSD: crwdns2935265:01crwdnd2935265:02crwdnd2935265:03crwdne2935265:0 Dell Inspiron 7586 2-in-1 SSD Replacement, SSD: crwdns2935265:01crwdnd2935265:03crwdnd2935265:03crwdne2935265:0
    • Flip the laptop over so the bottom is facing up.

    • Use a Phillips #00 screwdriver to remove nine screws from the back case.

    • Insert an opening tool or spudger in the seam between the back case and the body of the laptop.

    • Work your way around the perimeter of the laptop and release the clips that secure the back case.

    • You will hear a clicking sound as the the clips are released and the back case is being removed.

    • Remove the back case.

  2. Dell Inspiron 7586 2-in-1 SSD Replacement: crwdns2935265:02crwdnd2935265:01crwdnd2935265:03crwdne2935265:0 Dell Inspiron 7586 2-in-1 SSD Replacement: crwdns2935265:02crwdnd2935265:02crwdnd2935265:03crwdne2935265:0 Dell Inspiron 7586 2-in-1 SSD Replacement: crwdns2935265:02crwdnd2935265:03crwdnd2935265:03crwdne2935265:0
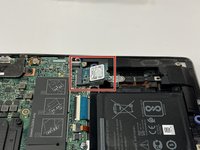
    • Use a Phillips #00 screwdriver to remove the single screw securing the NVME drive.

    • Once the screw is removed, the SSD should pop up.

  3. Dell Inspiron 7586 2-in-1 SSD Replacement: crwdns2935265:03crwdnd2935265:01crwdnd2935265:03crwdne2935265:0 Dell Inspiron 7586 2-in-1 SSD Replacement: crwdns2935265:03crwdnd2935265:02crwdnd2935265:03crwdne2935265:0 Dell Inspiron 7586 2-in-1 SSD Replacement: crwdns2935265:03crwdnd2935265:03crwdnd2935265:03crwdne2935265:0
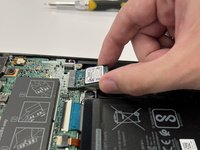
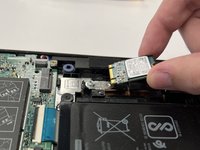
    • Gently slide the SSD out of the slot.

    • Make sure to gently pull out the drive to avoid damaging the M.2 slot where you insert the new SSD.

  4. Dell Inspiron 7586 2-in-1 SSD Replacement: crwdns2935265:04crwdnd2935265:01crwdnd2935265:02crwdne2935265:0 Dell Inspiron 7586 2-in-1 SSD Replacement: crwdns2935265:04crwdnd2935265:02crwdnd2935265:02crwdne2935265:0
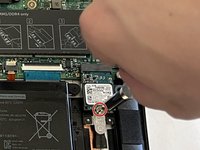
    • Align the tooth edge of the SSD with the indents on the drive socket and gently insert the replacement SSD.

    • Press down on the SSD so the screw hole and drive align.

    • Use a Phillips #00 screwdriver to replace the screw.

    • Don't be scared to push down on the SSD as it should be level with the rest of the components.

crwdns2915888:0crwdne2915888:0

To reassemble your device, follow these instructions in reverse order.

crwdns2935229:02crwdne2935229:0

Mike03

crwdns2935283:003/05/24crwdne2935283:0

139 crwdns2915208:0crwdne2915208:0

crwdns2935295:0crwdne2935295:0

crwdns2915084:0crwdne2915084:0

CSU Los Angeles, Team 7-1, Grodsky Spring 2024 crwdns2935289:0CSU Los Angeles, Team 7-1, Grodsky Spring 2024crwdne2935289:0

CSULA-GRODSKY-S24S7G1

crwdns2931471:02crwdne2931471:0

crwdns2935303:01crwdne2935303:0

crwdns2947412:00crwdne2947412:0

crwdns2917038:0crwdne2917038:0

crwdns2936625:0crwdne2936625:0:

crwdns2936751:024crwdne2936751:0 0

crwdns2936753:07crwdne2936753:0 2

crwdns2936753:030crwdne2936753:0 8

crwdns2942667:0crwdne2942667:0 254