crwdns2915892:0crwdne2915892:0
By following the steps in this guide one should be able to replace the complete display assembly on the a Dell Inspiron 7568.
crwdns2942213:0crwdne2942213:0
-
-
Remove the ten 7mm Phillips #1 screws on the bottom cover.
-
Remove the bottom cover.
 crwdns2952109:0crwdne2952109:0
-
-
-
Remove the four 3mm Phillips #1 screws holding the battery.
-
Unhinge the connector cable to the battery.
-
Remove the battery.
-
-
-
-
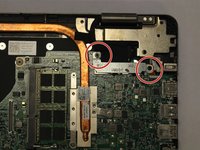
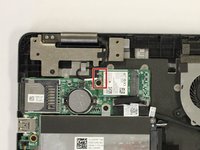
Unscrew & remove the two 3mm screws (using a ph1 screwdriver bit) and the cable bracket, above the motherboard
-
Doing this will allow one to access the LCD-motherboard connector cables.
-
-
-
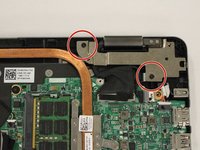
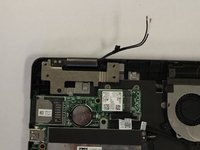
Unscrew the 7mm screws that secure the left and right hinges (using a ph1 screwdriver bit).
-
-
-
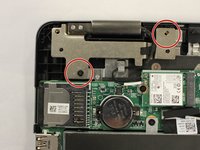
Disconnect the antenna cable (under the left hinge)
-
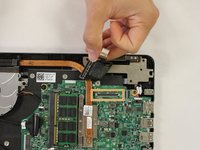
Disconnect the LCD and Touchscreen display cables under the right hinge.
-
-
-
Carefully separate the screen from the bottom half of the device.
-


To reassemble your device, follow these instructions in reverse order.
crwdns2935221:0crwdne2935221:0
crwdns2935229:02crwdne2935229:0
crwdns2935287:0crwdne2935287:0

USF Tampa, Team S2-G2, Lacy Spring 2017 crwdns2935289:0USF Tampa, Team S2-G2, Lacy Spring 2017crwdne2935289:0
USFT-LACY-S17S2G2
crwdns2931471:04crwdne2931471:0
crwdns2935297:07crwdne2935297:0