crwdns2915892:0crwdne2915892:0
Use this guide to remove the back panel in order to access internal components or replace the panel.
crwdns2942213:0crwdne2942213:0
-
-
Ensure the device is powered off and unplugged. Close the device and orient it face up, with the hinges further away from you.
-
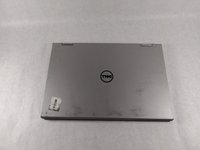
Flip the device over so the backside is facing you.
-
-
-
-
Using the Phillips #1 screwdriver, remove all nine 7mm screws.
-
-
-
Using the plastic opening tool, pull the back panel upward. Move the opening tool along the edge of the device and lift the panel off of your device.
-


To reassemble your device, follow these instructions in reverse order.
To reassemble your device, follow these instructions in reverse order.
crwdns2935221:0crwdne2935221:0
crwdns2935229:02crwdne2935229:0
crwdns2915084:0crwdne2915084:0

UMass Dartmouth, Team S1-G2, Simcock Fall 2018 crwdns2935289:0UMass Dartmouth, Team S1-G2, Simcock Fall 2018crwdne2935289:0
UMASSD-SIMCOCK-F18S1G2
crwdns2931471:03crwdne2931471:0
crwdns2935297:07crwdne2935297:0