crwdns2915892:0crwdne2915892:0
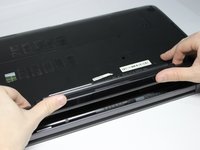
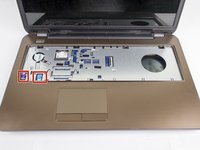
If your palmrest becomes cracked, you'll need to replace the entire palmrest assembly. You'll also need to remove this part to get to the various internals of the computer.
crwdns2942213:0crwdne2942213:0
-
-
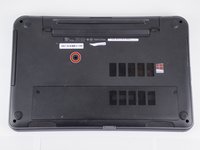
Flip over your laptop so that the battery faces you.
-
-
-
Slide each latch away from the battery to unlock it.
-
-
-
Lift the battery upwards to remove it.
-
-
-
Remove one 4.8mm screw with a JIS #00 screwdriver.
-
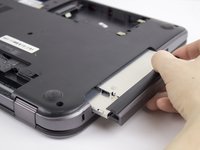
Remove the optical drive.
-
-
-
-
Remove two 4.8mm screws with a JIS #00 screwdriver.
-
Remove the access panel.
-
-
-
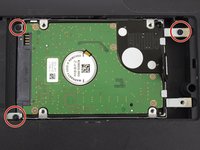
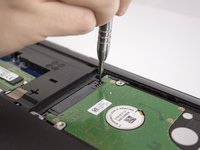
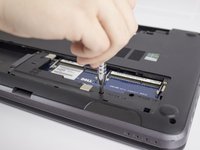
Remove three 4.8mm screws from the hard drive with a JIS #00 screwdriver.
-
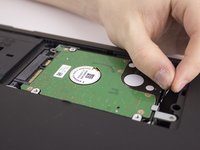
Slide the hard drive to the left.
-
Slide the hard drive to the right and up.
-
-
-
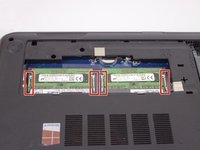
Slide the two clips away from the RAM.
-
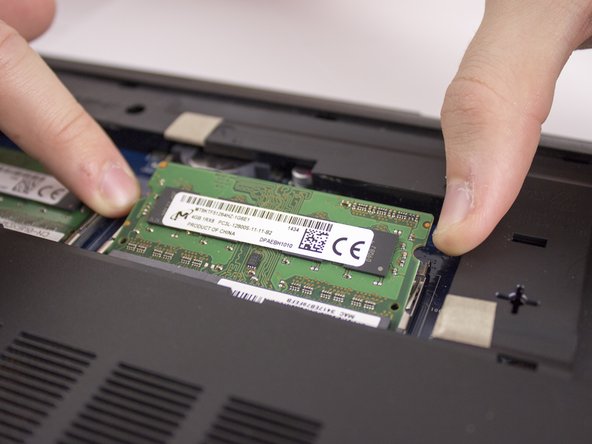
Lift the RAM out.
-
-
-
Use a metal spudger to loosen the main frame of the keyboard.
-
-
-
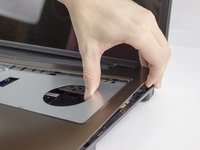
Slowly lift the keyboard.
-
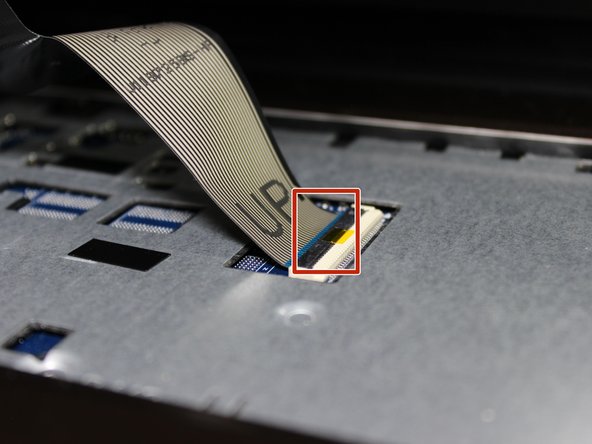
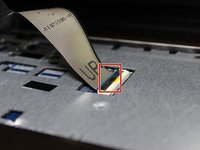
Lift the locking flap that holds the ribbon cable in place.
-
Remove the keyboard.
-
-
-
Remove two 1.6mm screws from beneath the optical drive with a JIS #00 screwdriver.
-
Remove the nine remaining 4.8mm screws from the back of the computer with a JIS #00 screwdriver.
-
-
-
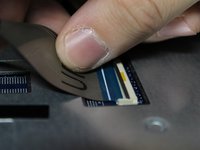
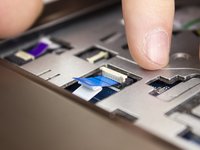
Remove the two exposed ribbon cables.
-
Remove the palmrest.
-


To reassemble your device, follow these instructions in reverse order.
crwdns2935287:0crwdne2935287:0

UMass Dartmouth, Team S3-G7, Bailey Fall 2017 crwdns2935289:0UMass Dartmouth, Team S3-G7, Bailey Fall 2017crwdne2935289:0
UMASSD-BAILEY-F17S3G7
crwdns2931471:03crwdne2931471:0
crwdns2935297:011crwdne2935297:0