crwdns2915892:0crwdne2915892:0
The Hard Drive is simple to remove. It is important that you do NOT drop or shake the hard-drive when it is out of its harness. This may harm the device further and render your stored data useless.
If there are important pictures, documents, or files on the drive that you do not want to lose, go to a local computer store and they should be able to let you know if the data is recoverable.
crwdns2942213:0crwdne2942213:0
-
-
Disconnect the Laptop from the AC adapter and turn off the Laptop.
-
-
-
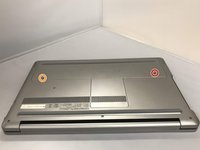
Remove the silver 15mm PH1 screw that holds the plastic cover in place over the battery.
-
Remove the 8mm PH 1 screw that holds the plastic cover in place over the battery.
-
-
-
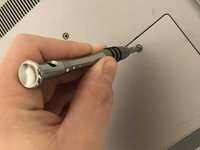
Using a metal jimmy, pry up to remove the first half of the cover.
-
-
-
-
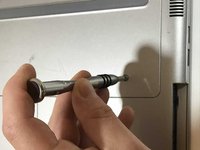
Apply pressure using your fingertips on the top of the cover, pushing to the front of the laptop. This will make the plate slide off exposing the hard drive.
-
-
-
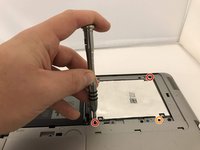
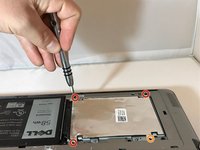
Remove the three black PH1 6mm screws that anchor the hard drive.
-
This screw hole will be empty because the 15mm silver screw that holds the plastic cover will anchor the hard drive down.
-
-
-
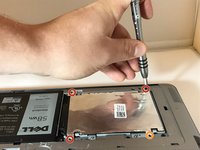
Using the Jimmy, pry up the hard drive and lift out using your fingers.
-
-
-
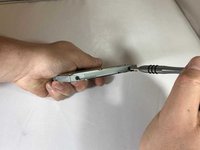
Gently wiggle and pull the connector to disconnect the Seta Cable attaching the hard drive to the laptop.
-
-
-
Remove the harness around the hard drive by removing four black 4mm PH1 screws located on the side.
-
-
-
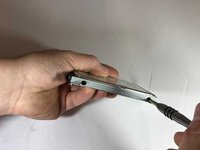
Remove the hard drive from the harness.
-


To reassemble your device, follow these instructions in reverse order.
To reassemble your device, follow these instructions in reverse order.
crwdns2935221:0crwdne2935221:0
crwdns2935229:02crwdne2935229:0

crwdns2915084:0crwdne2915084:0

Eastern Washington University, Team S1-G5, Carnegie Fall 2018 crwdns2935289:0Eastern Washington University, Team S1-G5, Carnegie Fall 2018crwdne2935289:0
EWU-CARNEGIE-F18S1G5
crwdns2931471:04crwdne2931471:0
crwdns2935297:05crwdne2935297:0