crwdns2915892:0crwdne2915892:0
There are multiple issues that can arise with the keyboard, this guide will allow you to fix a number of them. Using this guide you can clean the keyboard or access some of the more complex components of the laptop.
crwdns2942213:0crwdne2942213:0
-
-
Turn the laptop over to its back.
 crwdns2952109:0crwdne2952109:0
-
-
-
Slide the release latch while simultaneously pulling backwards on the battery.
-
-
-
Slide the battery out of the battery bay.
-
-
-
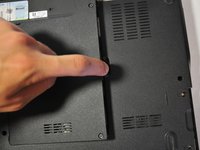
Unscrew the four screws (3mm Phillips #1) that hold the base cover in place.
-
-
-
-
Carefully lift the base cover vertically away from the laptop.
-
-
-
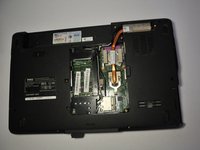
After removing the battery, remove the two screws (3mm Phillips #1) beneath it. These screws hold the Center Control Cover in place.
-
-
-
Flip the laptop over to the front and open the display as far as possible.
-
-
-
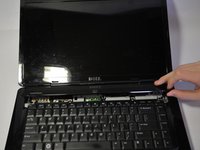
Pry the Center Control Cover from the laptop. On the right there is a small divot, it is advised that you start removing the panel from here.
-
Carefully lift the Center Control Cover away from the laptop.
-
-
-
Remove the two screws (5mm Phillips #1) at the top of the keyboard.
-
-
-
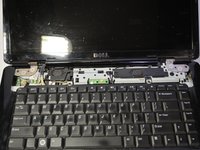
Slide the keyboard out and away from the laptop and lift it up to access the keyboard connector.
-
-
-
Lift the connector latch that secures the keyboard cable to the connector on the motherboard and remove the cable.
-
-
-
Lift the keyboard up and away from the laptop.
-


To reassemble your device, follow these instructions in reverse order.
crwdns2935221:0crwdne2935221:0
crwdns2935229:015crwdne2935229:0

crwdns2935287:0crwdne2935287:0

Cal Poly, Team 9-14, Regan Spring 2014 crwdns2935289:0Cal Poly, Team 9-14, Regan Spring 2014crwdne2935289:0
CPSU-REGAN-S14S9G14
crwdns2931471:04crwdne2931471:0
crwdns2935297:015crwdne2935297:0
crwdns2947412:03crwdne2947412:0
Step 4 and 5 are not needed.
James Thrun - crwdns2934203:0crwdne2934203:0 crwdns2950251:0crwdne2950251:0
Steps 4 and 5 are unnecessary for removing the keyboard. Other than that, well done.
lee - crwdns2934203:0crwdne2934203:0 crwdns2950251:0crwdne2950251:0
The connector latch is broken. What should I do?
Mjeed - crwdns2934203:0crwdne2934203:0 crwdns2950251:0crwdne2950251:0