crwdns2933423:0crwdne2933423:0

Dell Inspiron 15-3531 Hard Drive Replacement

crwdns2942213:0crwdne2942213:0

  1. Dell Inspiron 15-3531 Hard Drive Replacement, Battery: crwdns2935265:01crwdnd2935265:01crwdnd2935265:03crwdne2935265:0 Dell Inspiron 15-3531 Hard Drive Replacement, Battery: crwdns2935265:01crwdnd2935265:02crwdnd2935265:03crwdne2935265:0 Dell Inspiron 15-3531 Hard Drive Replacement, Battery: crwdns2935265:01crwdnd2935265:03crwdnd2935265:03crwdne2935265:0
    • Remove the battery to avoid electrical discharge while working with this system.

    • Flip the laptop over.

    • Slide the latches toward the edges to unlock the battery.

    • Lift the battery out of the laptop.

  2. Dell Inspiron 15-3531 Hard Drive Replacement, Hard Drive: crwdns2935265:02crwdnd2935265:01crwdnd2935265:03crwdne2935265:0 Dell Inspiron 15-3531 Hard Drive Replacement, Hard Drive: crwdns2935265:02crwdnd2935265:02crwdnd2935265:03crwdne2935265:0 Dell Inspiron 15-3531 Hard Drive Replacement, Hard Drive: crwdns2935265:02crwdnd2935265:03crwdnd2935265:03crwdne2935265:0
    • Loosen the two screws on the access panel using the PH1 head screwdriver.

    • Pry the access panel from the laptop using the spudger.

  3. Dell Inspiron 15-3531 Hard Drive Replacement: crwdns2935265:03crwdnd2935265:01crwdnd2935265:02crwdne2935265:0 Dell Inspiron 15-3531 Hard Drive Replacement: crwdns2935265:03crwdnd2935265:02crwdnd2935265:02crwdne2935265:0
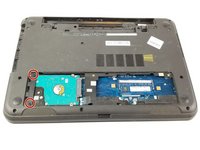
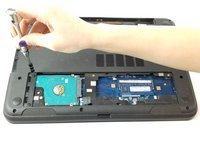
    • Lift the access panel away from the laptop to reveal the hard drive on the left.

    • Remove the two 8.65 mm screws on the left side of the hard drive using the PH0 head screwdriver.

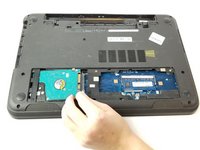
    • There is a plastic tab beneath the hard drive.

  4. Dell Inspiron 15-3531 Hard Drive Replacement: crwdns2935265:04crwdnd2935265:01crwdnd2935265:03crwdne2935265:0 Dell Inspiron 15-3531 Hard Drive Replacement: crwdns2935265:04crwdnd2935265:02crwdnd2935265:03crwdne2935265:0 Dell Inspiron 15-3531 Hard Drive Replacement: crwdns2935265:04crwdnd2935265:03crwdnd2935265:03crwdne2935265:0
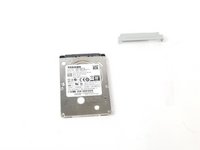
    • Push the hard drive to the left to release it and use the tab to pull it free from the laptop. The hard drive is in a caddy.

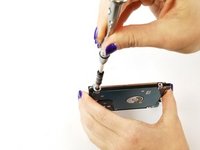
    • Remove the two 1.22 mm screws holding the hard drive in the caddy with the PH0 head screwdriver.

crwdns2915888:0crwdne2915888:0

To reassemble your device, follow these instructions in reverse order.

Kody Dahlke

crwdns2935283:002/15/18crwdne2935283:0

742 crwdns2915208:0crwdne2915208:0

crwdns2935297:05crwdne2935297:0

crwdns2915084:0crwdne2915084:0

USF Tampa, Team S1-G5, Leahy Spring 2018 crwdns2935289:0USF Tampa, Team S1-G5, Leahy Spring 2018crwdne2935289:0

USFT-LEAHY-S18S1G5

crwdns2931471:05crwdne2931471:0

crwdns2935297:05crwdne2935297:0

crwdns2947412:00crwdne2947412:0

crwdns2917038:0crwdne2917038:0

crwdns2936625:0crwdne2936625:0:

crwdns2936751:024crwdne2936751:0 0

crwdns2936753:07crwdne2936753:0 1

crwdns2936753:030crwdne2936753:0 12

crwdns2942667:0crwdne2942667:0 1,136