crwdns2933423:0crwdne2933423:0

Dell Inspiron 14z-5423 Optical Drive Replacement

crwdns2942213:0crwdne2942213:0

  1. Dell Inspiron 14z-5423 Optical Drive Replacement, RAM: crwdns2935265:01crwdnd2935265:01crwdnd2935265:02crwdne2935265:0 Dell Inspiron 14z-5423 Optical Drive Replacement, RAM: crwdns2935265:01crwdnd2935265:02crwdnd2935265:02crwdne2935265:0
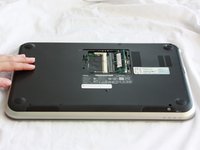
    • Close the display and turn over the computer.

    • Make sure your device is powered down and unplugged before beginning the replacement.

  2. Dell Inspiron 14z-5423 Optical Drive Replacement: crwdns2935265:02crwdnd2935265:01crwdnd2935265:01crwdne2935265:0
    • Use a J0 bit tipped screwdriver to unscrew the one 6 mm Phillips screw on the RAM cover.

  3. Dell Inspiron 14z-5423 Optical Drive Replacement: crwdns2935265:03crwdnd2935265:01crwdnd2935265:02crwdne2935265:0 Dell Inspiron 14z-5423 Optical Drive Replacement: crwdns2935265:03crwdnd2935265:02crwdnd2935265:02crwdne2935265:0
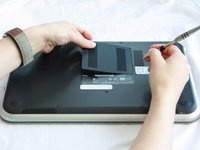
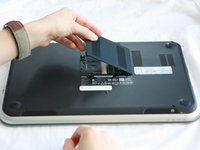
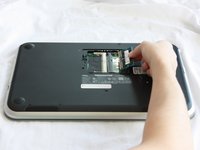
    • Lightly lift the RAM cover up and at an angle, away from the computer.

  4. Dell Inspiron 14z-5423 Optical Drive Replacement: crwdns2935265:04crwdnd2935265:01crwdnd2935265:02crwdne2935265:0 Dell Inspiron 14z-5423 Optical Drive Replacement: crwdns2935265:04crwdnd2935265:02crwdnd2935265:02crwdne2935265:0
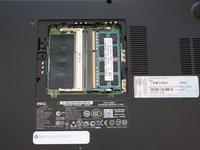
    • Use your fingers to carefully pull the securing clips on the RAM away from each other.

    • The RAM should pop up when the clips are released.

  5. Dell Inspiron 14z-5423 Optical Drive Replacement: crwdns2935265:05crwdnd2935265:01crwdnd2935265:02crwdne2935265:0 Dell Inspiron 14z-5423 Optical Drive Replacement: crwdns2935265:05crwdnd2935265:02crwdnd2935265:02crwdne2935265:0
    • Remove the popped up RAM by pulling it away from the connection.

    • If it does not pop up pry it out in a steady and straight direction.

  6. Dell Inspiron 14z-5423 Optical Drive Replacement, Optical Drive: crwdns2935265:06crwdnd2935265:01crwdnd2935265:02crwdne2935265:0 Dell Inspiron 14z-5423 Optical Drive Replacement, Optical Drive: crwdns2935265:06crwdnd2935265:02crwdnd2935265:02crwdne2935265:0
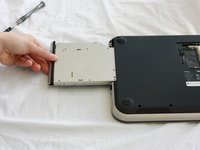
    • Slide the CD/DVD drive on the side of the laptop out using your fingers.

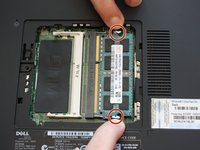
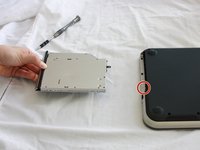
    • Using a J0 bit screwdriver, unscrew the one 2 mm Phillips screw.

    • You only need to unscrew this screw if you are using this as a prerequisite guide.

crwdns2915888:0crwdne2915888:0

To reassemble your device, follow these instructions in reverse order.

Marisol

crwdns2935283:009/12/16crwdne2935283:0

623 crwdns2915208:0crwdne2915208:0

crwdns2935297:04crwdne2935297:0

crwdns2915084:0crwdne2915084:0

CSU Fullerton, Team 2-2, Bruce Fall 2016 crwdns2935289:0CSU Fullerton, Team 2-2, Bruce Fall 2016crwdne2935289:0

CSUF-BRUCE-F16S2G2

crwdns2931471:05crwdne2931471:0

crwdns2935297:011crwdne2935297:0

crwdns2944067:00crwdne2944067:0

crwdns2917038:0crwdne2917038:0

crwdns2936625:0crwdne2936625:0:

crwdns2936751:024crwdne2936751:0 2

crwdns2936753:07crwdne2936753:0 3

crwdns2936753:030crwdne2936753:0 7

crwdns2942667:0crwdne2942667:0 656