crwdns2915892:0crwdne2915892:0
Does your Wi-Fi from your Dell Inspiron 13 7378 not connect to a network? This guide will help you walk through replacing your Wi-Fi card and get you back on the web.
The Wi-Fi card is the part of the laptop's way of connecting to a Wi-Fi network. The Wi-Fi card is a very small 1 inch square located on the motherboard which can easily be broken if the steps are not followed correctly.
crwdns2942213:0crwdne2942213:0
-
-
Set the laptop with its underside facing up for improved accessibility.
-
-
-
Using a Phillips #00 screwdriver, extract the nine 3 mm screws located on the back of the laptop.
-
-
-
-
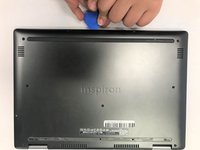
Carefully pry open the back of the back of the laptop using opening picks.
-
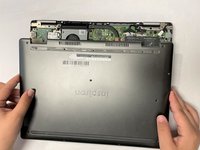
Carefully raise and detach the back cover from the laptop.
-
-
-
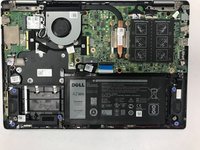
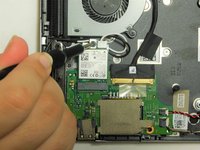
Remove the single 3 mm screw from the Wi-Fi card using a Phillips #1 screwdriver.
-
-
-
Use your fingers to pull the Wi-Fi card upwards from the slot of the motherboard.
-
-
-
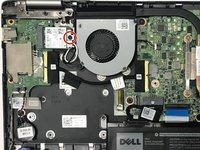
Disconnect the two wires attached to the Wi-Fi card.
-
Remove the Wi-Fi card from the laptop.
-


To reassemble your device, follow these instructions in reverse order.
To reassemble your device, follow these instructions in reverse order.
crwdns2935221:0crwdne2935221:0
crwdns2935227:0crwdne2935227:0
crwdns2915084:0crwdne2915084:0

Gateway, Team 1-3, Saknee Spring 2022 crwdns2935289:0Gateway, Team 1-3, Saknee Spring 2022crwdne2935289:0
GCC-SAKNEE-S22S1G3
crwdns2931471:05crwdne2931471:0
crwdns2935297:016crwdne2935297:0