crwdns2915892:0crwdne2915892:0
The potential for the hard drive to fail can happen with any computer. With laptops, this is especially the case due to their portable nature and limited protection. Replacing the hard drive is a useful skill in extending the lifespan of your laptop as well as maintaining storage space. In this guide, we will demonstrate how to replace the hard drive in a Dell G3 3590 (2019). No specialized skills are required for this replacement.
crwdns2942213:0crwdne2942213:0
-
-
Use a Phillips #00 screwdriver to loosen the four captive screws in the bottom cover.
-
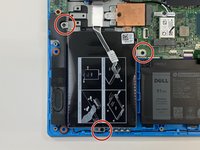
Remove six silver 7 mm screws using a Phillips #00 screwdriver.
-
-
-
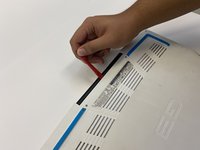
Use the opening tool to pry the base cover from the laptop.
-
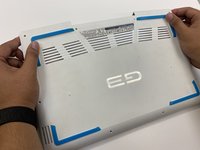
Lift the base cover off.
-
-
-
-
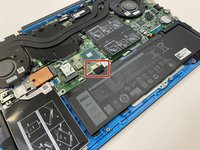
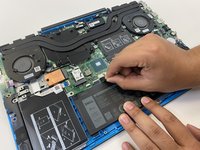
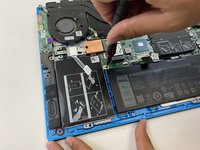
Disconnect the battery cable from the system board.
-
-
-
Open the latch.
-
Disconnect the hard drive cable from the system board.
-
-
-
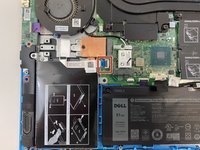
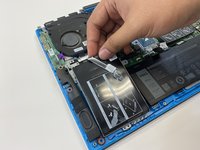
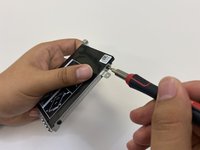
Use a Phillips #00 screwdriver to remove three black 3 mm screws.
-
Lift the hard drive assembly to remove it from the laptop.
-
-
-
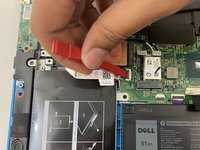
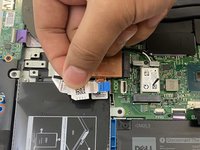
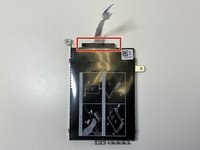
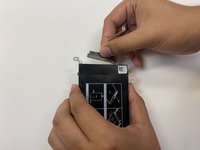
Gently pull the interposer from the hard drive.
-
-
-
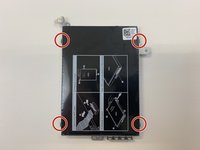
Use a Phillips #00 screwdriver to remove four black 3 mm screws from the hard drive bracket.
-
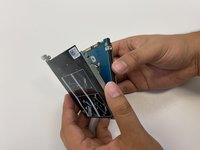
Remove the hard drive from the hard drive bracket.
-
Add the new hard drive into the hard drive bracket.
-


Once you’ve inserted the new hard drive into the hard drive bracket, reassembling the device can be done by reversing the instructions back to step one. You should hear clicks when you put the base cover back. The clicks ensure that the base cover is secured to the laptop. After this, start up the laptop and ensure it properly starts up.
crwdns2935221:0crwdne2935221:0
crwdns2935229:08crwdne2935229:0
crwdns2935287:0crwdne2935287:0

University of North Texas, Team 1-3, Raign Fall 2021 crwdns2935289:0University of North Texas, Team 1-3, Raign Fall 2021crwdne2935289:0
UNT-RAIGN-F21S1G3
crwdns2931471:02crwdne2931471:0
crwdns2935297:02crwdne2935297:0