crwdns2933423:0crwdne2933423:0

Dell DJ Disassembly

crwdns2942213:0crwdne2942213:0

  1. Dell DJ Disassembly, Dell DJ Disassembly: crwdns2935265:01crwdnd2935265:01crwdnd2935265:03crwdne2935265:0 Dell DJ Disassembly, Dell DJ Disassembly: crwdns2935265:01crwdnd2935265:02crwdnd2935265:03crwdne2935265:0 Dell DJ Disassembly, Dell DJ Disassembly: crwdns2935265:01crwdnd2935265:03crwdnd2935265:03crwdne2935265:0
    • Inspect your device and be sure that it matches the device that this guide is disassembling.

    • Familiarize yourself with the specific design of the device.

    • Battery replacement is the only repair that our guide offers that does not require a complete tear down.

  2. Dell DJ Disassembly: crwdns2935265:02crwdnd2935265:01crwdnd2935265:03crwdne2935265:0 Dell DJ Disassembly: crwdns2935265:02crwdnd2935265:02crwdnd2935265:03crwdne2935265:0 Dell DJ Disassembly: crwdns2935265:02crwdnd2935265:03crwdnd2935265:03crwdne2935265:0
    crwdns2935267:0crwdne2935267:0
    Magnetic Project Mat
    $19.95
    crwdns2942207:0crwdne2942207:0
    • Remove the bottom panel with the metal spudger. This panel may be fused to the outer shell with a dot of adhesive.

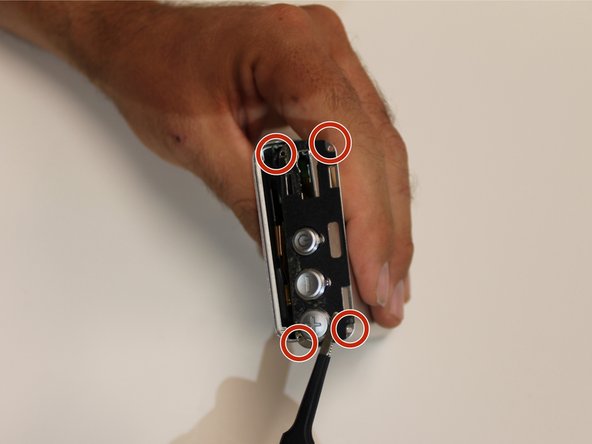
    • Four screws fasten a metal plate to the device. Using the device magnetic mat and 54 bit (Phillips J000) driver, remove the screws.

    • Be sure to keep the 4mm screws together and organized on the device magnet plate.

  3. Dell DJ Disassembly: crwdns2935265:03crwdnd2935265:01crwdnd2935265:03crwdne2935265:0 Dell DJ Disassembly: crwdns2935265:03crwdnd2935265:02crwdnd2935265:03crwdne2935265:0 Dell DJ Disassembly: crwdns2935265:03crwdnd2935265:03crwdnd2935265:03crwdne2935265:0
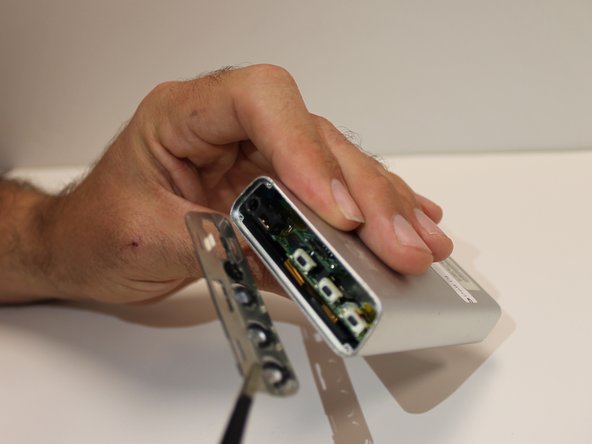
    • The top plate of the device is attached by a dot of glue. Use the metal spudger to pry the plate off.

    • After the top plate is removed, remove the four 4mm screws that attach the inner plate.

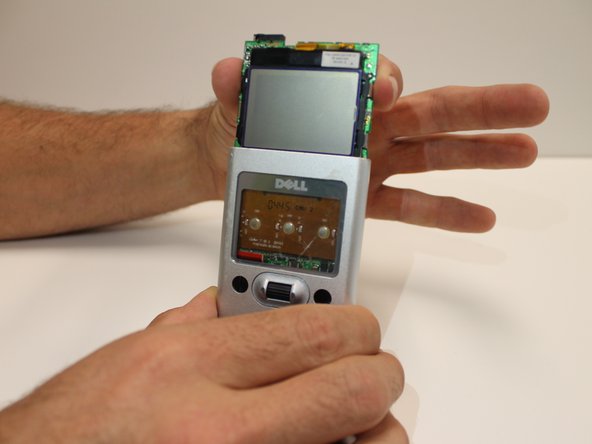
    • When the plate is removed, the motherboard will be ready to be removed.

  4. Dell DJ Disassembly: crwdns2935265:04crwdnd2935265:01crwdnd2935265:03crwdne2935265:0 Dell DJ Disassembly: crwdns2935265:04crwdnd2935265:02crwdnd2935265:03crwdne2935265:0 Dell DJ Disassembly: crwdns2935265:04crwdnd2935265:03crwdnd2935265:03crwdne2935265:0
    • Slide the motherboard out of the protective case.

    • Be careful not to snag any wires.

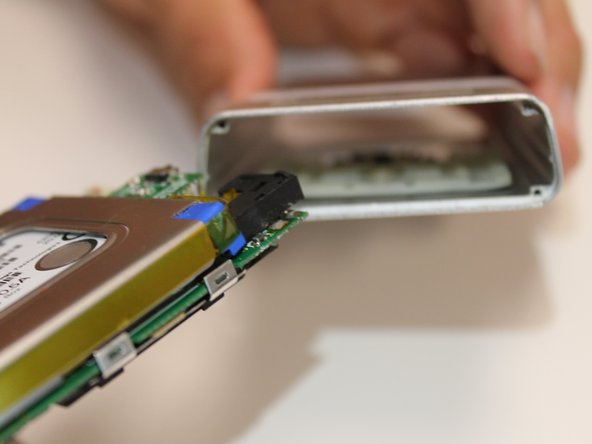
    • When the motherboard is exposed the device is ready to be inspected and repaired.

crwdns2935217:0crwdne2935217:0

crwdns2935227:0crwdne2935227:0

William Abel

crwdns2935283:001/28/16crwdne2935283:0

164 crwdns2915208:0crwdne2915208:0

crwdns2935295:0crwdne2935295:0

crwdns2915084:0crwdne2915084:0

USF Sarasota-Manatee, Team 1-1, Stewart Spring 2016 crwdns2935289:0USF Sarasota-Manatee, Team 1-1, Stewart Spring 2016crwdne2935289:0

USFSM-STEWART-S16S1G1

crwdns2931471:03crwdne2931471:0

crwdns2935297:05crwdne2935297:0

crwdns2917034:0crwdne2917034:0

How did you get the logic board to slide past the scroll wheel ?

kf4qic - crwdns2934203:0crwdne2934203:0

crwdns2917038:0crwdne2917038:0

crwdns2936625:0crwdne2936625:0:

crwdns2936751:024crwdne2936751:0 0

crwdns2936753:07crwdne2936753:0 1

crwdns2936753:030crwdne2936753:0 5

crwdns2942667:0crwdne2942667:0 596