crwdns2915892:0crwdne2915892:0
This guide will tell you step-by-step how to replace the keypad in the Dell Chromebook 3100 2-in-1 and tools are needed to do it.
Before beginning, make sure to power off the laptop completely and disconnect from any external power source.
crwdns2942213:0crwdne2942213:0
-
-
To start replacing the touch-pad, unscrew the 9 Phillips head screws holding down the rear cover (It is recommended to use a PH1 bit for the screwdriver).
-
-
-
Once all 9 screws are removed, wedge an iFixit Opening Tool in the gap between the rear cover and the rest of the laptop.
-
Once in, gently run the tool around the perimeter of the rear cover. You will hear popping sounds as the plastic tabs detach.
-
After enough tabs have been detached, simply pull off the rear cover.
-
-
-
Now that the rear cover is off, the first thing that must be done is to locate and unplug the battery cable from the motherboard.
-
-
-
-
Using the same PH1 bit for your screw driver, remove the 3 Phillips head screws holding down the battery.
-
Next, lift the battery and remove it from the laptop.
-
-
-
Once again, use the PH1 bit for your screwdriver to unscrew the 6 Phillips head screws holding down the touch-pad.
-
-
-
With all the screws removed, lift out the metal bracket holding down the touch-pad.
-
-
-
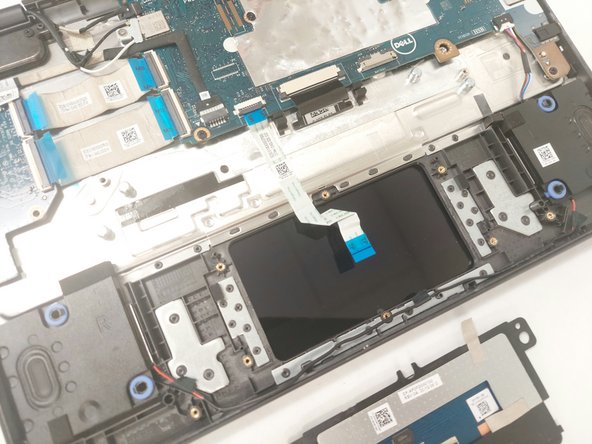
Next is to unplug the ribbon cable connecting to the touch-pad.
-
This can be done by flipping the black tab up and gently tugging on the blue handle to remove it.
-
-
-
With the cable unplugged and the metal bracket removed, grab the touch-pad along its edges and lift it off of the laptop.
-


To reassemble your device, follow these instructions in reverse order.
To reassemble your device, follow these instructions in reverse order.

crwdns2915084:0crwdne2915084:0

IUPUI, Team 3-2, Harley Fall 2023 crwdns2935289:0IUPUI, Team 3-2, Harley Fall 2023crwdne2935289:0
IUPUI-HARLEY-F23S3G2
crwdns2931471:03crwdne2931471:0
crwdns2935297:03crwdne2935297:0