crwdns2915892:0crwdne2915892:0
If the screen on your Dell Chromebook 13-7310 is cracked, pixelated, or fails to display material properly, use this replacement guide to replace it.
crwdns2942213:0crwdne2942213:0
-
-
To remove the screen, start by using the black nylon spudger to pry off the plastic hinge cover. This allows easy removal of the screen cover.
-
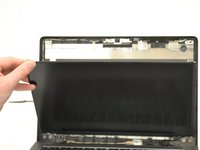
Using the same spudger and your finger nails, gently pry the outer casing around the screen itself. Once it is 1/3 to 1/2 of the way removed, gently pull the rest free by hand.
-
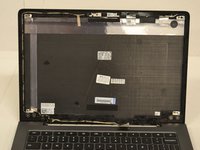
Once the clips are undone, remove the cover and you are ready for the next step!
-
-
-
-
Now that the cover is removed, use the #1 Philips screwdriver bit to remove the four, 3mm screws located at each corner of the screen.
-
-
-
Now that the screws are removed, gently lay the screen face down on the keyboard. It is best to lay a cloth on the keyboard first to keep debris form entering the keyboard.
-
After laying down the screen, carefully disconnect the ribbon cable located at the bottom middle of the display screen by pulling straight back towards the laptop cover.
-


Congratulations! You have successfully removed the screen of your Dell Chromebook 13-7310. To reassemble your device, follow these instructions in reverse order.

crwdns2935287:0crwdne2935287:0

Western Carolina University, Team S1-G3, Virtue Fall 2017 crwdns2935289:0Western Carolina University, Team S1-G3, Virtue Fall 2017crwdne2935289:0
WCU-VIRTUE-F17S1G3
crwdns2931471:04crwdne2931471:0
crwdns2935297:05crwdne2935297:0
crwdns2947410:01crwdne2947410:0
Hi,
If I have an i3 with non-touch matte display Dell Chromebook 7310 and an i5 touch glossy display, is it possible to swap the displays/lids so that the i5 has the non-touch matte display?