crwdns2915892:0crwdne2915892:0
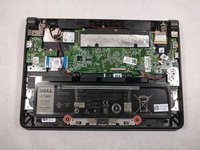
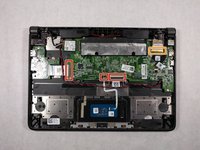
The motherboard makes connections to all of the different components of the laptop, allowing for power and data to be transmitted and distributed throughout all of the remaining hardware. In this guide, you will be shown how to remove this portion of your laptop so that the motherboard can be replaced.
crwdns2942213:0crwdne2942213:0
-
-
Use the #J0 screwdriver to unscrew the seven 4mm screws located around the back panel.
-
-
-
Use the plastic opening tool to gently pry around the four sides of the back panel until the panel is fully released.
-
-
-
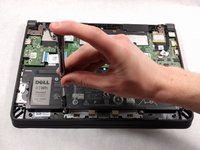
Using a JIS #0 screwdriver, unscrew the two 4mm screws securing the battery in place.
-
-
-
-
Using the pointed end of a #2 spudger, remove the connection between the battery and motherboard by slightly pulling on the wires while pushing the tiny hole down using the spudger.
-
Pull out the battery from inside the laptop.
-
-
-
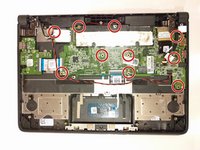
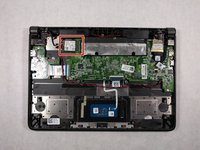
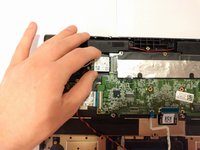
Using a JIS #0 screwdriver, unscrew the ten 4mm screws securing the motherboard in place.
-
-
-
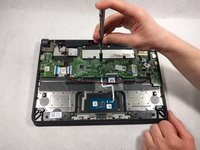
Gently remove the 3 ribbon cables that connect to the motherboard from other components. Lift the tiny switch from the direction of the wire insertion keeping the ribbon in place and pull the transparent strip attached to the ribbon.
-
Gently remove the display ribbon cable that says "NON-TOUCH" on its tag. This ribbon cable does not have a locking switch, but there is a wire metal latch that should be lifted up before pulling the ribbon.
-
-
-
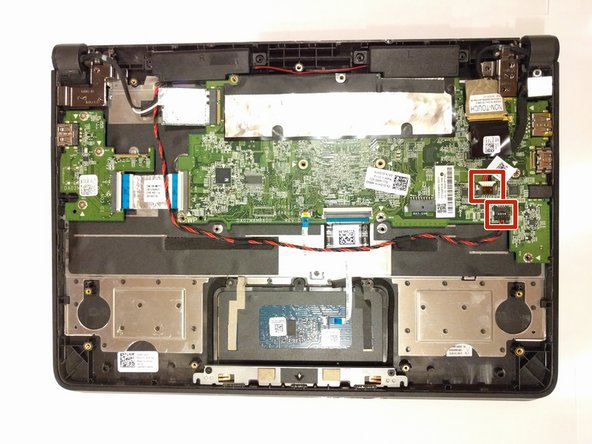
Remove the two 4-pin connectors that are also connected from other components in the device. Gently tug on the connector and it will come loose.
-
-
-
Disconnect the small chip that connects to the motherboard by gently tugging on it in the direction away from the board.
-
-
-
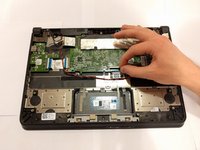
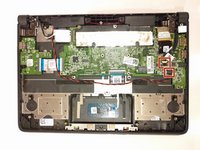
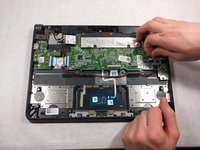
Hold the sides of the motherboard and gently lift it upwards from its position.
-


To reassemble your device, follow these instructions in reverse order.
crwdns2935221:0crwdne2935221:0
crwdns2935229:05crwdne2935229:0
crwdns2935287:0crwdne2935287:0

UMass Dartmouth, Team S4-G1, Julie Fall 2017 crwdns2935289:0UMass Dartmouth, Team S4-G1, Julie Fall 2017crwdne2935289:0
UMASSD-JULIE-F17S4G1
crwdns2931471:03crwdne2931471:0
crwdns2935297:06crwdne2935297:0
crwdns2947412:02crwdne2947412:0
Battery removal isn’t necessary. After removing the bottom case, you can skip to step 4 and just disconnect the battery before continuing.
Muchas gracias