crwdns2915892:0crwdne2915892:0
This guide will instruct you on how to remove the motherboard of your laptop. This is a rather involved process and may require some significant time to accomplish. The motherboard is located below the battery and is connected to nearly everything so take care that it is completed disconnected by following this step by step guide.
crwdns2942213:0crwdne2942213:0
-
-
Set your laptop upside down on your work space.
-
-
crwdns2935267:0crwdne2935267:0Tweezers$4.99
-
Using tweezers, remove the circular stickers that are covering the two screws near the middle of the back cover. Stick them to the laptop next to the screws.
-coordinate color of bullet points with markup
-perhaps say "...in the middle of the back cover" instead of "at"
-
-
-
Using a Phillips #0 screwdriver, loosen all seven 2.5mm screws on the back cover of the device.
-
-
-
Using a plastic opening tool, begin to separate the back cover from the body of the computer.
-
-
-
Using your hands, pull the back cover fully off of the body of the computer.
-
-
-
Unplug the battery from the motherboard by gently pulling the black cable header from the motherboard towards the battery.
-
-
-
Using a Phillips #0 screwdriver, remove each of the three 3mm screws from the battery.
-
-
-
-
Lift the battery away from the computer to remove it.
-
-
-
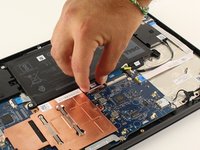
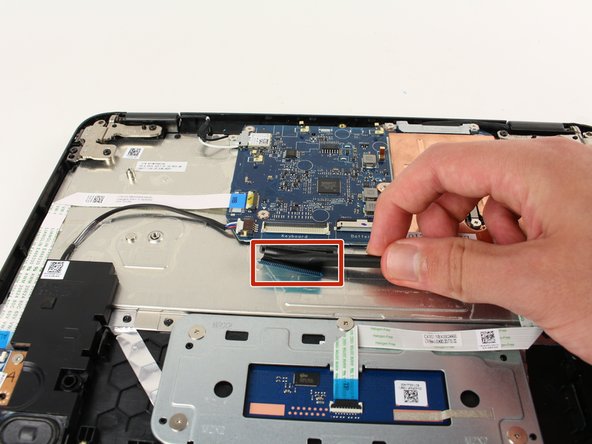
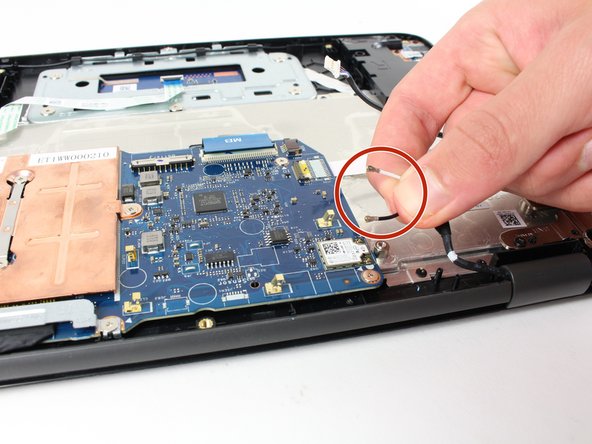
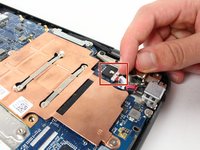
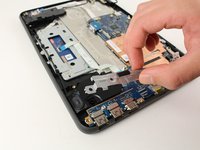
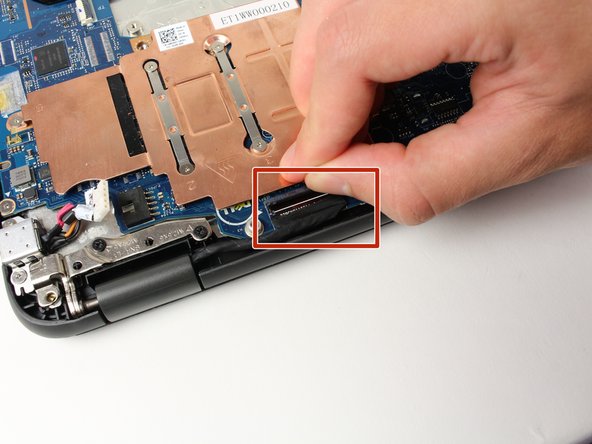
Lift the black clasp and gently pull on blue ribbon until it completely disconnects from the motherboard.
-
-
-
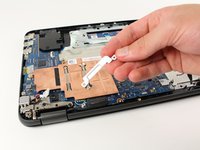
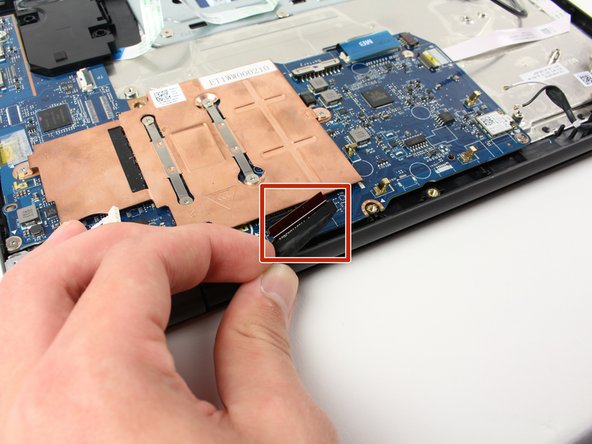
Lift the black clasp and use the spudger tool to remove the ribbon so that it completely disconnects from the motherboard.
-
-
-
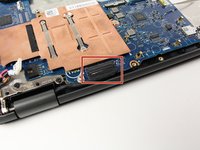
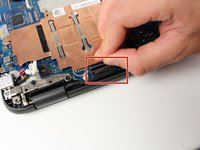
Lift the black clasp and gently pull on blue ribbon until it completely disconnects from the motherboard.
-
-
-
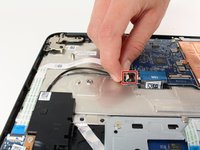
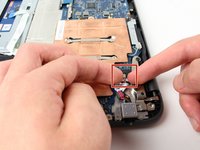
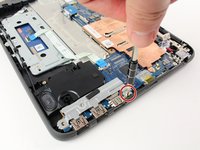
Locate and gently pull the wire harness (small plastic box with wires leading to the black audio speakers) directly out of the connector on the motherboard.
-
-
-
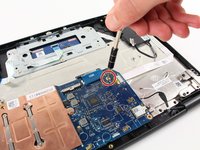
Using a Phillips #0 screwdriver, remove the single 3mm screw.
-
Remove the metal shield protecting the black and white wires beneath it.
-
-
-
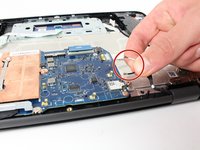
Locate and gently pull up on the white and black wires to disconnect them from the motherboard.
-
-
-
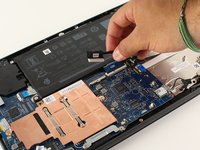
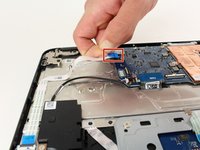
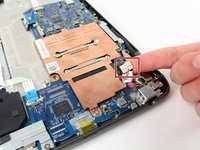
Locate and gently pull the wire harness (small plastic box with two pink, one orange, and two black wires) directly out of the connector on the motherboard.
-
-
-
Using a Phillips #0 screwdriver, remove the two 3mm screws.
-
Remove the metal shield protecting the black and white wires beneath it.
-
-
-
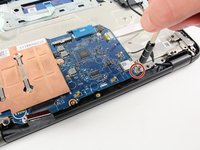
Using a Phillips #0 screwdriver, remove the two 3mm screws.
-
Remove the metal shield protecting the black and white wires beneath it.
-
-
-
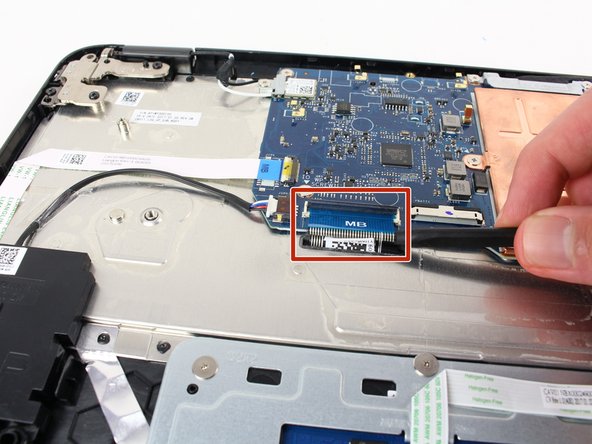
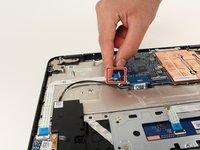
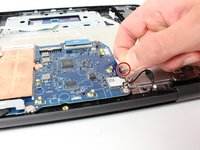
Lift black clasp and gently pull on the back of the wire until it completely disconnects from the motherboard.
-
-
-
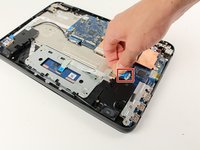
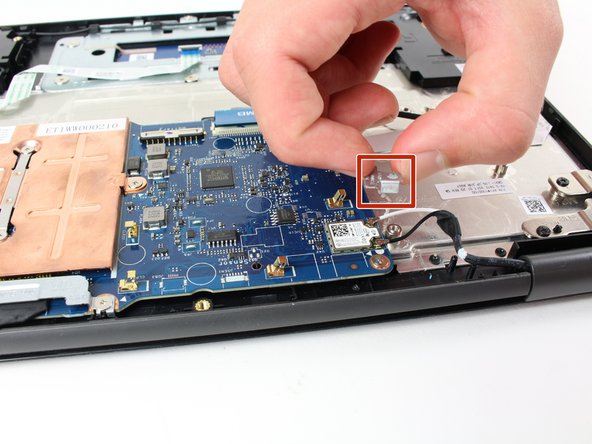
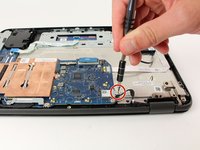
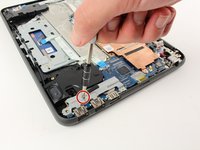
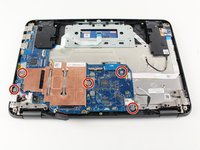
Using a Phillips #0 screwdriver, remove the five 3mm screws.
-
-
-
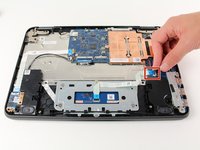
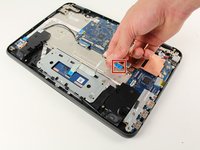
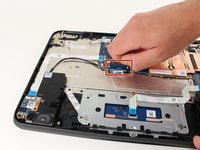
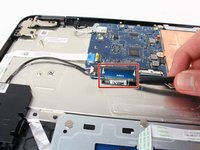
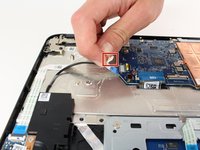
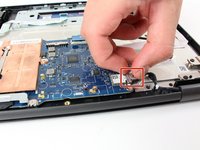
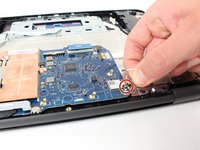
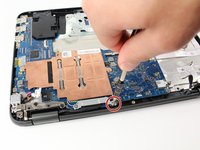
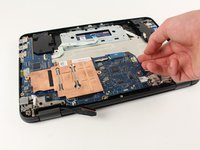
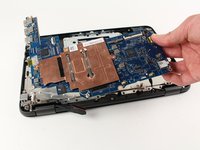
Gently lift and remove the motherboard.
-


To reassemble your device, follow these instructions in reverse order.
To reassemble your device, follow these instructions in reverse order.
crwdns2935221:0crwdne2935221:0
crwdns2935229:02crwdne2935229:0
crwdns2915084:0crwdne2915084:0

Cal Poly, Team S22-G1, Livingston Spring 2017 crwdns2935289:0Cal Poly, Team S22-G1, Livingston Spring 2017crwdne2935289:0
CPSU-LIVINGSTON-S17S22G1
crwdns2931471:04crwdne2931471:0
crwdns2935297:08crwdne2935297:0
crwdns2947412:02crwdne2947412:0
Dell Chromebook 11 3180 3189 uses a very special power jack connector, the power jack is soldering to a iron cover, people have to replace the whole part when the jack is broken/burnt, this is the correct part: https://www.dcincable.com/xnj46-0xnj46-c..., remember not to move the laptop while charging the battery, a good habit can make the laptop working longer.
On the dell 3180 non Chromebook variant You don't have to remove the hole motherboard just finesse it out and replace the part.
I usually skip most all of this and start with the bezel, disconnecting the screen wire AT THE SCREEN, and not at the motherboard. 4 screws around the bezel, and 4 screws in the screen. Leave everything connected and skip to step 12.
Denton Holland - crwdns2934203:0crwdne2934203:0