crwdns2915892:0crwdne2915892:0
This guide shows how to replace the RAM in your Alienware M11x R3 laptop. You may need to replace the RAM if your laptop is running slow, frequently crashing, or you want to upgrade its performance.
You will need a replacement RAM module that is compatible with your laptop's specifications. Before starting the repair, it's recommended to back up your important data to prevent any data loss.
Also, make sure to turn off your device and unplug it from the charger.
crwdns2942213:0crwdne2942213:0
-
-
Loosen the eight retaining screws on the base of the computer with a small Phillips screwdriver.
-
Remove the bottom cover from the laptop.
-
-
-
-
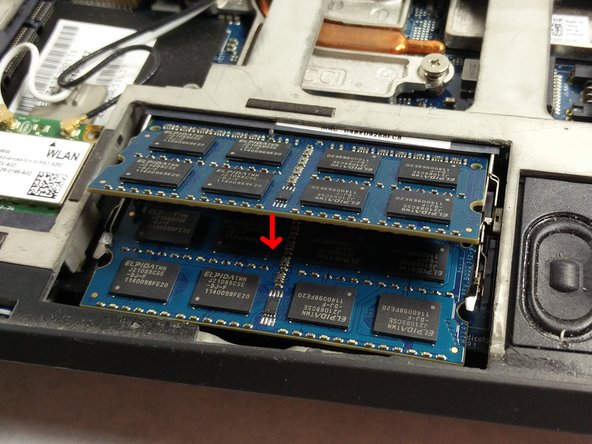
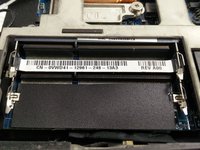
On the top stick of RAM, push each of the two tabs away from the side as shown in the second picture.
-
Repeat this process for the bottom stick.
-
-
-
Starting with the bottom stick of RAM, align the pin and insert the stick at the same angle you removed the old one. Once it is gently pushed in all the way, push the stick down as shown in the third picture until it locks under the retaining springs.
-
Repeat this process for the second stick of RAM.
-


To reassemble your device, follow these instructions in reverse order.
To reassemble your device, follow these instructions in reverse order.
crwdns2935221:0crwdne2935221:0
crwdns2935227:0crwdne2935227:0
crwdns2915084:0crwdne2915084:0

UMass Dartmouth, Team S3-G7, Botvin Spring 2017 crwdns2935289:0UMass Dartmouth, Team S3-G7, Botvin Spring 2017crwdne2935289:0
UMASSD-BOTVIN-S17S3G7
crwdns2931471:03crwdne2931471:0
crwdns2935297:07crwdne2935297:0