crwdns2933423:0crwdne2933423:0

Dell 3100 (Touch) Battery Replacement

crwdns2942213:0crwdne2942213:0

  1. Dell 3100 (Touch) Battery Replacement, Detach Bottom Cover: crwdns2935265:01crwdnd2935265:01crwdnd2935265:02crwdne2935265:0 Dell 3100 (Touch) Battery Replacement, Detach Bottom Cover: crwdns2935265:01crwdnd2935265:02crwdnd2935265:02crwdne2935265:0
    • Unscrew the nine PH#0 captive screws on the bottom of the device.

    • Use a pick to run along the outside of the device popping all the clips. Prying should not be necessary.

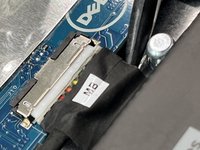
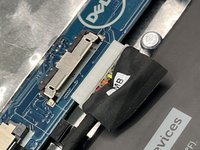
  2. Dell 3100 (Touch) Battery Replacement, Unplug the battery: crwdns2935265:02crwdnd2935265:01crwdnd2935265:02crwdne2935265:0 Dell 3100 (Touch) Battery Replacement, Unplug the battery: crwdns2935265:02crwdnd2935265:02crwdnd2935265:02crwdne2935265:0
    • Pull carefully, but firmly, on the battery cable until it becomes detached.

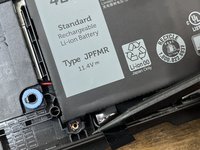
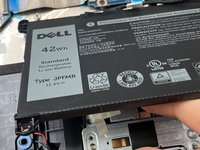
  3. Dell 3100 (Touch) Battery Replacement, Remove the battery: crwdns2935265:03crwdnd2935265:01crwdnd2935265:01crwdne2935265:0
    • Remove these three M2x5 screws and take the battery out

    • If your replacement battery doesn't come with a cable, you will need to remove the cable from the old battery before disposing of it.

    • DO NOT throw batteries in the trash. Take them to a proper battery recycling center.

  4. Dell 3100 (Touch) Battery Replacement, Battery: crwdns2935265:04crwdnd2935265:01crwdnd2935265:02crwdne2935265:0 Dell 3100 (Touch) Battery Replacement, Battery: crwdns2935265:04crwdnd2935265:02crwdnd2935265:02crwdne2935265:0
    • Use a plastic spudger to lift up the flap. Use the flap to pull the connector straight away from the board (towards the battery).

  5. Dell 3100 (Touch) Battery Replacement: crwdns2935265:05crwdnd2935265:01crwdnd2935265:01crwdne2935265:0
    • Remove 3 M2x4 screws

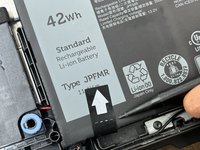
  6. Dell 3100 (Touch) Battery Replacement: crwdns2935265:06crwdnd2935265:01crwdnd2935265:03crwdne2935265:0 Dell 3100 (Touch) Battery Replacement: crwdns2935265:06crwdnd2935265:02crwdnd2935265:03crwdne2935265:0 Dell 3100 (Touch) Battery Replacement: crwdns2935265:06crwdnd2935265:03crwdnd2935265:03crwdne2935265:0
    • Use a spudger to detach the tab, and pull the tab up away from the device. This will break the adhesive holding in the battery.

crwdns2915888:0crwdne2915888:0

To reassemble your device, follow these instructions in reverse order.

crwdns2935227:0crwdne2935227:0

Isaac

1.173 crwdns2915208:0crwdne2915208:0

crwdns2935297:07crwdne2935297:0

crwdns2947412:00crwdne2947412:0

crwdns2917038:0crwdne2917038:0

crwdns2936625:0crwdne2936625:0:

crwdns2936751:024crwdne2936751:0 1

crwdns2936753:07crwdne2936753:0 1

crwdns2936753:030crwdne2936753:0 1

crwdns2942667:0crwdne2942667:0 61