crwdns2915892:0crwdne2915892:0
This guide will show you how to take out the trigger on the saw.
crwdns2942213:0crwdne2942213:0
-
-
Use a T-20 hexhead screw to unscrew 4 hexagonal screws surrounding the base of the black air filter. The screws are on the yellow portion.
-
-
-
Use a T-15 hexhead screw to unscrew 5 hexagonal screws. These screws are located on the opposite side of the saw from previous step.
-
-
-
Unscrew the black plastic knob underneath the trigger.
-
-
-
-
Grab hold of the black air filter portion and pull off.
-
-
-
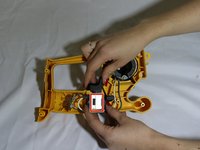
This is what the inside of the saw looks like.
-
-
-
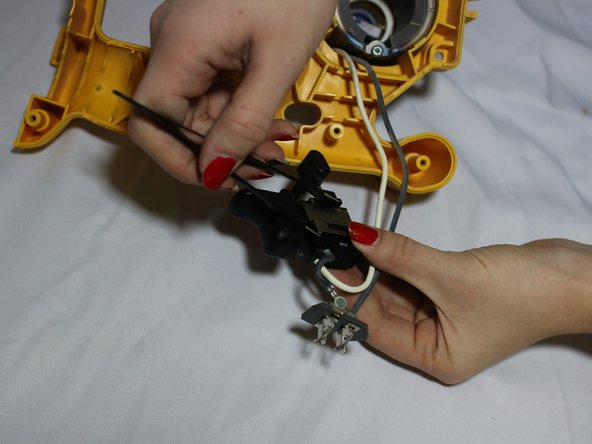
The trigger has black and white wires coming off of it. Grip the trigger with both hands, one on the plastic trigger part and the other on the plastic by the silver metal piece.
-
Pull up.
-
-
-
The trigger should be able to sit freely.
-
-
crwdns2935267:0crwdne2935267:0Tweezers$4.99
-
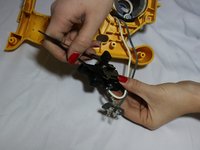
Lift off the silver metal piece using tweezers.
-
Lift off each hook. (4 corners)
-
-
-
Pull plastic trigger out of the black plastic casing.
-


To reassemble your device, follow these instructions in reverse order.
crwdns2935221:0crwdne2935221:0
crwdns2935229:02crwdne2935229:0
crwdns2935287:0crwdne2935287:0

Cal Poly, Team 8-2, Banghart Winter 2017 crwdns2935289:0Cal Poly, Team 8-2, Banghart Winter 2017crwdne2935289:0
CPSU-BANGHART-W17S8G2
crwdns2931471:03crwdne2931471:0
crwdns2935297:05crwdne2935297:0
crwdns2947410:01crwdne2947410:0
Then repair trigger by stripping,cleaning,soldering and whatever else before replacing to unit as you can no longer buy the part as it is obsolete!