crwdns2933423:0crwdne2933423:0

DeWalt DCS380 Blade Shaft Replacement

crwdns2942213:0crwdne2942213:0

  1. DeWalt DCS380 Blade Shaft Replacement, Removing shoe and boot.: crwdns2935265:01crwdnd2935265:01crwdnd2935265:01crwdne2935265:0
    • Remove the battery before disassembly.

    • Remove the shoe by pressing the yellow button on the left side of the hand grip.

  2. DeWalt DCS380 Blade Shaft Replacement: crwdns2935265:02crwdnd2935265:01crwdnd2935265:02crwdne2935265:0 DeWalt DCS380 Blade Shaft Replacement: crwdns2935265:02crwdnd2935265:02crwdnd2935265:02crwdne2935265:0
    • Remove the two M8x18mm T20 bolts from the front plate.

  3. DeWalt DCS380 Blade Shaft Replacement: crwdns2935265:03crwdnd2935265:01crwdnd2935265:01crwdne2935265:0
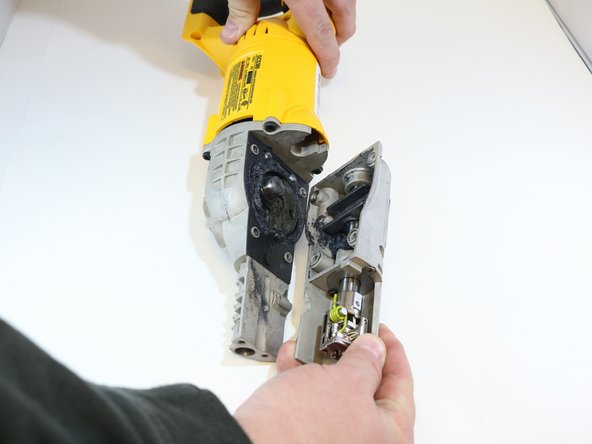
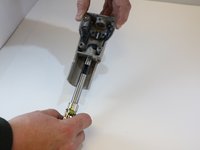
    • Pull the front of the grip while holding the saw body in place.

  4. DeWalt DCS380 Blade Shaft Replacement, Blade Shaft: crwdns2935265:04crwdnd2935265:01crwdnd2935265:02crwdne2935265:0 DeWalt DCS380 Blade Shaft Replacement, Blade Shaft: crwdns2935265:04crwdnd2935265:02crwdnd2935265:02crwdne2935265:0
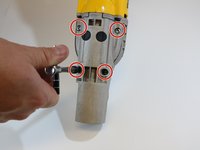
    • Remove the four M8x18mm T20 screws on the top of the gearbox.

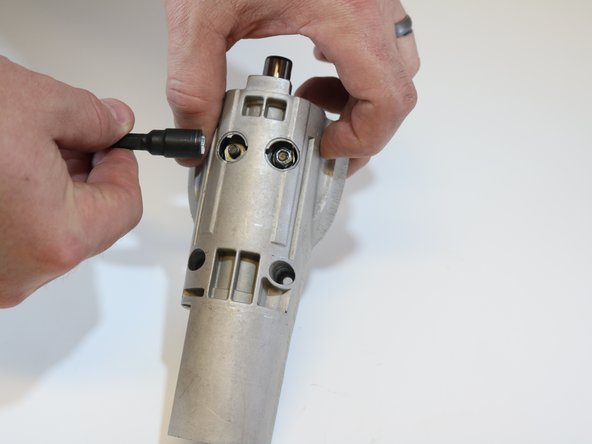
    • Pull the top of the gearbox off and set the saw body aside.

  5. DeWalt DCS380 Blade Shaft Replacement: crwdns2935265:05crwdnd2935265:01crwdnd2935265:02crwdne2935265:0 DeWalt DCS380 Blade Shaft Replacement: crwdns2935265:05crwdnd2935265:02crwdnd2935265:02crwdne2935265:0
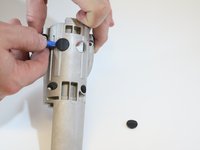
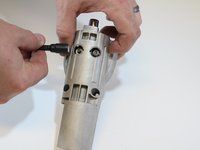
    • Remove the black plastic dust covers using the plastic pry bar.

    • Remove the two M5 lock nuts using a 5/16" socket.

  6. DeWalt DCS380 Blade Shaft Replacement: crwdns2935265:06crwdnd2935265:01crwdnd2935265:02crwdne2935265:0 DeWalt DCS380 Blade Shaft Replacement: crwdns2935265:06crwdnd2935265:02crwdnd2935265:02crwdne2935265:0
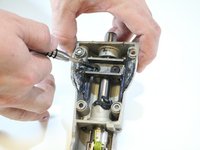
    • Turn the housing over and remove the two countersunk M5x17mm T20 bolts from the shaft yoke.

    • Remove the yoke.

  7. DeWalt DCS380 Blade Shaft Replacement: crwdns2935265:07crwdnd2935265:01crwdnd2935265:02crwdne2935265:0 DeWalt DCS380 Blade Shaft Replacement: crwdns2935265:07crwdnd2935265:02crwdnd2935265:02crwdne2935265:0
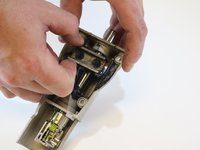
    • Pull the shaft out of the front of the housing.

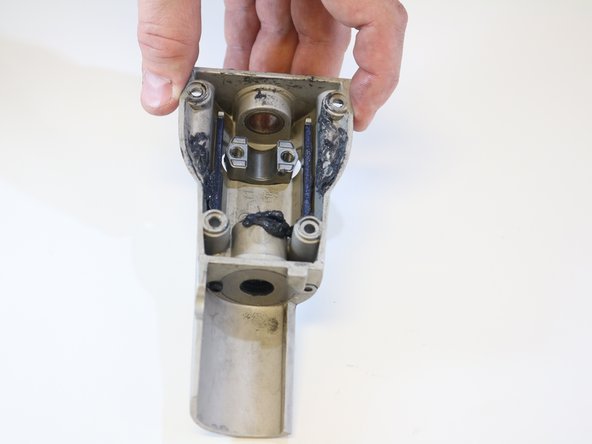
    • Leave the shaft saddle in place over the holes in the cover.

    • Re-grease before re-assembly. If there are metal shavings or pieces of the broken shaft left in the gearbox make sure to remove them before re-greasing.

crwdns2915888:0crwdne2915888:0

To reassemble your device, follow these instructions in reverse order.

Jonathan Hicks

crwdns2935283:001/17/19crwdne2935283:0

725 crwdns2915208:0crwdne2915208:0

crwdns2935297:07crwdne2935297:0

crwdns2915084:0crwdne2915084:0

Eastern Washington University, Team S2-G5, Munoz Winter 2019 crwdns2935289:0Eastern Washington University, Team S2-G5, Munoz Winter 2019crwdne2935289:0

EWU-MUNOZ-W19S2G5

crwdns2931471:03crwdne2931471:0

crwdns2935297:07crwdne2935297:0

crwdns2944067:00crwdne2944067:0

crwdns2917038:0crwdne2917038:0

crwdns2936625:0crwdne2936625:0:

crwdns2936751:024crwdne2936751:0 2

crwdns2936753:07crwdne2936753:0 10

crwdns2936753:030crwdne2936753:0 20

crwdns2942667:0crwdne2942667:0 848