crwdns2933423:0crwdne2933423:0

De'Longhi EC155 Core Replacement

crwdns2862623:0crwdne2862623:0
crwdns2942641:0crwdne2942641:0

crwdns2942213:0crwdne2942213:0

  1. De'Longhi EC155 Core Replacement, Water Reservoir: crwdns2935265:01crwdnd2935265:01crwdnd2935265:02crwdne2935265:0 De'Longhi EC155 Core Replacement, Water Reservoir: crwdns2935265:01crwdnd2935265:02crwdnd2935265:02crwdne2935265:0
    • Flip open the top panel to reveal water reservoir.

    • Grab the water reservoir by the handle and lift out.

  2. De'Longhi EC155 Core Replacement, Bottom Panel: crwdns2935265:02crwdnd2935265:01crwdnd2935265:02crwdne2935265:0 De'Longhi EC155 Core Replacement, Bottom Panel: crwdns2935265:02crwdnd2935265:02crwdnd2935265:02crwdne2935265:0
    • Flip the device on its head.

    • Using the Phillips #2 screwdriver, unscrew the four 12 mm screws found at each corner of the bottom panel.

    • Lift the panel off or flip the device over and let the panel drop out.

  3. De'Longhi EC155 Core Replacement, Top Panel: crwdns2935265:03crwdnd2935265:01crwdnd2935265:01crwdne2935265:0
    • Before flipping the device, removed the black container and grill.

    • Flip the device on its head, front end facing you.

    • Using the Phillips #2 unscrew the two 52 mm screws found underneath the top portion of the device.

  4. De'Longhi EC155 Core Replacement: crwdns2935265:04crwdnd2935265:01crwdnd2935265:01crwdne2935265:0
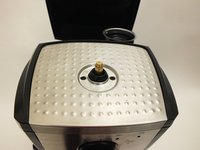
    • Flip the device back to its proper orientation.

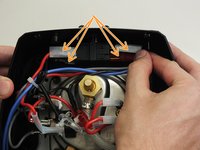
    • Using the Phillips #2 screwdriver remove the two 52 mm screws found on the lip next to the reservoir.

  5. De'Longhi EC155 Core Replacement: crwdns2935265:05crwdnd2935265:01crwdnd2935265:02crwdne2935265:0 De'Longhi EC155 Core Replacement: crwdns2935265:05crwdnd2935265:02crwdnd2935265:02crwdne2935265:0
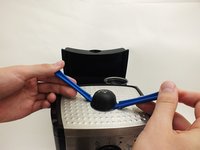
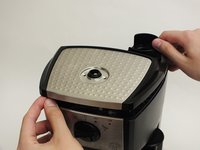
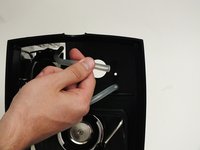
    • Insert the two plastic opening tools beneath the top knob.

    • Use the two plastic opening tools as leverage to lift the top knob off.

  6. De'Longhi EC155 Core Replacement: crwdns2935265:06crwdnd2935265:01crwdnd2935265:01crwdne2935265:0
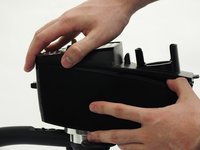
    • Grasp the lid firmly with both hands.

    • Pull mightily with both hands away from the device.

    • If you hear a slight snapping sound, it is supposed to do that.

  7. De'Longhi EC155 Core Replacement: crwdns2935265:07crwdnd2935265:01crwdnd2935265:02crwdne2935265:0 De'Longhi EC155 Core Replacement: crwdns2935265:07crwdnd2935265:02crwdnd2935265:02crwdne2935265:0
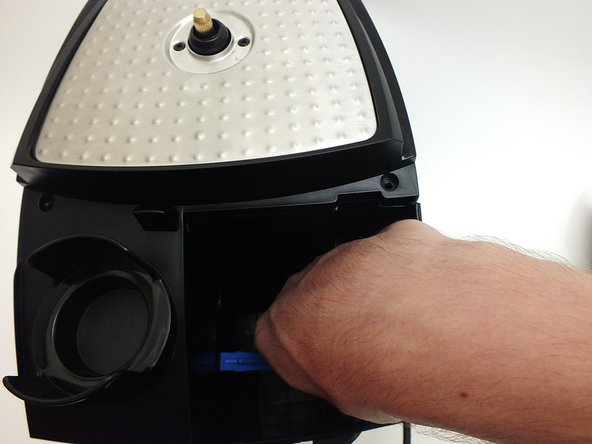
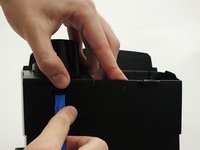
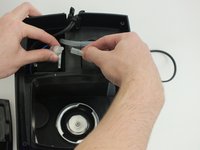
    • Use a plastic opening tool to push in the slot on the back panel while lifting.

    • Similarly, reach into where the reservoir used to be and insert a plastic spudger underneath the inside panel.

    • We recommend to not use your fingers for this step because there is a chance they will be pinched.

  8. De'Longhi EC155 Core Replacement: crwdns2935265:08crwdnd2935265:01crwdnd2935265:02crwdne2935265:0 De'Longhi EC155 Core Replacement: crwdns2935265:08crwdnd2935265:02crwdnd2935265:02crwdne2935265:0
    • You are now ready to lift the top off.

    • Place one hand near the back, the other at the front, and lift.

    • You may want to lift the front and back individually by pulling one a little off the part before the other. Afterwards, lifting the top off entirely will be easier.

  9. De'Longhi EC155 Core Replacement, Core: crwdns2935265:09crwdnd2935265:01crwdnd2935265:01crwdne2935265:0
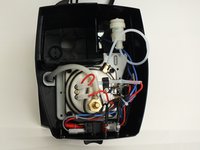
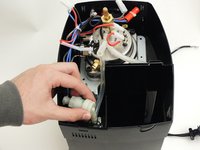
    • Twist the frother clockwise while pulling gently.

  10. De'Longhi EC155 Core Replacement: crwdns2935265:010crwdnd2935265:01crwdnd2935265:02crwdne2935265:0 De'Longhi EC155 Core Replacement: crwdns2935265:010crwdnd2935265:02crwdnd2935265:02crwdne2935265:0
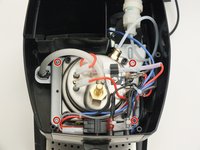
    • Remove the four 16mm screws with a T20 Screw head.

  11. De'Longhi EC155 Core Replacement: crwdns2935265:011crwdnd2935265:01crwdnd2935265:03crwdne2935265:0 De'Longhi EC155 Core Replacement: crwdns2935265:011crwdnd2935265:02crwdnd2935265:03crwdne2935265:0 De'Longhi EC155 Core Replacement: crwdns2935265:011crwdnd2935265:03crwdnd2935265:03crwdne2935265:0
    crwdns2935267:0crwdne2935267:0
    Tweezers
    $3.99
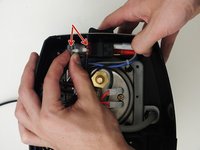
    • Remove each clip from the valve and core using the precision angled tweezers.

  12. De'Longhi EC155 Core Replacement: crwdns2935265:012crwdnd2935265:01crwdnd2935265:02crwdne2935265:0 De'Longhi EC155 Core Replacement: crwdns2935265:012crwdnd2935265:02crwdnd2935265:02crwdne2935265:0
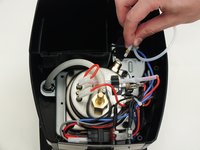
    • Pull out each LED with one quick tug.

    • Similarly, remove each set of wires from the setting tuner with one quick tug.

  13. De'Longhi EC155 Core Replacement: crwdns2935265:013crwdnd2935265:01crwdnd2935265:02crwdne2935265:0 De'Longhi EC155 Core Replacement: crwdns2935265:013crwdnd2935265:02crwdnd2935265:02crwdne2935265:0
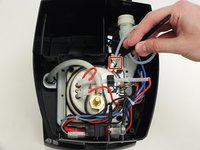
    • Flip the device and remove one end of the tube from the reservoir hole.

    • Completely remove the other tube from both the reservoir hole and filter to the water pump.

  14. De'Longhi EC155 Core Replacement: crwdns2935265:014crwdnd2935265:01crwdnd2935265:02crwdne2935265:0 De'Longhi EC155 Core Replacement: crwdns2935265:014crwdnd2935265:02crwdnd2935265:02crwdne2935265:0
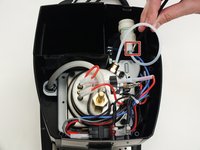
    • Pull the tube through the chamber with the water pump so it comes out of the top end.

    • Twist the valve counter-clockwise while pulling gently.

  15. De'Longhi EC155 Core Replacement: crwdns2935265:015crwdnd2935265:01crwdnd2935265:01crwdne2935265:0
    • Tilt the core towards the front while lifting from the back.

    • If the core is proving difficult to remove, a wire might be caught somewhere, likely near the water pump. We recommend shaking slightly as you lift since the frothing tube is at an odd angle.

    • We also recommend that you remove the valve before removing the core so that there is less obstructing movement. But the core can be removed without removing the valve.

crwdns2915888:0crwdne2915888:0

To reassemble your device, follow these instructions in reverse order.

David Griffith

crwdns2935283:010/01/15crwdne2935283:0

1,492 crwdns2915208:0crwdne2915208:0

crwdns2935297:09crwdne2935297:0

crwdns2915084:0crwdne2915084:0

Cal Poly, Team 4-2, Maness Fall 2015 crwdns2935289:0Cal Poly, Team 4-2, Maness Fall 2015crwdne2935289:0

CPSU-MANESS-F15S4G2

crwdns2931471:04crwdne2931471:0

crwdns2935297:036crwdne2935297:0

crwdns2947412:00crwdne2947412:0

crwdns2917038:0crwdne2917038:0

crwdns2936625:0crwdne2936625:0:

crwdns2936751:024crwdne2936751:0 0

crwdns2936753:07crwdne2936753:0 0

crwdns2936753:030crwdne2936753:0 0

crwdns2942667:0crwdne2942667:0 110