crwdns2915892:0crwdne2915892:0
This guide will illustrate the needed steps in removing the plastic shell from the DJI Phantom 3 Advanced. This includes the removal of screws that secure the two halves of the shell together. This guide also informs how to safely remove the top shell after it is unscrewed. This is a process required for removing several other components.
crwdns2942213:0crwdne2942213:0
-
-
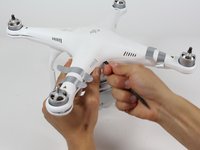
With the battery facing you, locate the two tabs on the top and bottom of the battery as shown.
-
-
-
Press the two tabs with your finger and thumb, and gently slide the battery towards you, out of the quadcopter frame.
-
With your other hand, be sure to hold the quadcopter steady to ensure that it stays still.
-
-
-
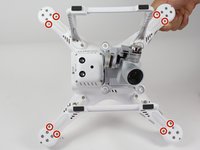
Turn the Phantom 3 Advanced upside down.
-
-
-
-
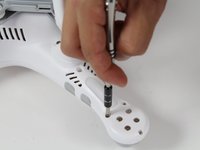
Remove the four 7mm long 2mm screws with a T-6 screwdriver.
-
-
-
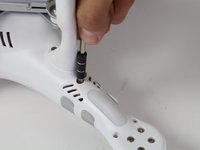
Remove the eight 5mm long 2.5mm screws using the T-8 screwdriver.
-
-
-
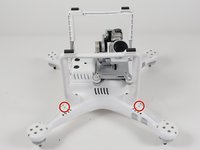
Remove the four 10mm long deep 3mm screws using the T-8 screwdriver.
-
-
-
Carefully flip the phantom back over with the motors facing up.
-
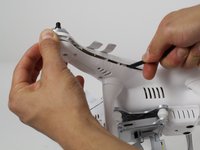
Peel back the silver stickers from the seam in the cover.
-
Using a plastic spudger, slowly separate the two halves of the plastic shell.
-
-
-
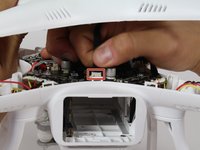
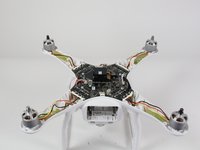
Slowly remove the upper half of the plastic case about halfway. There is a ribbon cable that's connects the cover and the control board.
-
Follow the ribbon cable to the control board and locate the connector that connects the cable to the control board.
-
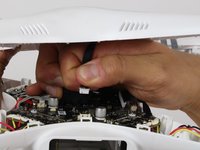
Press the tab on the side of the connector and pull up on the cable.
-
Continue to remove the shell the rest of the way.
“Press the tab on the side of the connector and pull up on the cable.”
The 2015 W323A model I am working on has no tab on the side of the connector. Connector released quite easily when I applied upward pressure away from the board, pulling on the all wires together. A little wiggle side to side helped. Be patient. It’s a small connector.
-


To reassemble your device, follow these instructions in reverse order.
To reassemble your device, follow these instructions in reverse order.
crwdns2935221:0crwdne2935221:0
crwdns2935229:011crwdne2935229:0
crwdns2915084:0crwdne2915084:0

Cal Poly, Team 10-2, Livingston Fall 2016 crwdns2935289:0Cal Poly, Team 10-2, Livingston Fall 2016crwdne2935289:0
CPSU-LIVINGSTON-F16S10G2
crwdns2931471:03crwdne2931471:0
crwdns2935297:012crwdne2935297:0
crwdns2947412:03crwdne2947412:0
Great Job Robert! Even the “Phantom Pilots Forum” had no recent recommendations for a disassembly manual, as DJI likes to “Fixit” themselves!
Excellent detailed instructions. Having pictures on procedure makes it idiot proof.
Does this also include the phantom 3 professional too? My understanding is that the only differences between them is the battery charger and the pro is 4k recording vs 1080p.