crwdns2915892:0crwdne2915892:0
This guide will show you how to replace the screen in a CyberpowerPC Fangbook HX6 with minimal difficulty.
crwdns2942213:0crwdne2942213:0
-
-
To replace the screen you will need a screwdriver (a size zero was used in this guide), and a tool that can be used to pry off the screen covering (a spudger was used in this guide).
-
-
-
Insert the spudger gently into the seam that connects the front plate to the rest of the device.
-
Move the tool carefully around the screen and apply a small amount of pressure. You are trying to undo several clasps holding the front plate on.
-
Do this on all sides of the face plate except for the bottom. The bottom will have a strip of adhesive you will need to carefully pull off to separate the face plate from the bottom of the screen.
-
-
-
-
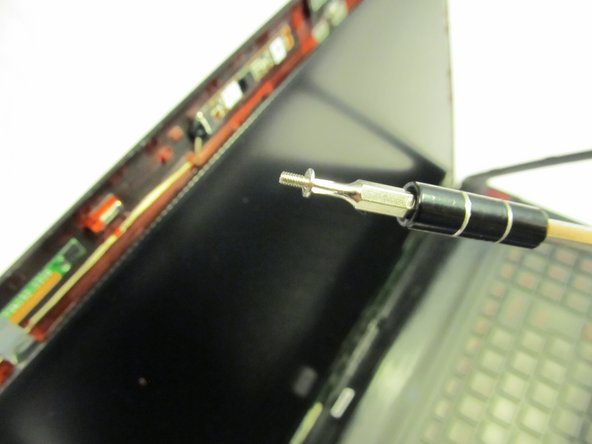
Remove the two 4mm silver screws on both sides of the top of the screen.
-
Once you have removed them, gently pull the screen off of the aligning dials (the small plastic pieces to the left of the screws).
-
-
-
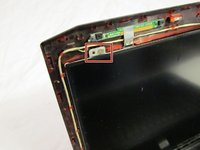
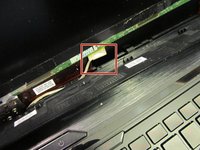
At this point the only thing keeping the screen attached to the laptop is this small wire and connector shown here.
-
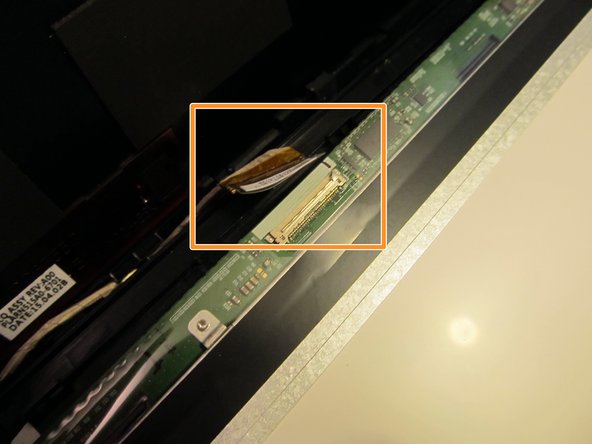
Gently pull the screen out and turn it over so that you can see where the connector is attached.
-
Carefully remove it. Once this is done you have successfully removed the screen from your laptop.
-


To reassemble your device, follow these instructions in reverse order.
To reassemble your device, follow these instructions in reverse order.
crwdns2935221:0crwdne2935221:0
crwdns2935227:0crwdne2935227:0

crwdns2915084:0crwdne2915084:0

University of Alabama, Team S1-G4, Bedsole Fall 2018 crwdns2935289:0University of Alabama, Team S1-G4, Bedsole Fall 2018crwdne2935289:0
UA-BEDSOLE-F18S1G4
crwdns2931471:02crwdne2931471:0
crwdns2935297:02crwdne2935297:0