crwdns2933423:0crwdne2933423:0

Cuisinart Mini-Prep DLC-2A blender Shell Replacement

crwdns2942213:0crwdne2942213:0

  1. Cuisinart Mini-Prep DLC-2A blender Shell Replacement, Blender Jar: crwdns2935265:01crwdnd2935265:01crwdnd2935265:02crwdne2935265:0 Cuisinart Mini-Prep DLC-2A blender Shell Replacement, Blender Jar: crwdns2935265:01crwdnd2935265:02crwdnd2935265:02crwdne2935265:0
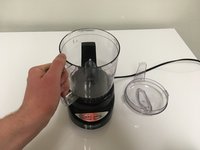
    • Identify the Jar of the Mini-Prep

  2. Cuisinart Mini-Prep DLC-2A blender Shell Replacement: crwdns2935265:02crwdnd2935265:01crwdnd2935265:02crwdne2935265:0 Cuisinart Mini-Prep DLC-2A blender Shell Replacement: crwdns2935265:02crwdnd2935265:02crwdnd2935265:02crwdne2935265:0
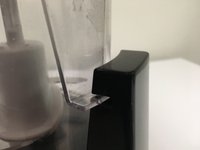
    • Place the Jar on top of the base by taking the bottom of jar and placing it through the blade accelerator.

  3. Cuisinart Mini-Prep DLC-2A blender Shell Replacement: crwdns2935265:03crwdnd2935265:01crwdnd2935265:03crwdne2935265:0 Cuisinart Mini-Prep DLC-2A blender Shell Replacement: crwdns2935265:03crwdnd2935265:02crwdnd2935265:03crwdne2935265:0 Cuisinart Mini-Prep DLC-2A blender Shell Replacement: crwdns2935265:03crwdnd2935265:03crwdnd2935265:03crwdne2935265:0
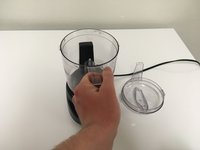
    • Notice that the written instructions on the top of the base remind the user to turn counter clock wise to lock the Jar into place.

    • Move the jar clock wise until it locks into place. Then to secure it turn it counter clock wise so that the handle sticks out the front of the blender.

  4. Cuisinart Mini-Prep DLC-2A blender Shell Replacement: crwdns2935265:04crwdnd2935265:01crwdnd2935265:01crwdne2935265:0
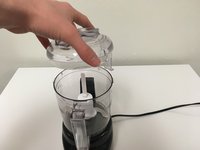
    • Place the blade inside using the jar, and on top of the motor propeller. [this is what spins the blade]

  5. Cuisinart Mini-Prep DLC-2A blender Shell Replacement: crwdns2935265:05crwdnd2935265:01crwdnd2935265:03crwdne2935265:0 Cuisinart Mini-Prep DLC-2A blender Shell Replacement: crwdns2935265:05crwdnd2935265:02crwdnd2935265:03crwdne2935265:0 Cuisinart Mini-Prep DLC-2A blender Shell Replacement: crwdns2935265:05crwdnd2935265:03crwdnd2935265:03crwdne2935265:0
    • first place the lid on top with the plastic attachment on the back right side.

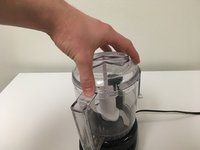
    • Once the lid is on, rotate the lid counter clockwise so that it locks into the black locking mechanism in the back.

    • This secures the lid on top of the jar.

  6. Cuisinart Mini-Prep DLC-2A blender Shell Replacement: crwdns2935265:06crwdnd2935265:01crwdnd2935265:01crwdne2935265:0
    • Ta-da! You have officially learned how to replace the jar section of the blender.

crwdns2915888:0crwdne2915888:0

To reassemble your device, follow these instructions in reverse order.

dhydrt345473

crwdns2935283:009/25/17crwdne2935283:0

103 crwdns2915208:0crwdne2915208:0

crwdns2935295:0crwdne2935295:0

crwdns2915084:0crwdne2915084:0

University of North Texas, Team S3-G1, Thompson Fall 2017 crwdns2935289:0University of North Texas, Team S3-G1, Thompson Fall 2017crwdne2935289:0

UNT-THOMPSON-F17S3G1

crwdns2931471:03crwdne2931471:0

crwdns2935297:04crwdne2935297:0

crwdns2947412:00crwdne2947412:0

crwdns2917038:0crwdne2917038:0

crwdns2936625:0crwdne2936625:0:

crwdns2936751:024crwdne2936751:0 0

crwdns2936753:07crwdne2936753:0 1

crwdns2936753:030crwdne2936753:0 5

crwdns2942667:0crwdne2942667:0 232