crwdns2933423:0crwdne2933423:0

Crosley CR42 Power Cable Replacement

crwdns2942213:0crwdne2942213:0

  1. Crosley CR42 Power Cable Replacement, Power Cable: crwdns2935265:01crwdnd2935265:01crwdnd2935265:02crwdne2935265:0 Crosley CR42 Power Cable Replacement, Power Cable: crwdns2935265:01crwdnd2935265:02crwdnd2935265:02crwdne2935265:0
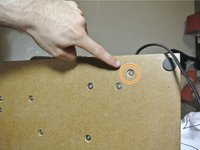
    • Turn the device around until you are looking at the line-out port.

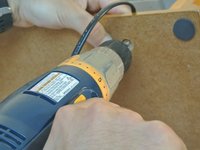
    • With a cordless drill or Phillips #0 screwdriver, remove the ten 12-mm screws.

  2. Crosley CR42 Power Cable Replacement: crwdns2935265:02crwdnd2935265:01crwdnd2935265:03crwdne2935265:0 Crosley CR42 Power Cable Replacement: crwdns2935265:02crwdnd2935265:02crwdnd2935265:03crwdne2935265:0 Crosley CR42 Power Cable Replacement: crwdns2935265:02crwdnd2935265:03crwdnd2935265:03crwdne2935265:0
    • Gently remove the back of the device. It should be connected by two wires.

  3. Crosley CR42 Power Cable Replacement: crwdns2935265:03crwdnd2935265:01crwdnd2935265:03crwdne2935265:0 Crosley CR42 Power Cable Replacement: crwdns2935265:03crwdnd2935265:02crwdnd2935265:03crwdne2935265:0 Crosley CR42 Power Cable Replacement: crwdns2935265:03crwdnd2935265:03crwdnd2935265:03crwdne2935265:0
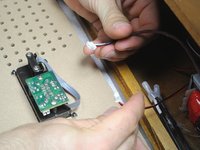
    • Gently remove both wires.

    • After de-threading the antenna wire, remove the back of the device and set it aside.

  4. Crosley CR42 Power Cable Replacement: crwdns2935265:04crwdnd2935265:01crwdnd2935265:03crwdne2935265:0 Crosley CR42 Power Cable Replacement: crwdns2935265:04crwdnd2935265:02crwdnd2935265:03crwdne2935265:0 Crosley CR42 Power Cable Replacement: crwdns2935265:04crwdnd2935265:03crwdnd2935265:03crwdne2935265:0
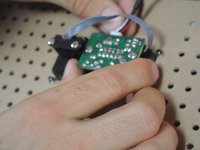
    • Locate where the power cable connects to the device.

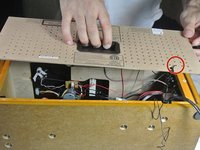
    • Pick up the device and locate the screw holding the small black peg to the device. Unscrew it and set the screw aside.

  5. Crosley CR42 Power Cable Replacement: crwdns2935265:05crwdnd2935265:01crwdnd2935265:03crwdne2935265:0 Crosley CR42 Power Cable Replacement: crwdns2935265:05crwdnd2935265:02crwdnd2935265:03crwdne2935265:0 Crosley CR42 Power Cable Replacement: crwdns2935265:05crwdnd2935265:03crwdnd2935265:03crwdne2935265:0
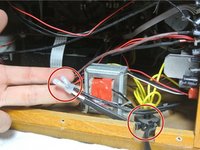
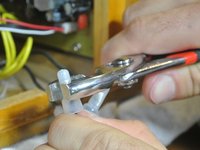
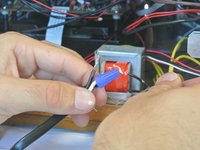
    • With the pliers, remove the wire connectors. You may need to be forceful

    • It is wise to attach a marking in order to recognize how the wires should be reattached.

  6. Crosley CR42 Power Cable Replacement: crwdns2935265:06crwdnd2935265:01crwdnd2935265:03crwdne2935265:0 Crosley CR42 Power Cable Replacement: crwdns2935265:06crwdnd2935265:02crwdnd2935265:03crwdne2935265:0 Crosley CR42 Power Cable Replacement: crwdns2935265:06crwdnd2935265:03crwdnd2935265:03crwdne2935265:0
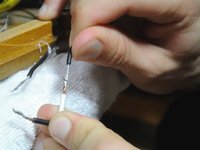
    • Pull apart both groups of wires.

    • After getting your replacement power cord, make sure you recognize how the wires should reattach.

  7. Crosley CR42 Power Cable Replacement: crwdns2935265:07crwdnd2935265:01crwdnd2935265:03crwdne2935265:0 Crosley CR42 Power Cable Replacement: crwdns2935265:07crwdnd2935265:02crwdnd2935265:03crwdne2935265:0 Crosley CR42 Power Cable Replacement: crwdns2935265:07crwdnd2935265:03crwdnd2935265:03crwdne2935265:0
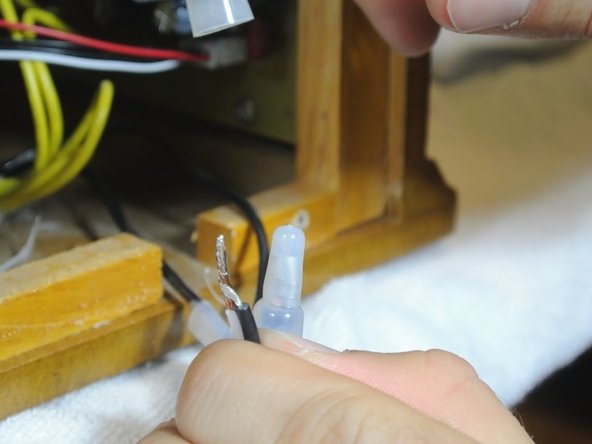
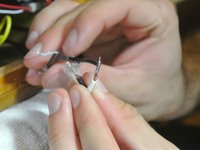
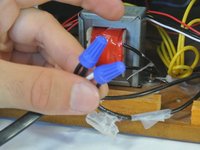
    • Twist the connecting wires together.

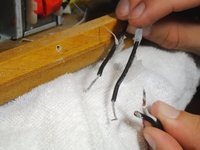
    • Attach the twist-on wire connectors to the exposed wires.

crwdns2915888:0crwdne2915888:0

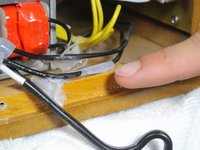
To reassemble your device, follow these instructions in reverse order.

crwdns2935227:0crwdne2935227:0

Eric Dybsetter

crwdns2935283:001/26/14crwdne2935283:0

175 crwdns2915208:0crwdne2915208:0

crwdns2935295:0crwdne2935295:0

crwdns2915084:0crwdne2915084:0

Cal Poly, Team 1-38, Maness Winter 2014 crwdns2935289:0Cal Poly, Team 1-38, Maness Winter 2014crwdne2935289:0

CPSU-MANESS-W14S1G38

crwdns2931471:04crwdne2931471:0

crwdns2935297:05crwdne2935297:0

crwdns2944067:00crwdne2944067:0

crwdns2917038:0crwdne2917038:0

crwdns2936625:0crwdne2936625:0:

crwdns2936751:024crwdne2936751:0 1

crwdns2936753:07crwdne2936753:0 15

crwdns2936753:030crwdne2936753:0 32

crwdns2942667:0crwdne2942667:0 6,319