crwdns2915892:0crwdne2915892:0
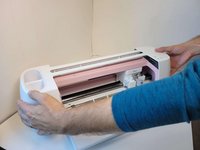
The Circut Maker it is powered by two motors. If your device isn't moving at all, and it's still receiving power, then the motors might need to be replaced. The motors are not identical, so be sure to identify which one is faulty before beginning.
Before beginning the repair, be sure to turn off the device and unplug it from the outlet.
crwdns2942213:0crwdne2942213:0
-
-
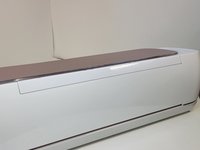
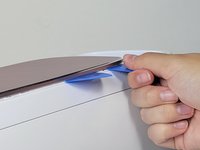
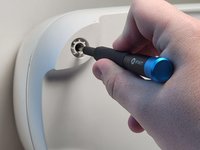
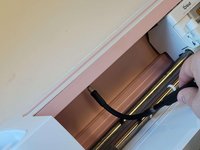
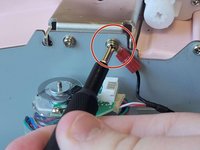
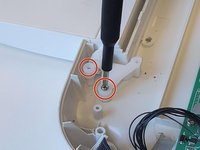
To remove the cover from the connecting joint, use an iFixit opening tool, and pry around the perimeter of the cover to release it.
-
Remove the cover from the connecting joint and set it aside.
-
-
-
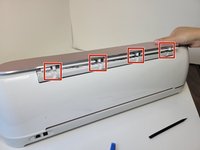
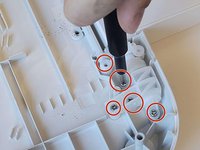
Remove the four, 10 mm Torx TR8 security screws holding the lid in place.
-
-
-
Turn the device around, so that the back is facing you.
-
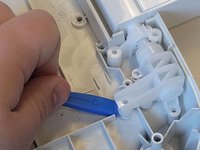
Wedge one or two iFixit opening picks in the seam connecting the Top Door to the device, and use the iFixit opening tool to pry upwards along the seam.
-
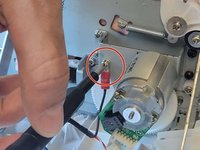
These actions should reveal the cylindrical connectors.
-
-
-
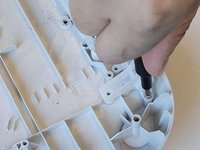
Press down on the lid.
-
Push the lid outwards to free it from the jointed clasps.
-
-
-
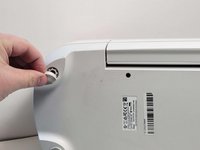
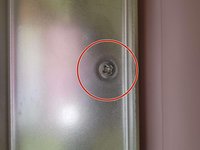
Using your hands or an opening tool, remove the four foot pads covering four screws.
-
Use a Phillips #1 screwdriver to remove four 41 mm screws from the feet.
-
-
-
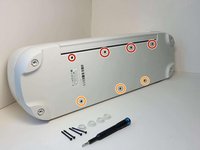
Remove the seven screws (Four 8.5 mm screws, and three 12.5 mm screws) on the bottom of the device, this will allow you to remove the cover later on.
-
Use a Phillips #1 screwdriver to remove the four 8.5 mm screws from the bottom of the device.
-
Use a Phillips #0 screwdriver to remove the three 12.5 mm screws.
-
-
-
Turn the device on its side.
-
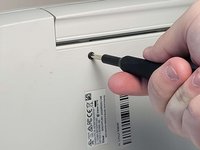
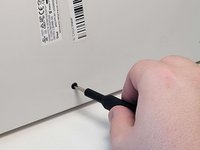
To remove the seven 10 mm screws from the underside of the top of the device, use a Phillips #1 screwdriver with the flex extension.
-
-
-
-
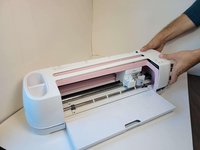
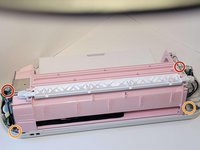
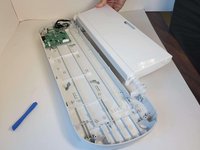
Lift the top case off of the base of the device.
-
-
-
Use a Phillips #1 screwdriver to remove four 10 mm screws on the side of the device next to the motors.
-
Use a Phillips #1 screwdriver to remove the two 22 mm screws.
-
-
-
Use a Phillips #1 screwdriver to remove two 10 mm screws. These are parallel to one another, one on either side of the machine.
-
Use a Phillips #1 screwdriver to remove two 8mm screws, these are also directly parallel to one another on either side of the machine.
-
-
-
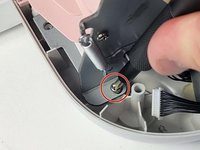
Unplug the bundled connector from the motor on both sides of the machine. To to avoid damage, coax the connector out of the socket gently using a spudger.
-
-
-
Using a Phillips #1 screwdriver, remove one 10 mm screw from both sides of the machine. This will release wires that are screwed into the sides of device.
-
-
-
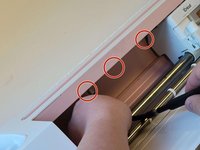
Remove a total of seven 10 mm screws from the underside of the door.
-
One side of the base has two 10mm screws.
-
The other side of the base has five 10 mm screws.
-
-
-
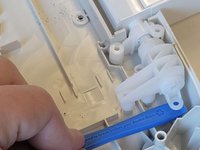
Pry the door from hinges using an iFixit opening tool.
-
Lift upwards and towards you, to remove the door from the hinges.
-
-
-
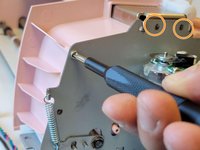
Use a Phillips #1 screwdriver to remove the four 5 mm screws that attach the motor on the left side of the machine.
-
-
-
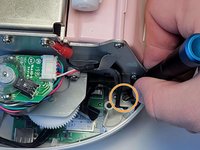
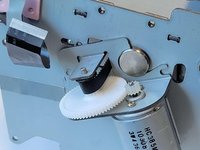
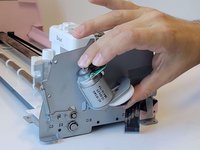
Remove the motor by pulling it from the device.
-
-
-
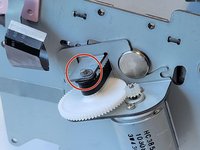
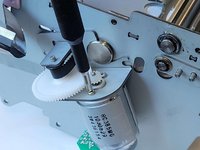
Under the motor there is a white plastic gear. To remove it, gently pull it off the axle.
-
-
-
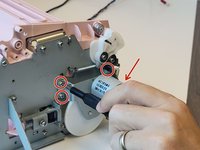
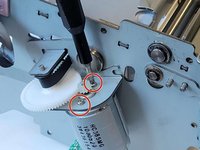
Remove the washer from the top screw above the motor.
-
-
-
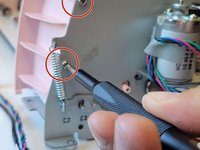
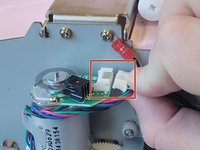
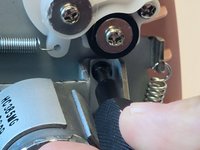
Remove the two 5 mm screws from the remaining motor on the opposite side, using a Phillips #2 screwdriver.
-
-
-
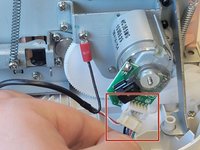
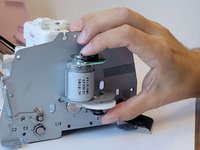
Twist and remove the motor from the machine.
-


To reassemble your device, follow these instructions in reverse order.
crwdns2935221:0crwdne2935221:0
crwdns2935229:02crwdne2935229:0

crwdns2935287:0crwdne2935287:0

Austin Community College, Team 9-1, Watkins Fall 2022 crwdns2935289:0Austin Community College, Team 9-1, Watkins Fall 2022crwdne2935289:0
AUSTINCC-WATKINS-F22S9G1
crwdns2931471:03crwdne2931471:0
crwdns2935297:027crwdne2935297:0
crwdns2947412:03crwdne2947412:0
Bonjour,
Merci pour vos précisions c’est parfait comme tuto mais quels sont les signaux de la cricut nous alarmant que c’est une panne de moteur ? Car ma machine en l’occurrence fait un drôle de bruit au démarrage mais je ne sais pas d’où vient la panne ni le centre d’assistance de cricut d’ailleurs à part me conseiller d’en acheter une autre. Pouvez-vous peut-être me conseiller ?
Merci d’avance
Fanny
Convenient that the tools list doesn't have the flex extension. Great directions dick face.
Bonjour pouvez vous me dire où se procurer ces moteurs ?
Cordialement
Mr Lopez