crwdns2933423:0crwdne2933423:0

Cricut Maker 3 Top Cover Replacement

crwdns2942213:0crwdne2942213:0

  1. Cricut Maker 3 Top Cover Replacement, Prepare your Cricut for disassembly: crwdns2935265:01crwdnd2935265:01crwdnd2935265:03crwdne2935265:0 Cricut Maker 3 Top Cover Replacement, Prepare your Cricut for disassembly: crwdns2935265:01crwdnd2935265:02crwdnd2935265:03crwdne2935265:0 Cricut Maker 3 Top Cover Replacement, Prepare your Cricut for disassembly: crwdns2935265:01crwdnd2935265:03crwdnd2935265:03crwdne2935265:0
    • Be very careful not to cut yourself when working near the Cricut's small, sharp blade, located in the tool holder within the Cricut.

    • Power off the Cricut and unplug all cables.

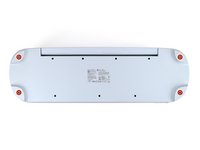
  2. Cricut Maker 3 Top Cover Replacement, Remove the rubber feet: crwdns2935265:02crwdnd2935265:01crwdnd2935265:03crwdne2935265:0 Cricut Maker 3 Top Cover Replacement, Remove the rubber feet: crwdns2935265:02crwdnd2935265:02crwdnd2935265:03crwdne2935265:0 Cricut Maker 3 Top Cover Replacement, Remove the rubber feet: crwdns2935265:02crwdnd2935265:03crwdnd2935265:03crwdne2935265:0
    • Flip the Cricut over so the bottom is facing up.

    • Use your finger to pry up and remove all four rubber feet from the bottom of the Cricut.

  3. Cricut Maker 3 Top Cover Replacement, Remove the screws from the base: crwdns2935265:03crwdnd2935265:01crwdnd2935265:02crwdne2935265:0 Cricut Maker 3 Top Cover Replacement, Remove the screws from the base: crwdns2935265:03crwdnd2935265:02crwdnd2935265:02crwdne2935265:0
    crwdns2935267:0crwdne2935267:0
    FixMat
    $36.95
    • Use a Phillips screwdriver to remove the four 41 mm‑long screws securing the top cover to the base. There's one screw under each foot.

    • Throughout this repair, keep track of each screw and make sure it goes back exactly where it came from.

  4. Cricut Maker 3 Top Cover Replacement, Open the Cricut: crwdns2935265:04crwdnd2935265:01crwdnd2935265:02crwdne2935265:0 Cricut Maker 3 Top Cover Replacement, Open the Cricut: crwdns2935265:04crwdnd2935265:02crwdnd2935265:02crwdne2935265:0
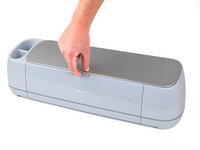
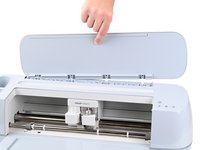
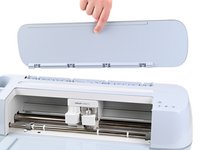
    • Flip the Cricut over so the silver lid is facing up.

    • You may replace the rubber feet before flipping your Cricut to avoid damaging the Cricut or your work surface.

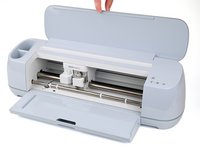
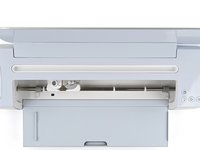
    • Open the Cricut by lifting the top silver lid. The front tray will also open.

  5. Cricut Maker 3 Top Cover Replacement, Remove the screws from the metal track: crwdns2935265:05crwdnd2935265:01crwdnd2935265:03crwdne2935265:0 Cricut Maker 3 Top Cover Replacement, Remove the screws from the metal track: crwdns2935265:05crwdnd2935265:02crwdnd2935265:03crwdne2935265:0 Cricut Maker 3 Top Cover Replacement, Remove the screws from the metal track: crwdns2935265:05crwdnd2935265:03crwdnd2935265:03crwdne2935265:0
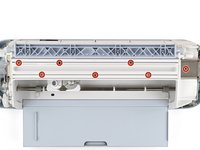
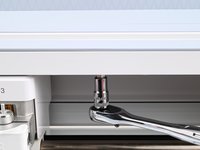
    • Inside the Cricut are seven screws securing the top cover to the metal track that guides the tool holder. You can reach these screws by putting a screwdriver bit in a ratcheting socket wrench. If you're using iFixit bits, the smaller bits work with a 4‑mm socket and the larger bits work with a 1/4‑inch socket.

    • Remove the seven 9.8 mm‑long Phillips screws securing the top cover to the metal track.

  6. Cricut Maker 3 Top Cover Replacement, Remove the lid hinge cover: crwdns2935265:06crwdnd2935265:01crwdnd2935265:02crwdne2935265:0 Cricut Maker 3 Top Cover Replacement, Remove the lid hinge cover: crwdns2935265:06crwdnd2935265:02crwdnd2935265:02crwdne2935265:0
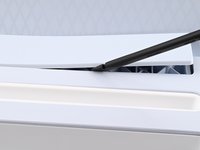
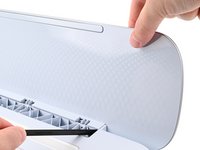
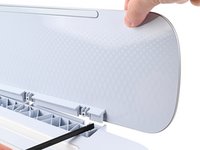
    • The lid hinge cover is located at the base of the silver lid and is held in place by five pegs which are lightly glued in place.

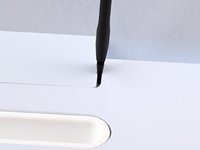
    • Insert the flat end of a spudger between the right side of the lid hinge cover and the top cover.

    • If there's not enough space to insert a spudger, push the silver lid to the left.

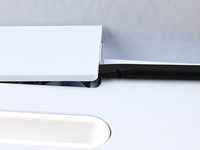
    • Use the spudger to pry up the cover.

    • Firmly pry near the pegs to avoid cracking the cover.

  7. Cricut Maker 3 Top Cover Replacement: crwdns2935265:07crwdnd2935265:01crwdnd2935265:03crwdne2935265:0 Cricut Maker 3 Top Cover Replacement: crwdns2935265:07crwdnd2935265:02crwdnd2935265:03crwdne2935265:0 Cricut Maker 3 Top Cover Replacement: crwdns2935265:07crwdnd2935265:03crwdnd2935265:03crwdne2935265:0
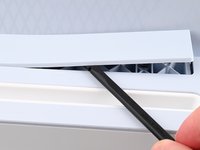
    • Use the flat end of a spudger to pry up along the long edge of the lid hinge cover until the cover is free.

  8. Cricut Maker 3 Top Cover Replacement: crwdns2935265:08crwdnd2935265:01crwdnd2935265:02crwdne2935265:0 Cricut Maker 3 Top Cover Replacement: crwdns2935265:08crwdnd2935265:02crwdnd2935265:02crwdne2935265:0
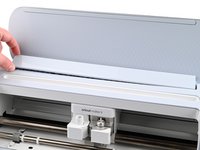
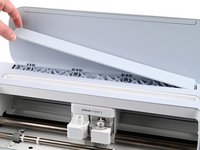
    • Lift and remove the lid hinge cover.

  9. Cricut Maker 3 Top Cover Replacement, Remove the lid screws: crwdns2935265:09crwdnd2935265:01crwdnd2935265:01crwdne2935265:0
    • Use a Torx T8 screwdriver to remove the four 10.2 mm‑long screws securing the lid to the hinge.

  10. Cricut Maker 3 Top Cover Replacement, Remove the lid: crwdns2935265:010crwdnd2935265:01crwdnd2935265:02crwdne2935265:0 Cricut Maker 3 Top Cover Replacement, Remove the lid: crwdns2935265:010crwdnd2935265:02crwdnd2935265:02crwdne2935265:0
    • Use the flat end of spudger to pry the lid out of the hinge while lifting the lid.

  11. Cricut Maker 3 Top Cover Replacement: crwdns2935265:011crwdnd2935265:01crwdnd2935265:02crwdne2935265:0 Cricut Maker 3 Top Cover Replacement: crwdns2935265:011crwdnd2935265:02crwdnd2935265:02crwdne2935265:0
    • Lift and remove the lid

  12. Cricut Maker 3 Top Cover Replacement, Lift the top cover: crwdns2935265:012crwdnd2935265:01crwdnd2935265:02crwdne2935265:0 Cricut Maker 3 Top Cover Replacement, Lift the top cover: crwdns2935265:012crwdnd2935265:02crwdnd2935265:02crwdne2935265:0
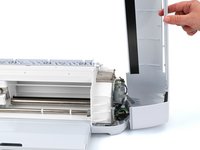
    • There's still a cable connected to the inside of the top cover. Don't attempt to fully remove the top cover yet.

    • Lift the top cover up from the Cricut just until it comes free of the base.

  13. Cricut Maker 3 Top Cover Replacement: crwdns2935265:013crwdnd2935265:01crwdnd2935265:03crwdne2935265:0 Cricut Maker 3 Top Cover Replacement: crwdns2935265:013crwdnd2935265:02crwdnd2935265:03crwdne2935265:0 Cricut Maker 3 Top Cover Replacement: crwdns2935265:013crwdnd2935265:03crwdnd2935265:03crwdne2935265:0
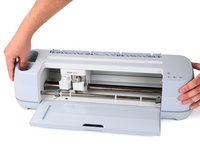
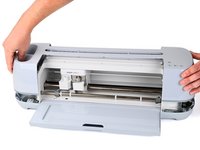
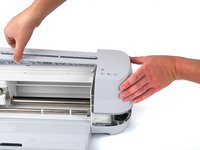
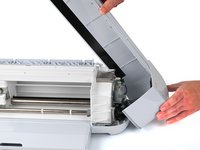
    • Rotate the top cover to the right and prop it up so the right side of the cover is resting on your work surface.

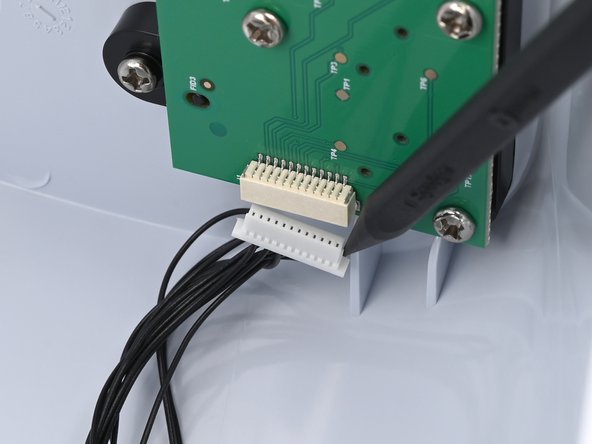
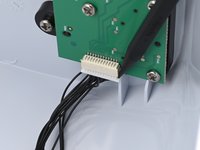
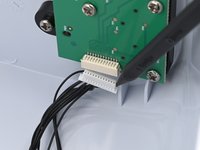
  14. Cricut Maker 3 Top Cover Replacement, Disconnect the button board: crwdns2935265:014crwdnd2935265:01crwdnd2935265:02crwdne2935265:0 Cricut Maker 3 Top Cover Replacement, Disconnect the button board: crwdns2935265:014crwdnd2935265:02crwdnd2935265:02crwdne2935265:0
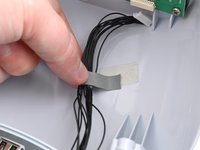
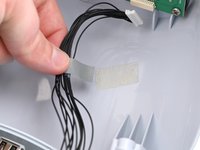
  15. Cricut Maker 3 Top Cover Replacement: crwdns2935265:015crwdnd2935265:01crwdnd2935265:02crwdne2935265:0 Cricut Maker 3 Top Cover Replacement: crwdns2935265:015crwdnd2935265:02crwdnd2935265:02crwdne2935265:0
    • Peel up the tape securing the button wires to the inside of the top cover.

    • During reassembly, if this tape isn't sticking well, replace it with a piece of electrical tape to make sure these wires don't get caught in the gears.

  16. Cricut Maker 3 Top Cover Replacement, Remove the top cover: crwdns2935265:016crwdnd2935265:01crwdnd2935265:01crwdne2935265:0
    • Lift and remove the top cover.

crwdns2915888:0crwdne2915888:0

To reassemble your device, follow these instructions in reverse order.

Repair didn’t go as planned? Try some basic troubleshooting, or ask our Answers community for help.

crwdns2935227:0crwdne2935227:0

Spencer Pennington

crwdns2935283:009/09/23crwdne2935283:0

18,924 crwdns2915208:0crwdne2915208:0

crwdns2935297:0114crwdne2935297:0
crwdns2915084:0crwdne2915084:0

iFixit crwdns2935289:0iFixitcrwdne2935289:0

Staff

crwdns2931471:0121crwdne2931471:0

crwdns2935297:020,355crwdne2935297:0

crwdns2947412:00crwdne2947412:0

crwdns2917038:0crwdne2917038:0

crwdns2936625:0crwdne2936625:0:

crwdns2936751:024crwdne2936751:0 2

crwdns2936753:07crwdne2936753:0 14

crwdns2936753:030crwdne2936753:0 51

crwdns2942667:0crwdne2942667:0 379