crwdns2915892:0crwdne2915892:0
If you need to replace the motherboard, use this guide to access and remove it. If the Cricut's cutter or any other part begins to malfunction, the motherboard may be the cause. Use the Front Door Replacement Guide as a prerequisite to access the internal parts of the Cricut.
For this repair, you will need Phillips #1 and #2 screwdrivers and a prying tool, ideally plastic in order to not damage the machine. No steps are particularly difficult, but the handling of the motherboard and surrounding parts require delicate care.
crwdns2942213:0crwdne2942213:0
-
-
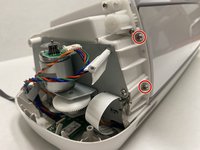
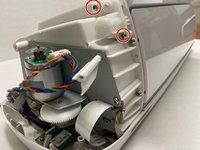
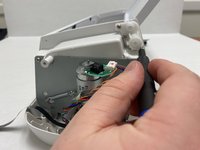
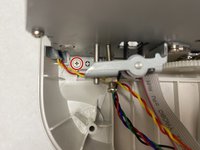
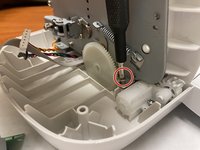
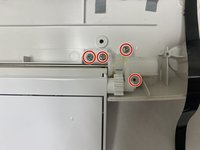
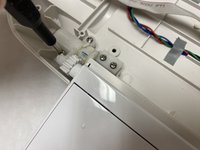
On both the left and right sides of the Cricut, locate the two internal screws.
-
Use a Phillips #1 screwdriver bit to unscrew the top 10.8 mm screw and the lower 9.1 mm screw on each side, four screws in total.
-
-
-
Rotate the Cricut so the bottom faces upwards.
-
-
-
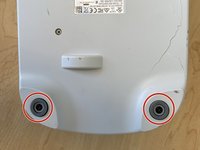
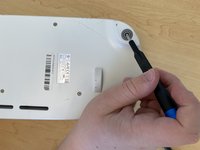
Locate the four screws, two on the left and two on the right, with pads attached.
-
Using a Phillips #2 screwdriver, remove all four of the screws and their pads.
-
-
-
Rotate the Cricut back to an upright position.
-
-
-
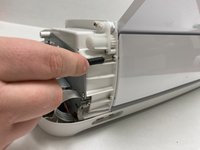
Gently lift the left and right sides of the Cricut's plastic shell off.
-
-
-
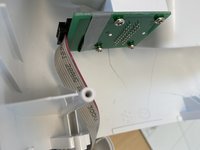
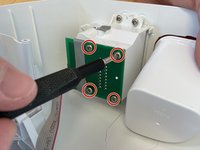
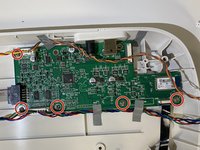
On the right side of the Cricut, locate the circuit board screwed in to the cover just removed.
-
Locate the four screws securing the circuit board to the shell.
-
Use a Phillips #1 screwdriver to unscrew each of the four 10 mm screws.
-
-
-
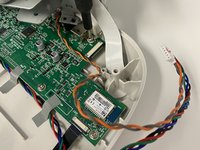
Gently unplug the connector from the circuit board, freeing the right side of the plastic shell completely.
-
-
-
-
On both the left and right sides of the back plastic panel.
-
Using a Phillips #2 screwdriver, unscrew each of the four 5mm screws.
-
-
-
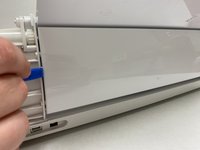
Wedge a plastic pryer tool next to the left side of the back panel.
-
Gently pry the left side of the back door from the rest of the machine.
-
Repeat with the right side of the back door to completely remove the back panel.
-
-
-
On both the left and right sides, locate the screws securing the top door's hinge.
-
Use a Phillips #1 screwdriver to remove the two 6.5 mm screws on each side, four in total.
-
-
-
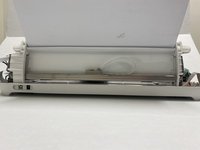
Gently lift the lid off of the Cricut.
-
-
-
Locate the screws on the corners of the metal interior plate on both the left and right sides.
-
Unscrew the two the 8 mm screws on each side, four in total.
-
-
-
Gently lean the metal interior and all that comes with it backwards, exposing the bottom plastic shell of the Cricut.
-
-
-
Locate the screws securing the front door hinge to the bottom plate of the Cricut.
-
Unscrew each of the four 5 mm screws on each side, 8 in total.
-
-
-
Gently remove the front door from the bottom plate of the Cricut.
-
-
-
Locate the plug above the motor on the left side of the Cricut.
-
Gently unplug the two wires from the plug.
-
-
-
Locate the large green board attached to the plastic base plate of the Cricut.
-
-
-
Identify the five screws securing the motherboard to the plastic base plate.
-
Using a Phillips #1 screwdriver, remove each of these 10.3 mm screws, five in total.
-
-
-
Insert your hand underneath the motherboard and gently push upwards, unadhering the tape from the base plate and freeing the motherboard from the plastic base plate.
-
To reassemble your device, follow these instructions in reverse order.
To reassemble your device, follow these instructions in reverse order.
crwdns2947412:04crwdne2947412:0
where can we purchase the mother board uk
Where we can purchase the mother board in Sydney Australian
the guide is missing a few steps:
-between step 4 and 5: Remove the silver cover of the cutter (two screws in total), Remove the internal horizontal cover panel by lifting it upwards, remove the screws behind the panel (two screws in total).
-between step 12 and 13: Remove all screws on the bottom (7 in total)
over all very resourceful guide huge thank you to Hannah for giving us this good guide <3
where can i purchase the motherboard canada


