crwdns2933423:0crwdne2933423:0
crwdns2947577:0crwdnd2947577:0crwdne2947577:0

Creative Ziio 7" Battery Replacement

crwdns2942213:0crwdne2942213:0

  1. Creative Ziio 7" Battery Replacement, Back Panel: crwdns2935265:01crwdnd2935265:01crwdnd2935265:03crwdne2935265:0 Creative Ziio 7" Battery Replacement, Back Panel: crwdns2935265:01crwdnd2935265:02crwdnd2935265:03crwdne2935265:0 Creative Ziio 7" Battery Replacement, Back Panel: crwdns2935265:01crwdnd2935265:03crwdnd2935265:03crwdne2935265:0
    • Remove the back panel by using the plastic opening tool to carefully pry around the panel's edges.

    • The volume control button and the top power button may fall out during this step.

    crwdns2952109:0crwdne2952109:0

    crwdns2917038:0crwdne2917038:0

  2. Creative Ziio 7" Battery Replacement, Battery: crwdns2935265:02crwdnd2935265:01crwdnd2935265:03crwdne2935265:0 Creative Ziio 7" Battery Replacement, Battery: crwdns2935265:02crwdnd2935265:02crwdnd2935265:03crwdne2935265:0 Creative Ziio 7" Battery Replacement, Battery: crwdns2935265:02crwdnd2935265:03crwdnd2935265:03crwdne2935265:0
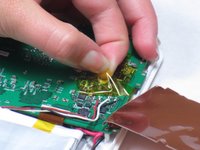
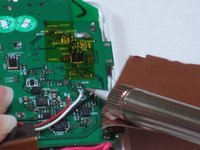
    • Remove the copper plate covering the motherboard by desoldering the ten solder points so that the copper plate is free.

    • The last point is hidden by the soldering iron.

    • Remove the copper plate once all the solder points are undone.

    crwdns2952109:0crwdne2952109:0

    crwdns2917038:0crwdne2917038:0

  3. Creative Ziio 7" Battery Replacement: crwdns2935265:03crwdnd2935265:01crwdnd2935265:02crwdne2935265:0 Creative Ziio 7" Battery Replacement: crwdns2935265:03crwdnd2935265:02crwdnd2935265:02crwdne2935265:0
    • Remove adhesive tape covering the three wires connected to the motherboard.

    • Desolder the solder points connecting the wires to the mother board.

    crwdns2952109:0crwdne2952109:0

    crwdns2917038:0crwdne2917038:0

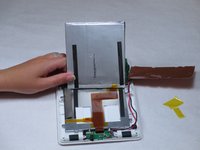
  4. Creative Ziio 7" Battery Replacement: crwdns2935265:04crwdnd2935265:01crwdnd2935265:02crwdne2935265:0 Creative Ziio 7" Battery Replacement: crwdns2935265:04crwdnd2935265:02crwdnd2935265:02crwdne2935265:0
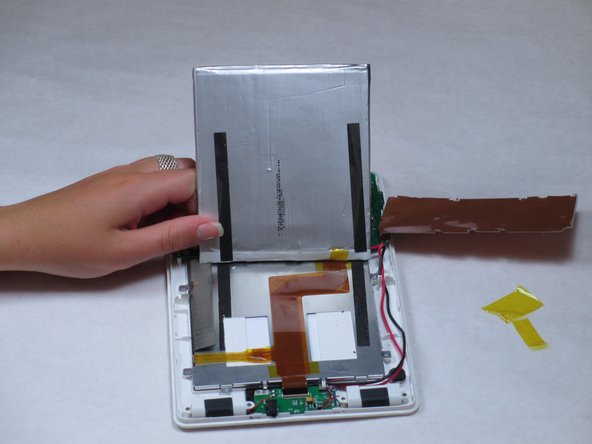
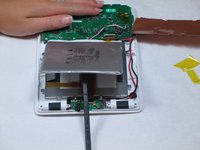
    • With a spudger, pry the battery from the back of the LCD screen.

    • The battery is attached with double sided foam tape. When prying, the tape will probably not come apart easy. This will result in the tape tearing and leaving residue.

    crwdns2952109:0crwdne2952109:0

    crwdns2917038:0crwdne2917038:0

  5. Creative Ziio 7" Battery Replacement: crwdns2935265:05crwdnd2935265:01crwdnd2935265:01crwdne2935265:0
    • Remove old battery and dispose of it responsibly.

    crwdns2952109:0crwdne2952109:0

    crwdns2917038:0crwdne2917038:0

crwdns2915888:0crwdne2915888:0

To reassemble your device, follow these instructions in reverse order.

crwdns2935221:0crwdne2935221:0

crwdns2935227:0crwdne2935227:0

Bryce Simmons

crwdns2935283:004/16/13crwdne2935283:0

150 crwdns2915208:0crwdne2915208:0

crwdns2935297:02crwdne2935297:0

crwdns2935287:0crwdne2935287:0

Cal Poly, Team 14-10, Maness Spring 2013 crwdns2935289:0Cal Poly, Team 14-10, Maness Spring 2013crwdne2935289:0

CPSU-MANESS-S13S14G10

crwdns2931471:04crwdne2931471:0

crwdns2935297:015crwdne2935297:0

crwdns2947412:00crwdne2947412:0

crwdns2917038:0crwdne2917038:0

crwdns2936625:0crwdne2936625:0:

crwdns2936751:024crwdne2936751:0 0

crwdns2936753:07crwdne2936753:0 4

crwdns2936753:030crwdne2936753:0 25

crwdns2942667:0crwdne2942667:0 1,275