crwdns2933423:0crwdne2933423:0
crwdns2947577:0crwdnd2947577:0crwdne2947577:0

Creative Zen X-Fi LCD Screen Replacement

crwdns2869540:0crwdne2869540:0: 2.3 k

crwdns2959988:0crwdne2959988:0

crwdns2959990:0crwdne2959990:0
1
crwdns2959992:0crwdne2959992:0
9
crwdns2959994:0crwdne2959994:0
81
crwdns2959996:0crwdne2959996:0
2,265
crwdns2955950:0crwdne2955950:0: 0

crwdns2959998:0crwdne2959998:0

crwdns2960000:0crwdne2960000:0
crwdns2959984:0crwdne2959984:0: 3

crwdns2959974:03crwdne2959974:0

crwdns2959986:0crwdne2959986:0: 1

crwdns2959980:01crwdne2959980:0

crwdns2955944:0crwdne2955944:0: crwdns2931287:05crwdne2931287:0
crwdns2955970:0crwdne2955970:0: crwdns2937801:0crwdne2937801:0
crwdns2862611:0crwdne2862611:0

crwdns2862612:0crwdne2862612:0

Creative Zen X-Fi LCD Screen Replacement

crwdns2915892:0crwdne2915892:0

crwdns2959928:0crwdne2959928:0 ↓

The LCD screen is an output component that displays information to the user.

crwdns2959930:0crwdne2959930:0

crwdns2943215:0crwdne2943215:0

    1. Creative Zen X-Fi LCD Screen Replacement, Detaching Front Case: crwdns2935265:01crwdnd2935265:01crwdnd2935265:03crwdne2935265:0 Creative Zen X-Fi LCD Screen Replacement, Detaching Front Case: crwdns2935265:01crwdnd2935265:02crwdnd2935265:03crwdne2935265:0 Creative Zen X-Fi LCD Screen Replacement, Detaching Front Case: crwdns2935265:01crwdnd2935265:03crwdnd2935265:03crwdne2935265:0
      • Using a spudger, wedge the tip between the front and back case to pry them apart.

      • Be careful to not apply excessive force since there are six fasteners on the screen's side that holds the cases firmly together.

      crwdns2952109:0crwdne2952109:0

      crwdns2917038:0crwdne2917038:0

    1. Creative Zen X-Fi LCD Screen Replacement, Rubber Button Cover: crwdns2935265:02crwdnd2935265:01crwdnd2935265:01crwdne2935265:0
      • The black rubber button pad can be removed by simply picking it up.

      crwdns2952109:0crwdne2952109:0

      crwdns2917038:0crwdne2917038:0

    1. Creative Zen X-Fi LCD Screen Replacement, Button Input Chip Part 1: crwdns2935265:03crwdnd2935265:01crwdnd2935265:01crwdne2935265:0
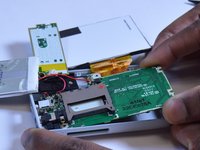
      • Flip the LCD screen off the midsection plate to gain access to the space around the input button chip.

      crwdns2952109:0crwdne2952109:0

      crwdns2917038:0crwdne2917038:0

    2. Creative Zen X-Fi LCD Screen Replacement, Button Input Chip: crwdns2935265:04crwdnd2935265:01crwdnd2935265:01crwdne2935265:0
      • Using a spudger, pry off the button input chip from the mid-section of the device. To gain best leverage, start at the bottom right corner and level your way up the side of the chip.

      • Be aware that the button input chip is glued to the mid-section, so some extra force may be required.

      crwdns2952109:0crwdne2952109:0

      crwdns2917038:0crwdne2917038:0

    1. Creative Zen X-Fi LCD Screen Replacement, Access Midsection Plate: crwdns2935265:05crwdnd2935265:01crwdnd2935265:01crwdne2935265:0
      • Lift open the LCD screen and button input chip to access the entire midsection plate.

      crwdns2952109:0crwdne2952109:0

      crwdns2917038:0crwdne2917038:0

    2. Creative Zen X-Fi LCD Screen Replacement, Unscrew below Button Chip: crwdns2935265:06crwdnd2935265:01crwdnd2935265:01crwdne2935265:0
      • Use a Phillips Head screwdriver to unscrew the three 3/16 inch screws that were underneath the button input chip.

      crwdns2952109:0crwdne2952109:0

      crwdns2917038:0crwdne2917038:0

    3. Creative Zen X-Fi LCD Screen Replacement, Unscrew below LCD Screen: crwdns2935265:07crwdnd2935265:01crwdnd2935265:01crwdne2935265:0
      • Use a Phillips Head screwdriver to unscrew the three 3/16 inch screws that were underneath the LCD screen.

      crwdns2952109:0crwdne2952109:0

      crwdns2917038:0crwdne2917038:0

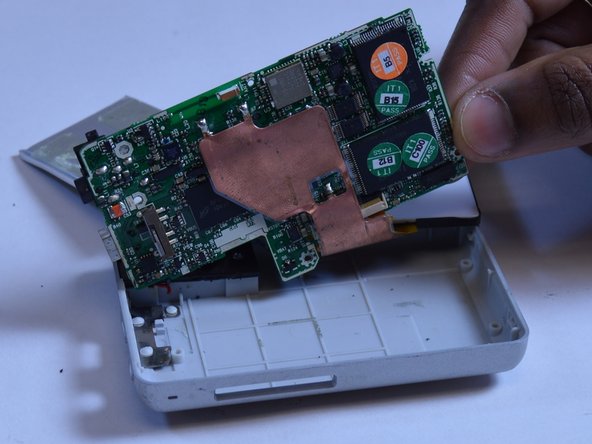
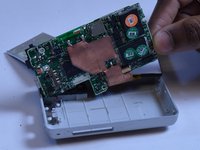
    1. Creative Zen X-Fi LCD Screen Replacement, Pull the Motherboard Out: crwdns2935265:08crwdnd2935265:01crwdnd2935265:02crwdne2935265:0 Creative Zen X-Fi LCD Screen Replacement, Pull the Motherboard Out: crwdns2935265:08crwdnd2935265:02crwdnd2935265:02crwdne2935265:0
      • Lift the right edge of the motherboard off the back case.

      • Using two fingers to grip the edge of the board, slide the motherboard out of the case to the right.

      crwdns2952109:0crwdne2952109:0

      crwdns2917038:0crwdne2917038:0

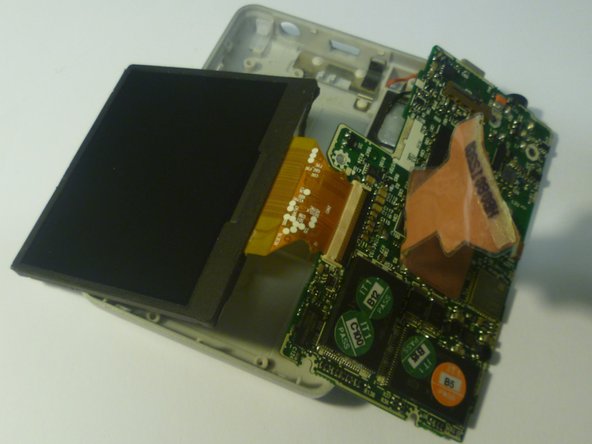
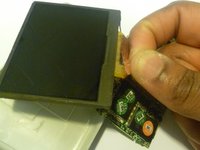
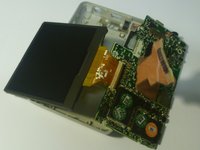
    1. Creative Zen X-Fi LCD Screen Replacement, Disconnect the LCD Screen: crwdns2935265:09crwdnd2935265:01crwdnd2935265:02crwdne2935265:0 Creative Zen X-Fi LCD Screen Replacement, Disconnect the LCD Screen: crwdns2935265:09crwdnd2935265:02crwdnd2935265:02crwdne2935265:0
      • Use two fingers to peel back the edge of the ribbon connector that is glued to the bottom of the LCD screen.

      crwdns2952109:0crwdne2952109:0

      crwdns2917038:0crwdne2917038:0

    2. Creative Zen X-Fi LCD Screen Replacement, Unlatch the LCD Screen: crwdns2935265:010crwdnd2935265:01crwdnd2935265:01crwdne2935265:0
      • Using a plastic opening tool, unlock the ribbon connector by unlatching the black lever that pins it on the motherboard.

      • Once the black lever arm is open, pull the ribbon connector out to disconnect the LCD screen.

      crwdns2952109:0crwdne2952109:0

      crwdns2917038:0crwdne2917038:0

crwdns2915888:0crwdne2915888:0

To reassemble your device, follow these instructions in reverse order.

crwdns2935221:0crwdne2935221:0

crwdns2935229:03crwdne2935229:0

Westley Courchene

crwdns2935283:001/13/15crwdne2935283:0

3,410 crwdns2915208:0crwdne2915208:0

crwdns2935297:014crwdne2935297:0

crwdns2947412:00crwdne2947412:0

crwdns2917038:0crwdne2917038:0

crwdns2936625:0crwdne2936625:0:

crwdns2936751:024crwdne2936751:0 1

crwdns2936753:07crwdne2936753:0 9

crwdns2936753:030crwdne2936753:0 81

crwdns2959996:0crwdne2959996:0 2,265