crwdns2933423:0crwdne2933423:0

Cosori Pro II Motherboard Replacement

crwdns2942213:0crwdne2942213:0

  1. Cosori Pro II Motherboard Replacement, Shell: crwdns2935265:01crwdnd2935265:01crwdnd2935265:01crwdne2935265:0
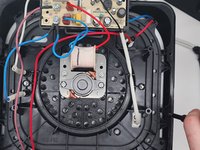
    • Flip the device upside down and remove all of the Phillips #1 screws.

  2. Cosori Pro II Motherboard Replacement: crwdns2935265:02crwdnd2935265:01crwdnd2935265:02crwdne2935265:0 Cosori Pro II Motherboard Replacement: crwdns2935265:02crwdnd2935265:02crwdnd2935265:02crwdne2935265:0
    • Use an opening tool to push on the retaining hooks to disengage them while prying slightly.
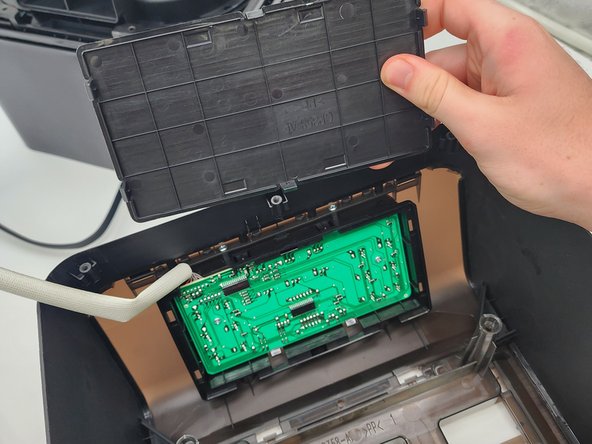
    • Remove the panel.

  3. Cosori Pro II Motherboard Replacement: crwdns2935265:03crwdnd2935265:01crwdnd2935265:01crwdne2935265:0
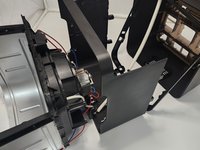
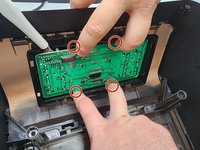
    • Use a Phillips #1 screwdriver to remove all four screws.

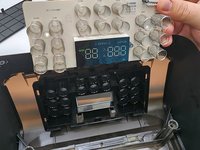
    • Lift off the bracket.

    • When lifting this off be careful to not unplug the screen.

  4. Cosori Pro II Motherboard Replacement: crwdns2935265:04crwdnd2935265:01crwdnd2935265:02crwdne2935265:0 Cosori Pro II Motherboard Replacement: crwdns2935265:04crwdnd2935265:02crwdnd2935265:02crwdne2935265:0
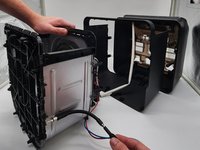
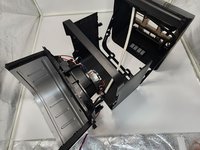
    • Use a Phillips #0 screwdriver to remove all the screws connecting to the shell.

    • Dissemble the shell going up to separate the basket holder.

  5. Cosori Pro II Motherboard Replacement: crwdns2935265:05crwdnd2935265:01crwdnd2935265:02crwdne2935265:0 Cosori Pro II Motherboard Replacement: crwdns2935265:05crwdnd2935265:02crwdnd2935265:02crwdne2935265:0
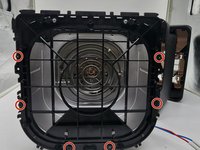
    • Use a Phillips #0 screwdriver and the 150 mm Flex Extension to unscrew the bottom plastic connecting to the basket holder.

    • Be careful to not apply too much force to the metal as it can cause it to warp it, and so it is easy rescrew the plastic piece in place.

  6. Cosori Pro II Motherboard Replacement: crwdns2935265:06crwdnd2935265:01crwdnd2935265:02crwdne2935265:0 Cosori Pro II Motherboard Replacement: crwdns2935265:06crwdnd2935265:02crwdnd2935265:02crwdne2935265:0
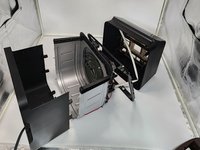
    • Pull the bottom shell down pulling at the sides to get them over screw holes.

  7. Cosori Pro II Motherboard Replacement, Motherboard: crwdns2935265:07crwdnd2935265:01crwdnd2935265:02crwdne2935265:0 Cosori Pro II Motherboard Replacement, Motherboard: crwdns2935265:07crwdnd2935265:02crwdnd2935265:02crwdne2935265:0
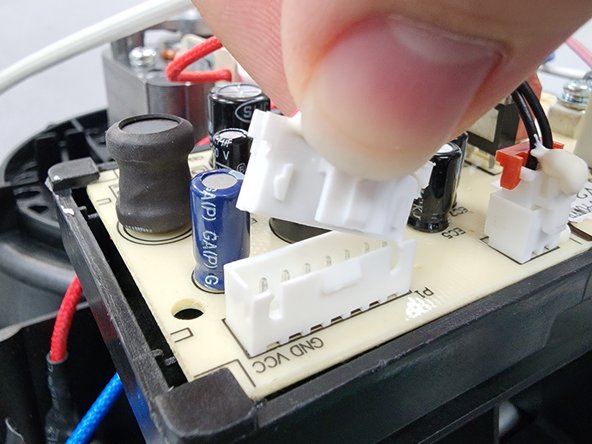
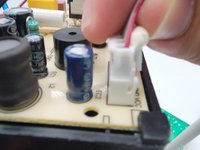
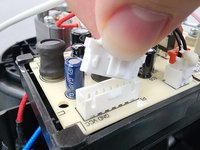
    • Depress the white clip and disconnect the screen connector.

  8. Cosori Pro II Motherboard Replacement: crwdns2935265:08crwdnd2935265:01crwdnd2935265:02crwdne2935265:0 Cosori Pro II Motherboard Replacement: crwdns2935265:08crwdnd2935265:02crwdnd2935265:02crwdne2935265:0
    • Remove the plastic panel.

  9. Cosori Pro II Motherboard Replacement: crwdns2935265:09crwdnd2935265:01crwdnd2935265:01crwdne2935265:0
    • Remove the two screws with a Phillips #1 screwdriver.

  10. Cosori Pro II Motherboard Replacement: crwdns2935265:010crwdnd2935265:01crwdnd2935265:03crwdne2935265:0 Cosori Pro II Motherboard Replacement: crwdns2935265:010crwdnd2935265:02crwdnd2935265:03crwdne2935265:0 Cosori Pro II Motherboard Replacement: crwdns2935265:010crwdnd2935265:03crwdnd2935265:03crwdne2935265:0
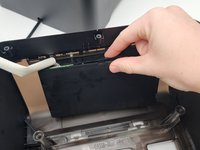
    • Apply force simultaneously to the four hooks to release the mother board.

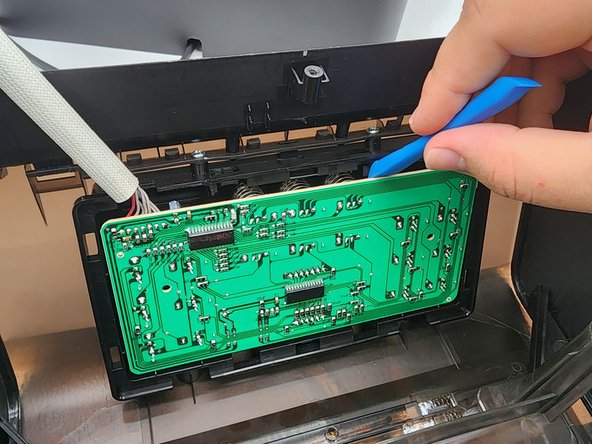
    • Using a prying tool pull out the springs on the mother board from their sockets.

    • Remove the motherboard.

crwdns2915888:0crwdne2915888:0

To reassemble your device, follow these instructions in reverse order.

Andrew Levonius

crwdns2935283:008/28/24crwdne2935283:0

121 crwdns2915208:0crwdne2915208:0

crwdns2935295:0crwdne2935295:0

crwdns2915084:0crwdne2915084:0

University of North Texas, Team 7-1, Kilpatrick Fall 2024 crwdns2935289:0University of North Texas, Team 7-1, Kilpatrick Fall 2024crwdne2935289:0

UNT-KILPATRICK-F24S7G1

crwdns2931471:03crwdne2931471:0

crwdns2935297:05crwdne2935297:0

crwdns2947412:00crwdne2947412:0

crwdns2917038:0crwdne2917038:0

crwdns2936625:0crwdne2936625:0:

crwdns2936751:024crwdne2936751:0 1

crwdns2936753:07crwdne2936753:0 9

crwdns2936753:030crwdne2936753:0 29

crwdns2942667:0crwdne2942667:0 127