crwdns2933423:0crwdne2933423:0

Cosco Stylaire Step Stool (44-B) Upholstery Replacement

crwdns2942213:0crwdne2942213:0

  1. Cosco Stylaire Step Stool (44-B) Upholstery Replacement, Cushion Padding and Upholstery: crwdns2935265:01crwdnd2935265:01crwdnd2935265:01crwdne2935265:0
    • Cut two pieces of foam for each seat cushion.

    • Bottom seat: 14" x 12"

    • Back rest: 14" x 6"

  2. Cosco Stylaire Step Stool (44-B) Upholstery Replacement: crwdns2935265:02crwdnd2935265:01crwdnd2935265:01crwdne2935265:0
    • Cut two pieces of oil cloth for each seat.

    • Bottom seat: 20" x 18"

    • Back rest: 17.5" x 9.5"

  3. Cosco Stylaire Step Stool (44-B) Upholstery Replacement: crwdns2935265:03crwdnd2935265:01crwdnd2935265:01crwdne2935265:0
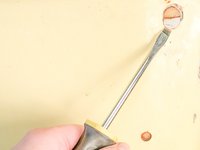
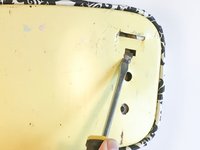
    • Using a Phillips #0 screwdriver, unscrew the back rest from the stool.

  4. Cosco Stylaire Step Stool (44-B) Upholstery Replacement: crwdns2935265:04crwdnd2935265:01crwdnd2935265:03crwdne2935265:0 Cosco Stylaire Step Stool (44-B) Upholstery Replacement: crwdns2935265:04crwdnd2935265:02crwdnd2935265:03crwdne2935265:0 Cosco Stylaire Step Stool (44-B) Upholstery Replacement: crwdns2935265:04crwdnd2935265:03crwdnd2935265:03crwdne2935265:0
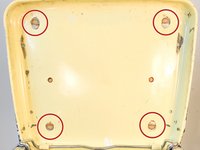
    • To detach the seat, lift up the seat and use a flathead screwdriver to lift up all four tabs underneath.

  5. Cosco Stylaire Step Stool (44-B) Upholstery Replacement: crwdns2935265:05crwdnd2935265:01crwdnd2935265:01crwdne2935265:0
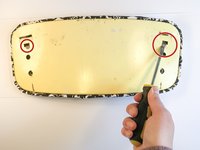
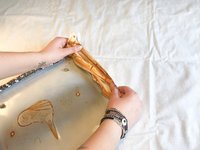
    • Use the flathead screwdriver to pry the top of the seat off.

    • The base of the seat will stay attached to the stool.

  6. Cosco Stylaire Step Stool (44-B) Upholstery Replacement: crwdns2935265:06crwdnd2935265:01crwdnd2935265:02crwdne2935265:0 Cosco Stylaire Step Stool (44-B) Upholstery Replacement: crwdns2935265:06crwdnd2935265:02crwdnd2935265:02crwdne2935265:0
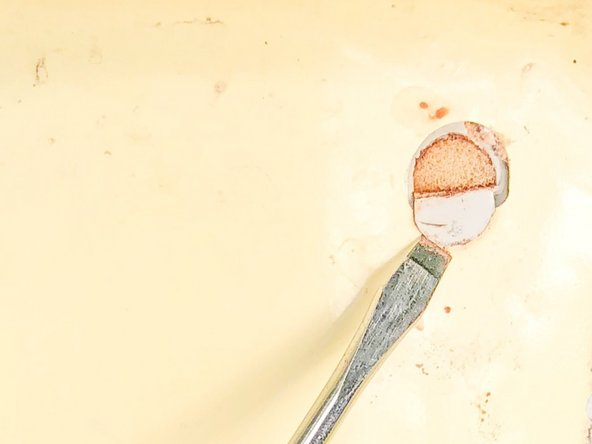
    • Use a flathead screwdriver to lift up the tabs on the back rest to remove the metal plate.

  7. Cosco Stylaire Step Stool (44-B) Upholstery Replacement: crwdns2935265:07crwdnd2935265:01crwdnd2935265:03crwdne2935265:0 Cosco Stylaire Step Stool (44-B) Upholstery Replacement: crwdns2935265:07crwdnd2935265:02crwdnd2935265:03crwdne2935265:0 Cosco Stylaire Step Stool (44-B) Upholstery Replacement: crwdns2935265:07crwdnd2935265:03crwdnd2935265:03crwdne2935265:0
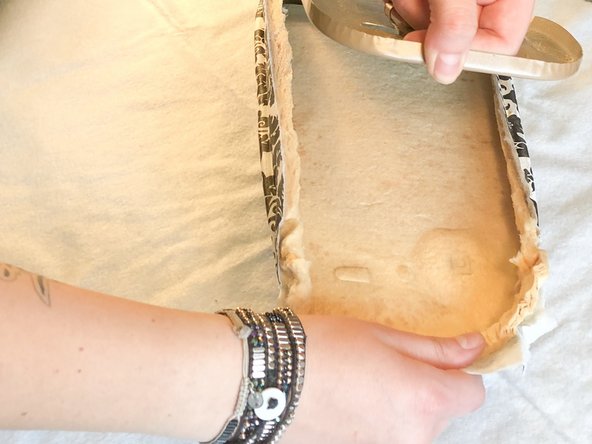
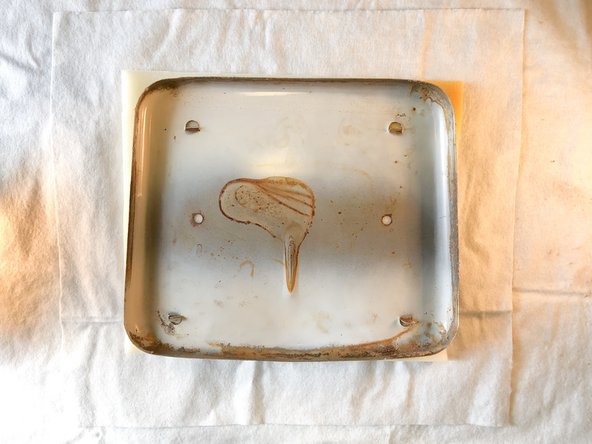
    • Remove old materials from each metal seat plate.

    • You may need to use a paint scraper to scrape off the foam.

  8. Cosco Stylaire Step Stool (44-B) Upholstery Replacement: crwdns2935265:08crwdnd2935265:01crwdnd2935265:01crwdne2935265:0
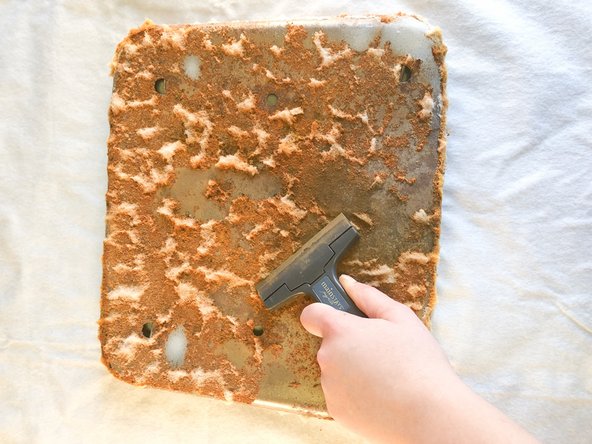
    • Clean off any rust using vinegar and paper towels.

  9. Cosco Stylaire Step Stool (44-B) Upholstery Replacement: crwdns2935265:09crwdnd2935265:01crwdnd2935265:03crwdne2935265:0 Cosco Stylaire Step Stool (44-B) Upholstery Replacement: crwdns2935265:09crwdnd2935265:02crwdnd2935265:03crwdne2935265:0 Cosco Stylaire Step Stool (44-B) Upholstery Replacement: crwdns2935265:09crwdnd2935265:03crwdnd2935265:03crwdne2935265:0
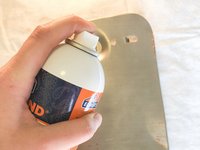
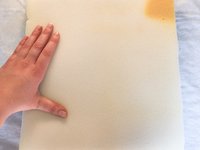
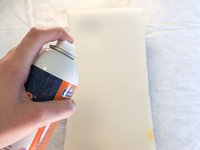
    • Use the spray adhesive to spray the metal plates and apply the foam to their respective pieces.

    • Let it sit for five minutes to dry.

  10. Cosco Stylaire Step Stool (44-B) Upholstery Replacement: crwdns2935265:010crwdnd2935265:01crwdnd2935265:03crwdne2935265:0 Cosco Stylaire Step Stool (44-B) Upholstery Replacement: crwdns2935265:010crwdnd2935265:02crwdnd2935265:03crwdne2935265:0 Cosco Stylaire Step Stool (44-B) Upholstery Replacement: crwdns2935265:010crwdnd2935265:03crwdnd2935265:03crwdne2935265:0
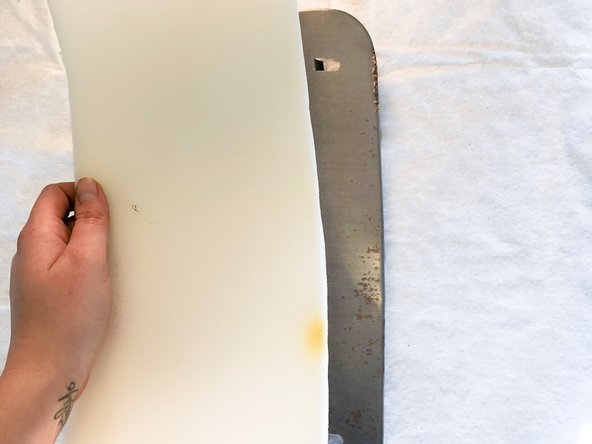
    • Spray adhesive onto foam and center each metal plate on the cloth so that there is an equal amount of cloth peeking out on all four sides.

  11. Cosco Stylaire Step Stool (44-B) Upholstery Replacement: crwdns2935265:011crwdnd2935265:01crwdnd2935265:02crwdne2935265:0 Cosco Stylaire Step Stool (44-B) Upholstery Replacement: crwdns2935265:011crwdnd2935265:02crwdnd2935265:02crwdne2935265:0
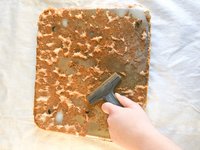
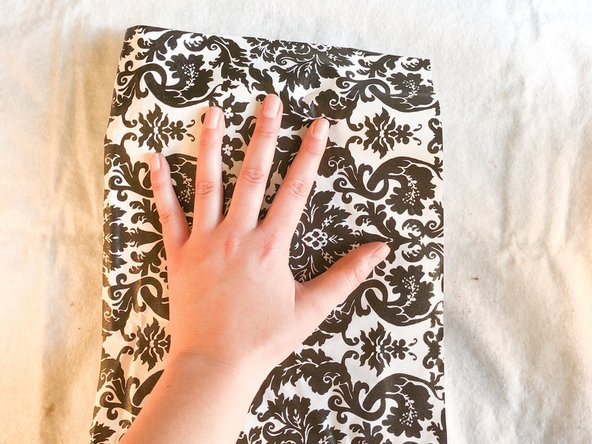
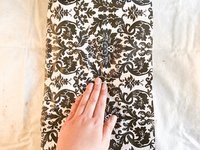
    • Smooth cloth onto each metal plate, pushing from the center, outwards.

  12. Cosco Stylaire Step Stool (44-B) Upholstery Replacement: crwdns2935265:012crwdnd2935265:01crwdnd2935265:02crwdne2935265:0 Cosco Stylaire Step Stool (44-B) Upholstery Replacement: crwdns2935265:012crwdnd2935265:02crwdnd2935265:02crwdne2935265:0
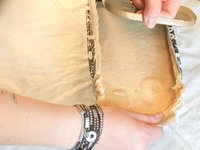
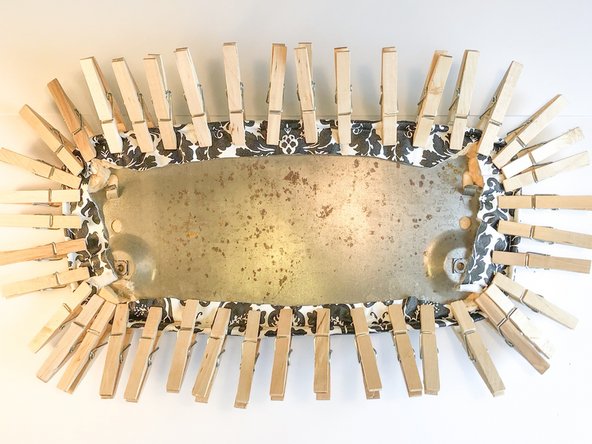
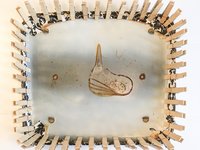
    • Fold the cloth up over the sides and clothespin it down along all four edges.

    • Let it dry for at least one hour.

crwdns2915888:0crwdne2915888:0

To reassemble your device, follow steps 3-5 in reverse order, using a hammer to push down the tabs.

crwdns2935229:07crwdne2935229:0

JacQueline Walker

crwdns2935283:001/30/18crwdne2935283:0

428 crwdns2915208:0crwdne2915208:0

crwdns2935295:0crwdne2935295:0

crwdns2915084:0crwdne2915084:0

Eastern Washington University, Team S27-G1, Crane Winter 2018 crwdns2935289:0Eastern Washington University, Team S27-G1, Crane Winter 2018crwdne2935289:0

EWU-CRANE-W18S27G1

crwdns2931471:04crwdne2931471:0

crwdns2935297:05crwdne2935297:0

crwdns2917034:0crwdne2917034:0

Instructions were perfect. Pictures were very helpful, and I was able to successfully (and easily because of the detail provided) finish upholstering my chair. Follow the instructions and you’ll be successful too!

gchan - crwdns2934203:0crwdne2934203:0

crwdns2917038:0crwdne2917038:0

crwdns2936625:0crwdne2936625:0:

crwdns2936751:024crwdne2936751:0 4

crwdns2936753:07crwdne2936753:0 18

crwdns2936753:030crwdne2936753:0 100

crwdns2942667:0crwdne2942667:0 7,489