crwdns2915892:0crwdne2915892:0
Replacing the RGB lights in the earcups is a technical process that includes disassembly and soldering. This guide walks you through each of the steps to replace the lights in the righthand earcup. For this guide, you will need a soldering kit and a screw driver kit.
crwdns2942213:0crwdne2942213:0
-
-
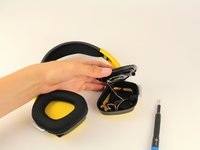
Carefully remove earmuff from headphones by getting a grip under the earmuff cushion and peeling up over the lip that keeps it in place.
-
-
-
Using the Phillips #0 screwdriver, unscrew the seven 6.4 mm screws holding the black speaker cover in place.
-
-
-
Remove and set aside the black panel, taking care to keep the wires attached.
-
-
-
-
Using the Phillips #0 screwdriver, remove the three 6.4 mm screws on the black plastic panel with the grid of holes.
-
-
-
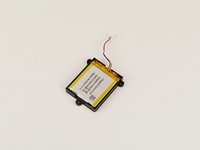
Carefully unplug the wire that connects the battery pack to the headphones.
-
-
-
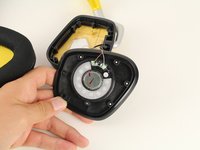
Remove the clear plastic covering and set aside.
-
-
-
There is a small circuit board near the bottom of the muff.
-
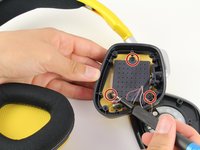
Using a Phillips #0 screwdriver, unscrew the single screw holding the circuit board in place.
-
-
crwdns2935267:0crwdne2935267:0Tweezers$4.99
-
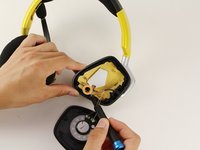
Remove the circuit board from its plastic slot.
-
-
-
Desolder the three points where the wires connect to the circuit board. For detailed instructions on soldering, see this helpful guide.
-
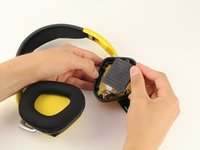
Follow these steps again to replace the light on the other earcup.
-


To reassemble your device, follow these instructions in reverse order.
To reassemble your device, follow these instructions in reverse order.
crwdns2935221:0crwdne2935221:0
crwdns2935229:02crwdne2935229:0
crwdns2915084:0crwdne2915084:0

Cal Poly, Team S9-G13, Maness Spring 2019 crwdns2935289:0Cal Poly, Team S9-G13, Maness Spring 2019crwdne2935289:0
CPSU-MANESS-S19S9G13
crwdns2931471:04crwdne2931471:0
crwdns2935297:014crwdne2935297:0