crwdns2933423:0crwdne2933423:0

crwdns2937539:0crwdnd2937539:0crwdne2937539:0

Corsair K65 disassembly Water Damage cleaning

crwdns2942213:0crwdne2942213:0

  1. Corsair K65 disassembly Water Damage cleaning, Corsair K65 disassembly Water Damage cleaning: crwdns2935265:01crwdnd2935265:01crwdnd2935265:03crwdne2935265:0 Corsair K65 disassembly Water Damage cleaning, Corsair K65 disassembly Water Damage cleaning: crwdns2935265:01crwdnd2935265:02crwdnd2935265:03crwdne2935265:0 Corsair K65 disassembly Water Damage cleaning, Corsair K65 disassembly Water Damage cleaning: crwdns2935265:01crwdnd2935265:03crwdnd2935265:03crwdne2935265:0
    • Unplug your keyboard. The wire is located near the back and on the bottom of the keyboard.

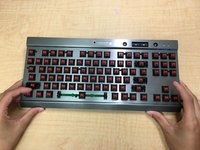
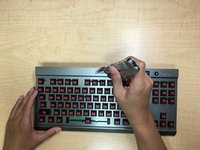
    • Place your keyboard onto a workspace with plenty of room.

  2. Corsair K65 disassembly Water Damage cleaning: crwdns2935265:02crwdnd2935265:01crwdnd2935265:02crwdne2935265:0 Corsair K65 disassembly Water Damage cleaning: crwdns2935265:02crwdnd2935265:02crwdnd2935265:02crwdne2935265:0
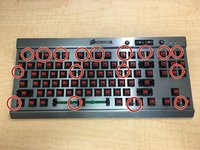
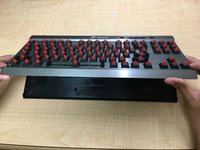
    • Pry each keycap off by grabbing the keycap with your fingers and pulling directly up.

    • Pulling the keycaps off at an angle may damage the keys or the switches on the keyboard.

    • A specialized tool to remove the keycaps will make this process a lot easier and faster, but is not required.

  3. Corsair K65 disassembly Water Damage cleaning: crwdns2935265:03crwdnd2935265:01crwdnd2935265:03crwdne2935265:0 Corsair K65 disassembly Water Damage cleaning: crwdns2935265:03crwdnd2935265:02crwdnd2935265:03crwdne2935265:0 Corsair K65 disassembly Water Damage cleaning: crwdns2935265:03crwdnd2935265:03crwdnd2935265:03crwdne2935265:0
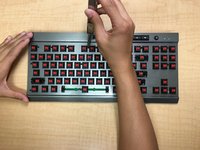
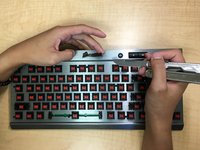
    • Unscrew the exposed 9mm Phillips #0 screws with your mini Phillips #0 screwdriver.

    • There should be 17 exposed screws in total.

  4. Corsair K65 disassembly Water Damage cleaning: crwdns2935265:04crwdnd2935265:01crwdnd2935265:02crwdne2935265:0 Corsair K65 disassembly Water Damage cleaning: crwdns2935265:04crwdnd2935265:02crwdnd2935265:02crwdne2935265:0
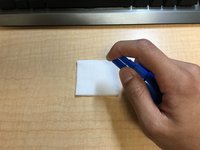
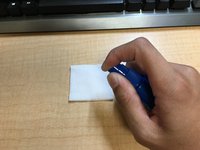
    • Peel back the Corsair logo with a knife.

    • Remove the logo, exposing another 9mm Phillips #0 screw.

  5. Corsair K65 disassembly Water Damage cleaning: crwdns2935265:05crwdnd2935265:01crwdnd2935265:02crwdne2935265:0 Corsair K65 disassembly Water Damage cleaning: crwdns2935265:05crwdnd2935265:02crwdnd2935265:02crwdne2935265:0
    • Unscrew the now exposed 9mm Phillips #0 screw.

    • There should now be a total of 18 9mm Phillips #0 screws.

  6. Corsair K65 disassembly Water Damage cleaning: crwdns2935265:06crwdnd2935265:01crwdnd2935265:02crwdne2935265:0 Corsair K65 disassembly Water Damage cleaning: crwdns2935265:06crwdnd2935265:02crwdnd2935265:02crwdne2935265:0
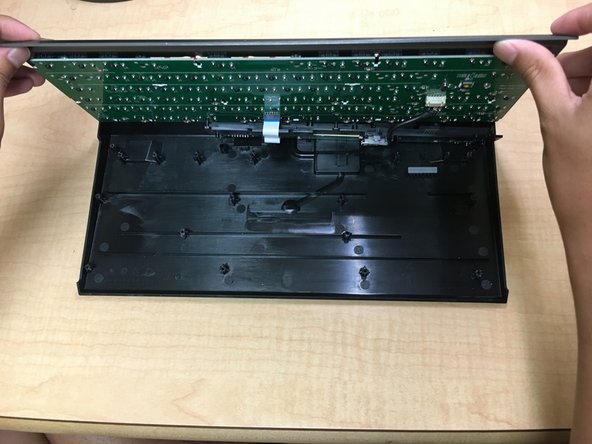
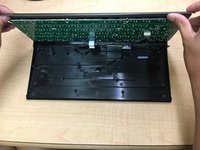
    • Carefully separate the bottom half of the keyboard from the top half of the keyboard.

  7. Corsair K65 disassembly Water Damage cleaning: crwdns2935265:07crwdnd2935265:01crwdnd2935265:02crwdne2935265:0 Corsair K65 disassembly Water Damage cleaning: crwdns2935265:07crwdnd2935265:02crwdnd2935265:02crwdne2935265:0
    • Apply the rubbing alcohol to your cotton pad.

  8. Corsair K65 disassembly Water Damage cleaning: crwdns2935265:08crwdnd2935265:01crwdnd2935265:01crwdne2935265:0
    • Wipe down the affected parts of the keyboard interior with the alcohol-soaked pad.

    • Allow the interior of the keyboard to dry for a few minutes before reassembling the keyboard.

crwdns2915888:0crwdne2915888:0

To reassemble your device, follow these instructions in reverse order.

crwdns2935229:025crwdne2935229:0

Michael Le

crwdns2935283:009/29/15crwdne2935283:0

733 crwdns2915208:0crwdne2915208:0

crwdns2935295:0crwdne2935295:0

crwdns2915084:0crwdne2915084:0

Cal Poly, Team 14-5, Green Fall 2015 crwdns2935289:0Cal Poly, Team 14-5, Green Fall 2015crwdne2935289:0

CPSU-GREEN-F15S14G5

crwdns2931471:04crwdne2931471:0

crwdns2935297:05crwdne2935297:0

crwdns2944067:05crwdne2944067:0

キーボードの中に液体が入ってしまい、どうしようかと困っていたところこちらのサイトに辿り着きました。

丁寧な説明のお陰で無事、拭き取ることが出来ました。本当に有難うございました。

kumashikota - crwdns2934203:0crwdne2934203:0

broke the white and blue connector, no way to get the board in the same orientation as you did.

qwuzzy - crwdns2934203:0crwdne2934203:0

Extremely bad guide. Doesn’t go over how the switch to change the LEDs need to be carefully moved away or it will snap. I can’t imagine how many people you’ve costed a keyboard. 0/5 stars.

ah93493 - crwdns2934203:0crwdne2934203:0

Nice guide, helped me to clean the board after I spilled a drink on my beloved board. ade some comments at points that proved difficult for me. Unfortunately I only understood what the white plastic thingie that fell out is used for after I reassembled the keyboard. It is supposed to sit on the LEDs to dim them and even out the light.

St Schiff - crwdns2934203:0crwdne2934203:0

crwdns2917038:0crwdne2917038:0

crwdns2936625:0crwdne2936625:0:

crwdns2936751:024crwdne2936751:0 5

crwdns2936753:07crwdne2936753:0 41

crwdns2936753:030crwdne2936753:0 225

crwdns2942667:0crwdne2942667:0 43,202