crwdns2933423:0crwdne2933423:0

Compaq Presario v2000 mother board Replacement

crwdns2942213:0crwdne2942213:0

  1. Compaq Presario v2000 mother board Replacement, mother board: crwdns2935265:01crwdnd2935265:01crwdnd2935265:01crwdne2935265:0
    • Start by removing the battery

  2. Compaq Presario v2000 mother board Replacement: crwdns2935265:02crwdnd2935265:01crwdnd2935265:02crwdne2935265:0 Compaq Presario v2000 mother board Replacement: crwdns2935265:02crwdnd2935265:02crwdnd2935265:02crwdne2935265:0
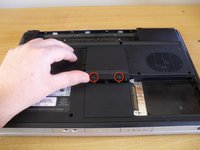
    • Loosen the two screws of the hard drive cover

    • The screws will remain in the cover

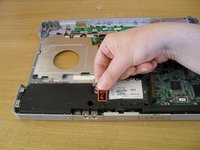
    • Remove the cover, then pull straight up on the pull tab to remove the hard drive

  3. Compaq Presario v2000 mother board Replacement: crwdns2935265:03crwdnd2935265:01crwdnd2935265:02crwdne2935265:0 Compaq Presario v2000 mother board Replacement: crwdns2935265:03crwdnd2935265:02crwdnd2935265:02crwdne2935265:0
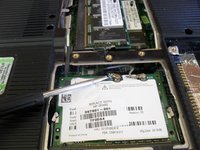
    • Loosen the two screws on the ram cover and remove

    • Loosen the one screw on the wireless card cover and remove

    • These screws will remain in their covers

  4. Compaq Presario v2000 mother board Replacement: crwdns2935265:04crwdnd2935265:01crwdnd2935265:01crwdne2935265:0
    • Remove 16 bottom cover screws (dark coloured 6mm screws)

    • Remove 5 screws from inside the battery bay (silver coloured 4mm screws)

  5. Compaq Presario v2000 mother board Replacement: crwdns2935265:05crwdnd2935265:01crwdnd2935265:03crwdne2935265:0 Compaq Presario v2000 mother board Replacement: crwdns2935265:05crwdnd2935265:02crwdnd2935265:03crwdne2935265:0 Compaq Presario v2000 mother board Replacement: crwdns2935265:05crwdnd2935265:03crwdnd2935265:03crwdne2935265:0
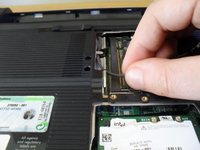
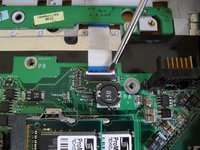
    • Using a small flat blade screwdriver pop off the wireless aerial connectors from the wireless card

    • The wireless connecters are easily damaged. Lift the connecters straight up. When reassembling line them up carefully and push them straight down

    • Unroute the cables from the bottom of the case

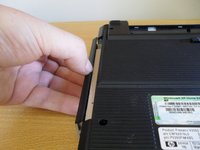
    • Slide out the dvd drive

  6. Compaq Presario v2000 mother board Replacement: crwdns2935265:06crwdnd2935265:01crwdnd2935265:03crwdne2935265:0 Compaq Presario v2000 mother board Replacement: crwdns2935265:06crwdnd2935265:02crwdnd2935265:03crwdne2935265:0 Compaq Presario v2000 mother board Replacement: crwdns2935265:06crwdnd2935265:03crwdnd2935265:03crwdne2935265:0
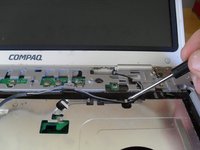
    • Flip the laptop over and open the display to start removing the keyboard

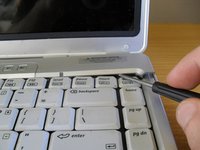
    • Slide a small flat blade screwdriver between the insert and delete keys and lever the button board cover off

    • Remove the four keyboard screws (dark coloured 4mm screws)

    • Lift up the keyboard, but beware of the cable underneath still to be removed

    • Loosen the socket for the keyboard cable and remove the keyboard

  7. Compaq Presario v2000 mother board Replacement: crwdns2935265:07crwdnd2935265:01crwdnd2935265:03crwdne2935265:0 Compaq Presario v2000 mother board Replacement: crwdns2935265:07crwdnd2935265:02crwdnd2935265:03crwdne2935265:0 Compaq Presario v2000 mother board Replacement: crwdns2935265:07crwdnd2935265:03crwdnd2935265:03crwdne2935265:0
    • Remove the display cable connector by lifting it straight up

    • Un-route the wireless aerial cables from the top cover

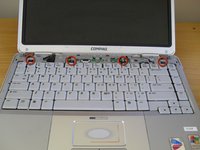
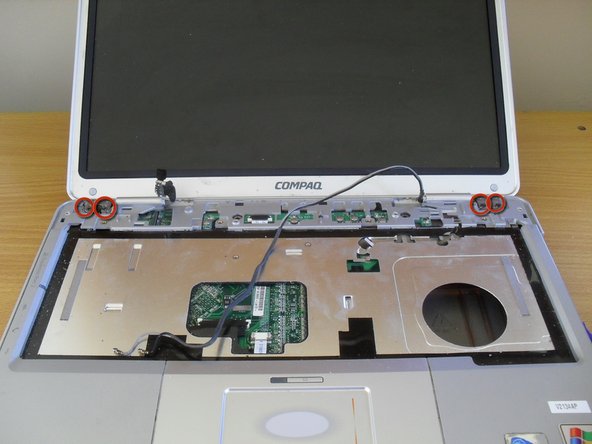
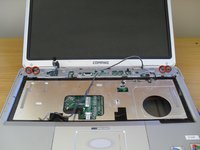
    • Remove the four display screws (dark coloured 5mm screws). Lift the display up and off

  8. Compaq Presario v2000 mother board Replacement: crwdns2935265:08crwdnd2935265:01crwdnd2935265:01crwdne2935265:0
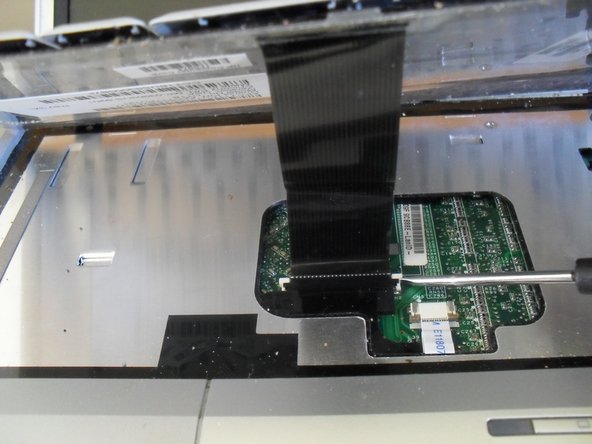
    • Use a flat blade screwdriver to loosen the touchpad cable connecter

  9. Compaq Presario v2000 mother board Replacement: crwdns2935265:09crwdnd2935265:01crwdnd2935265:01crwdne2935265:0
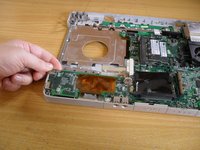
    • Flip the laptop over and grip the bottom case where the dvd drive used to be

    • Lift off the bottom case

  10. Compaq Presario v2000 mother board Replacement: crwdns2935265:010crwdnd2935265:01crwdnd2935265:02crwdne2935265:0 Compaq Presario v2000 mother board Replacement: crwdns2935265:010crwdnd2935265:02crwdnd2935265:02crwdne2935265:0
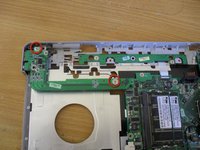
    • Remove two screws from the s-video/usb board (silver coloured 4mm screws)

    • Lift the board from the right hand side

    • The connecter for this board is under the right hand side. When reassembling, make sure this connecter plugs in firmly

  11. Compaq Presario v2000 mother board Replacement: crwdns2935265:011crwdnd2935265:01crwdnd2935265:03crwdne2935265:0 Compaq Presario v2000 mother board Replacement: crwdns2935265:011crwdnd2935265:02crwdnd2935265:03crwdne2935265:0 Compaq Presario v2000 mother board Replacement: crwdns2935265:011crwdnd2935265:03crwdnd2935265:03crwdne2935265:0
    • Remove the speaker cable and lift out the speaker module

    • Use a flat blade screw driver to loosen the button board connecter

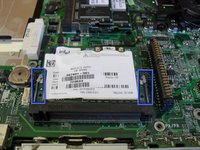
    • Push the two wireless card arms outwards to remove the wireless card

  12. Compaq Presario v2000 mother board Replacement: crwdns2935265:012crwdnd2935265:01crwdnd2935265:01crwdne2935265:0
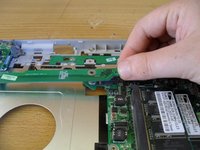
    • Remove the four screws holding the mother board in place (silver coloured 4mm screws)

    • The screw holes are marked "PA/PR" or "PR". When reassembling do not put a screw in the hole marked "PA"

  13. Compaq Presario v2000 mother board Replacement: crwdns2935265:013crwdnd2935265:01crwdnd2935265:03crwdne2935265:0 Compaq Presario v2000 mother board Replacement: crwdns2935265:013crwdnd2935265:02crwdnd2935265:03crwdne2935265:0 Compaq Presario v2000 mother board Replacement: crwdns2935265:013crwdnd2935265:03crwdnd2935265:03crwdne2935265:0
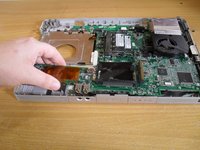
    • Remove the left side of the motherboard first. It may be necessary to bent the case a little to get the firewire and USB port away from the case

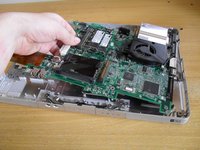
    • Pull on the middle of the board next, angling up to clear the front audio jacks from the case

    • Pull the board away from the right side of the case

  14. Compaq Presario v2000 mother board Replacement: crwdns2935265:014crwdnd2935265:01crwdnd2935265:02crwdne2935265:0 Compaq Presario v2000 mother board Replacement: crwdns2935265:014crwdnd2935265:02crwdnd2935265:02crwdne2935265:0
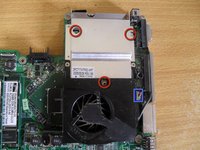
    • Remove the three screws holding the heatsink to the mother board (silver coloured 4mm screws)

    • Remove the heatsink fan connecter

    • Lift the heatsink off the board

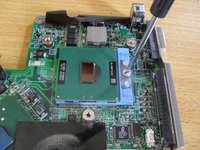
    • Use a flat blade screwdriver to turn the CPU lock and remove the CPU

crwdns2915888:0crwdne2915888:0

To reassemble your device, follow these instructions in reverse order. See special reassembly notes in steps 10 and 12.

crwdns2935229:07crwdne2935229:0

Andrew

crwdns2935283:005/08/10crwdne2935283:0

1,341 crwdns2915208:0crwdne2915208:0

crwdns2935297:05crwdne2935297:0

crwdns2917034:0crwdne2917034:0

How to clean the fan cooler? do i have to disassemble it whole or can i just blow it from the outside, no tools?

Marcos Mora - crwdns2934203:0crwdne2934203:0

crwdns2917038:0crwdne2917038:0

crwdns2936625:0crwdne2936625:0:

crwdns2936751:024crwdne2936751:0 0

crwdns2936753:07crwdne2936753:0 19

crwdns2936753:030crwdne2936753:0 36

crwdns2942667:0crwdne2942667:0 5,797