crwdns2915892:0crwdne2915892:0
Laptops commonly come with a built in webcam, and sometimes they may malfunctioning, requiring replacement. In this guide you will be guided step by step through the process of replacing the webcam.
The laptop webcam in question is the unspecified HP Webcam with an integrated microphone from the HP Compaq Mini 110.
There is no specific set of skills required for this fix, but do note that a slight learning curve may appear in the case of knowing what to pullout. Do not worry, as it is a fairly easy and simple process once you get the hang of it.
crwdns2942213:0crwdne2942213:0
-
-
Locate the battery and the battery tabs on the bottom of the Compaq Mini.
-
-
-
Push both tabs inward simultaneously and slide the battery out.
-
-
-
Use a Philips #0 screwdriver to unscrew the two screws covering the memory compartment on the bottom of the laptop and remove the cover.
-
-
-
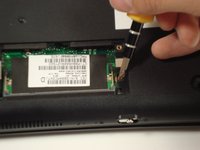
Push out the side tabs simultaneously and pull out the old RAM module.
-
-
-
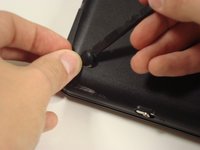
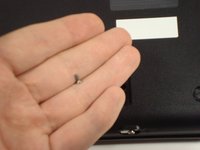
Remove the rubber pads located on the corners of your Compaq Mini.
-
-
-
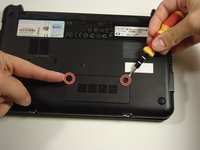
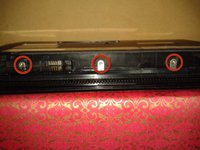
Unscrew all the corner screws. There are four total, one under each rubber pad.
-
-
-
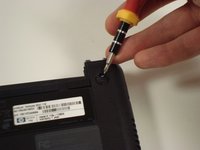
Unscrew the screw for the bottom case located in the RAM compartment.
-
-
-
-
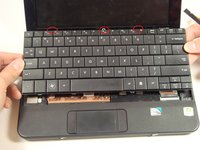
Remove the three screws in the silver tabs at the back of the keyboard.
-
Lift the keyboard away from the laptop.
-
-
-
Remove the three screws holding the panel in place.
-
-
-
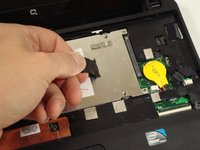
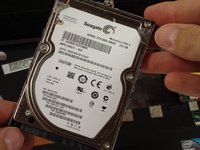
Pull up on the tab to remove the hard drive.
-
-
-
Remove the eight screws that are from the plastic top cover.
-
-
-
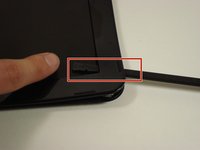
Pry up the top plastic cover using a spudger.
-
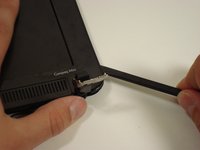
These two tabs under the screen need to be pushed in with a spudger.
-
-
-
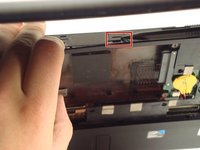
Remove the cable by carefully pulling it up.
-
-
-
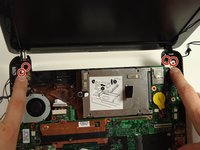
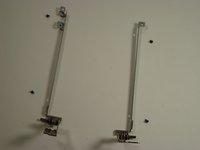
Remove the four screws that keep the bottom of the hinges attached to the base.
-
-
-
Pry off the top plastic cover of the display assembly.
-
The spudger may go all the way through to the screen-side of the cover. This is not a problem and won't damage anything.
-
-
-
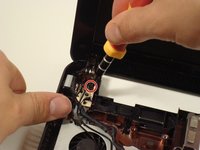
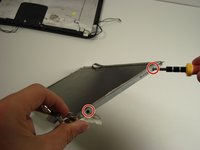
Remove the 4 screws keeping the screen on the plastic assembly.
-
-
-
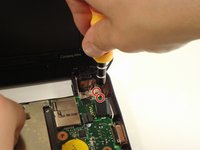
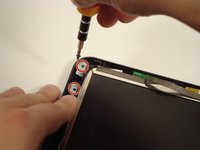
Take the screen off the metal connectors by unscrewing each side. Each side has 2 screws.
-
-
-
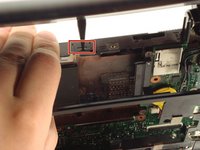
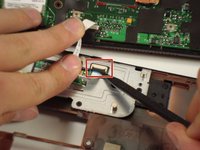
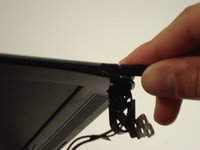
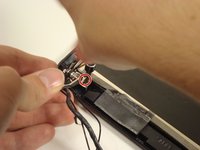
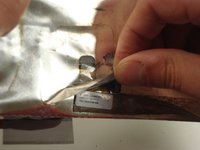
Detach the cable from the screen. It is connected under the foil flap.
-
-
-
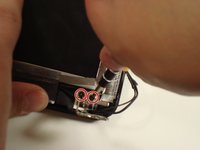
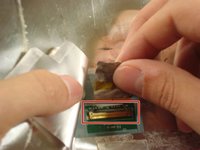
After removing the cable from the back of the screen, detach the webcam assembly.
-


To reassemble your device, follow these instructions in reverse order.
crwdns2935287:0crwdne2935287:0

Cal Poly, Team 22-2, Maness Fall 2010 crwdns2935289:0Cal Poly, Team 22-2, Maness Fall 2010crwdne2935289:0
CPSU-MANESS-F10S22G2
crwdns2931471:06crwdne2931471:0
crwdns2935297:020crwdne2935297:0