crwdns2933423:0crwdne2933423:0

Cobra 29 LTD Classic Knobs Replacement

crwdns2942213:0crwdne2942213:0

  1. Cobra 29 LTD Classic Knobs Replacement, Power Cable: crwdns2935265:01crwdnd2935265:01crwdnd2935265:02crwdne2935265:0 Cobra 29 LTD Classic Knobs Replacement, Power Cable: crwdns2935265:01crwdnd2935265:02crwdnd2935265:02crwdne2935265:0
    • Turn the power switch, the leftmost knob, counterclockwise to off.

  2. Cobra 29 LTD Classic Knobs Replacement: crwdns2935265:02crwdnd2935265:01crwdnd2935265:02crwdne2935265:0 Cobra 29 LTD Classic Knobs Replacement: crwdns2935265:02crwdnd2935265:02crwdnd2935265:02crwdne2935265:0
    • Turn the device around and firmly pull the power cable plug to remove it from the radio.

  3. Cobra 29 LTD Classic Knobs Replacement, Microphone: crwdns2935265:03crwdnd2935265:01crwdnd2935265:02crwdne2935265:0 Cobra 29 LTD Classic Knobs Replacement, Microphone: crwdns2935265:03crwdnd2935265:02crwdnd2935265:02crwdne2935265:0
    • Unscrew the cap counterclockwise on the microphone plug to disconnect the cable.

  4. Cobra 29 LTD Classic Knobs Replacement: crwdns2935265:04crwdnd2935265:01crwdnd2935265:01crwdne2935265:0
    • Gently unplug the microphone plug.

  5. Cobra 29 LTD Classic Knobs Replacement, Knobs: crwdns2935265:05crwdnd2935265:01crwdnd2935265:01crwdne2935265:0
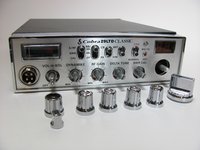
    • Gently turn the middle four knobs counter-clockwise until they no longer move.

    • The middle four knobs are held in place by friction and do not have a way to keep them in the correct position. When reassembling the middle four knobs, make sure to line up the mark on the knob with the left-most mark on the front panel.

  6. Cobra 29 LTD Classic Knobs Replacement: crwdns2935265:06crwdnd2935265:01crwdnd2935265:02crwdne2935265:0 Cobra 29 LTD Classic Knobs Replacement: crwdns2935265:06crwdnd2935265:02crwdnd2935265:02crwdne2935265:0
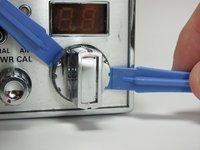
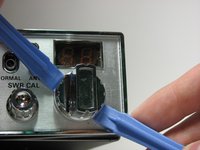
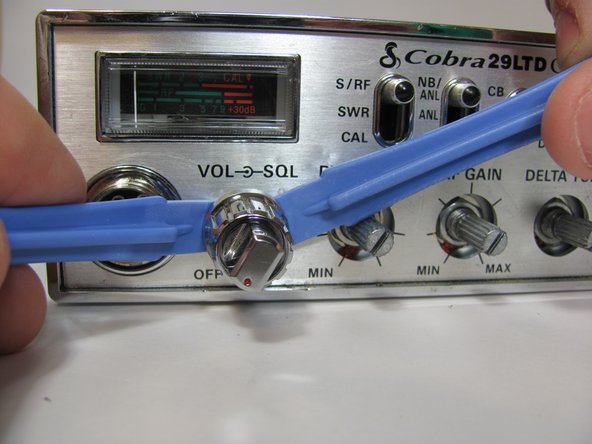
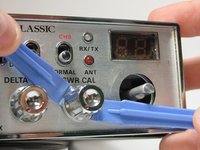
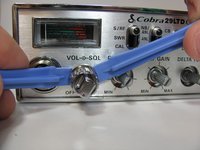
    • Insert two plastic opening tools behind the tuning knob.

    • With some force, pry the knob off of the radio.

    • Two opening tools are needed so that you don't break the knob or connector by applying uneven force.

  7. Cobra 29 LTD Classic Knobs Replacement: crwdns2935265:07crwdnd2935265:01crwdnd2935265:03crwdne2935265:0 Cobra 29 LTD Classic Knobs Replacement: crwdns2935265:07crwdnd2935265:02crwdnd2935265:03crwdne2935265:0 Cobra 29 LTD Classic Knobs Replacement: crwdns2935265:07crwdnd2935265:03crwdnd2935265:03crwdne2935265:0
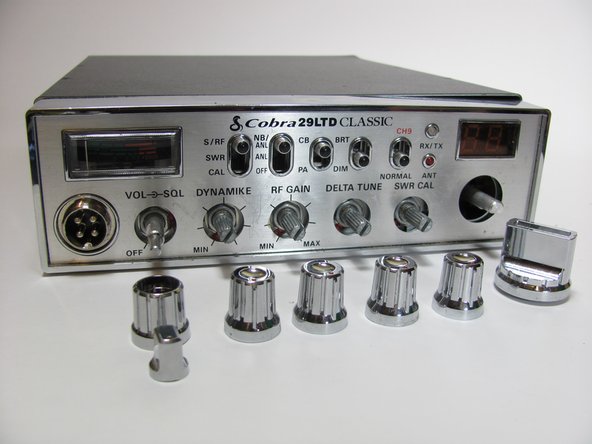
    • Repeat the above procedure with the remaining knobs.

    • The final knob will have a power knob on the end of it. When reassembling, put the power knob on last.

crwdns2915888:0crwdne2915888:0

To reassemble your device, align the buttons and push them on.

crwdns2935227:0crwdne2935227:0

Matt Williams

crwdns2935283:010/20/13crwdne2935283:0

133 crwdns2915208:0crwdne2915208:0

crwdns2935295:0crwdne2935295:0

crwdns2915084:0crwdne2915084:0

Cal Poly, Team 11-37, Amido Fall 2013 crwdns2935289:0Cal Poly, Team 11-37, Amido Fall 2013crwdne2935289:0

CPSU-AMIDO-F13S11G37

crwdns2931471:04crwdne2931471:0

crwdns2935297:09crwdne2935297:0

crwdns2944067:00crwdne2944067:0

crwdns2917038:0crwdne2917038:0

crwdns2936625:0crwdne2936625:0:

crwdns2936751:024crwdne2936751:0 0

crwdns2936753:07crwdne2936753:0 11

crwdns2936753:030crwdne2936753:0 31

crwdns2942667:0crwdne2942667:0 5,183