crwdns2942213:0crwdne2942213:0
-
-
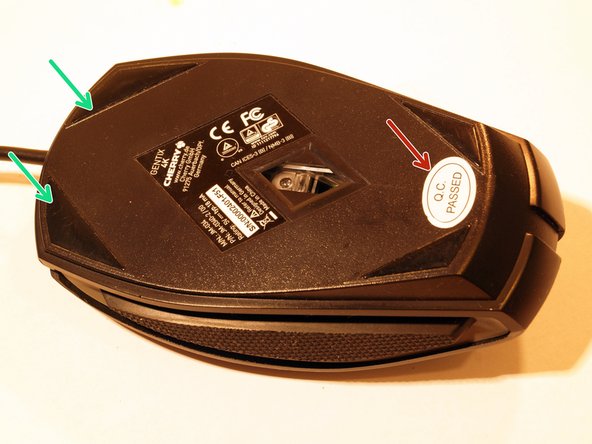
Remove the "Q.C. Passed" Sticker to have access to the Phillips screw below.
-
Pull of the two upper mouse feet. It's enough to just remove half of the mouse feet to get to the screws.
-
-
-
Lift the upper part of the mouse.
-
Fold the upper and the lower part back like a book and put it aside.
-
-
-
Loose the plug with the flat end of a spudger.
-
Pull the plug.
-
-
-
Lift the two side parts and put it aside.
-
-
-
Loose the plug with the flat end of a spudger.
-
Pull the plug.
-
-
-
-
There are two plasic clips. Loose the left plastic clip very carefully.
-
Fold the board up from the left side.
-
Take out the board and put it aside.
-
-
-
Move the mouse wheel a bit to the right.
-
Take the mouse wheel out of the guide forks.
-
-
-
Remove the four Phillips Screws.
-
Remove the weight.
-
Remove the board.
-
-
-
Have a look at the plastic clips
-
Plastic clips for the black upper part for clicking.
-
Plastic clips for the DPI button.
-
-
-
Insert the flat end of the spudger into the gap between the two halves on the left and right. The rear plastic clips should then release automatically.
-
-
-
Loose the plastic clips in the middle.
-
Insert the spudger from the left and right side between both parts. The plastic clips should release automatically form their rest postion.
-
Alle plastic clips are now released.
-
-
-
Insert the flat end of a spudger into the gap between the two parts.
-
Increase the gap all around until the pieces fall apart.
-
-
-
Unlock the two plastic clips.
-
Use the flat end of a spudger to lift and remove the DPI button.
-
Reverse the steps to reassemble your device.
Reverse the steps to reassemble your device.
crwdns2935221:0crwdne2935221:0
crwdns2935227:0crwdne2935227:0
crwdns2934873:0crwdne2934873:0
100%
crwdns2934883:0Xarecrwdne2934883:0 crwdns2934875:0crwdne2934875:0
crwdns2934877:0crwdne2934877:0 ›


