crwdns2933423:0crwdne2933423:0

Casio LK-170 Display Replacement

crwdns2942213:0crwdne2942213:0

  1. Casio LK-170 Display Replacement, Display: crwdns2935265:01crwdnd2935265:01crwdnd2935265:01crwdne2935265:0
    • Using JIS-1 screwdriver, remove the seven 11mm screws located on the back of the keyboard.

  2. Casio LK-170 Display Replacement: crwdns2935265:02crwdnd2935265:01crwdnd2935265:01crwdne2935265:0
    • Once all the screws are out, flip the keyboard over and gently pull the middle panel out.

    • Flip this panel up so that the component board can be seen.

  3. Casio LK-170 Display Replacement: crwdns2935265:03crwdnd2935265:01crwdnd2935265:03crwdne2935265:0 Casio LK-170 Display Replacement: crwdns2935265:03crwdnd2935265:02crwdnd2935265:03crwdne2935265:0 Casio LK-170 Display Replacement: crwdns2935265:03crwdnd2935265:03crwdnd2935265:03crwdne2935265:0
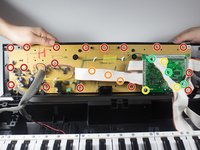
    • We will be removing a total of 26 screws on the component board..

    • First, you must use the PH-1 bit to remove the 17 8mm screws, circled in red.

    • Second, using the same PH-1 bit, you will remove the three 8mm screws hidden under the white wire. These screws are circled in orange.

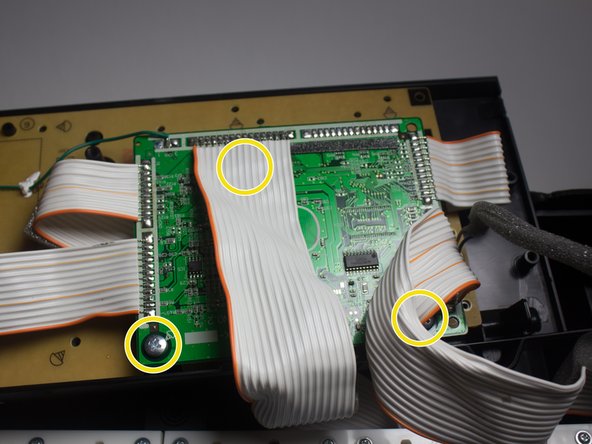
    • Third, using the JIS-1 bit, remove the three 7mm screws on the circuit board.

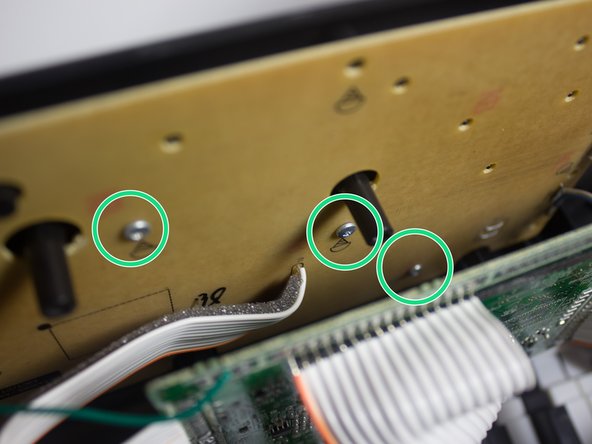
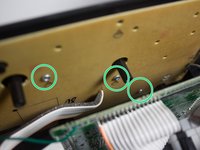
    • After removing the circuit board, three more screws will be revealed.

    • Using the PH-1 bit, remove the last three 8mm screws, circled in green.

  4. Casio LK-170 Display Replacement: crwdns2935265:04crwdnd2935265:01crwdnd2935265:01crwdne2935265:0
    • Once all the screws have been removed, lift the component board and place it face down on the keys.

    • The component board is connected to the keyboard, so do not try to remove it.

  5. Casio LK-170 Display Replacement: crwdns2935265:05crwdnd2935265:01crwdnd2935265:01crwdne2935265:0
    • Flip over the component board to reveal the display that is currently connected to a green panel.

  6. Casio LK-170 Display Replacement: crwdns2935265:06crwdnd2935265:01crwdnd2935265:01crwdne2935265:0
    • Remove the display by carefully picking it up with your fingers from the green panel.

crwdns2915888:0crwdne2915888:0

To reassemble your device, follow these instructions in reverse order.

Samantha Baker

crwdns2935283:001/24/17crwdne2935283:0

425 crwdns2915208:0crwdne2915208:0

crwdns2935297:04crwdne2935297:0

crwdns2915084:0crwdne2915084:0

Cal Poly, Team 13-2, Banghart Winter 2017 crwdns2935289:0Cal Poly, Team 13-2, Banghart Winter 2017crwdne2935289:0

CPSU-BANGHART-W17S13G2

crwdns2931471:03crwdne2931471:0

crwdns2935297:05crwdne2935297:0

crwdns2917034:0crwdne2917034:0

Hey, where do you find a replacement lcd?

Albert istvab - crwdns2934203:0crwdne2934203:0

crwdns2917038:0crwdne2917038:0

crwdns2936625:0crwdne2936625:0:

crwdns2936751:024crwdne2936751:0 1

crwdns2936753:07crwdne2936753:0 1

crwdns2936753:030crwdne2936753:0 6

crwdns2942667:0crwdne2942667:0 657