crwdns2915892:0crwdne2915892:0
With the help of a screwdriver, you will be able to replace the silicon buttons, so you can hear some tunes again.
crwdns2942213:0crwdne2942213:0
-
-
Using a JIS-1 screwdriver, remove the seven 11 mm screws located on the back of the keyboard.
 crwdns2952109:0crwdne2952109:0
-
-
-
Once all the screws are out, flip the keyboard over and gently pull the middle panel out.
-
Flip the middle panel up so that the component board can be seen.
-
-
-
-
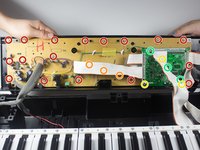
First, you will use a PH-1 bit to remove the 17 8mm screws circled in red.
-
Next, using the same PH-1 bit, you will remove the three 8mm screws hidden under the white wires, circled in orange.
-
Then, using a JIS-1 bit, we will remove three 7mm screws from the circuit board, circled in yellow.
-
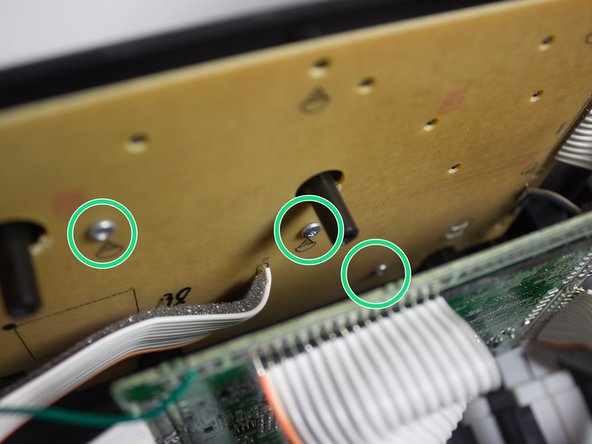
After removing the circuit board, the last three screws are revealed, circled in green. You will use the PH-1 bit to remove these last screws.
-
-
-
Once all the screws have been removed, lift the panel and place it face down on the keys.
-
-
-
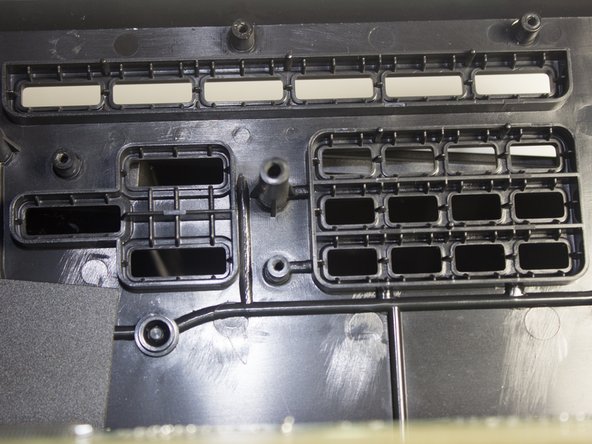
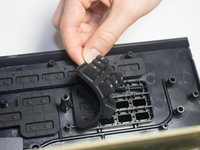
Under the panel are the buttons. Remove them by pulling from any corner with your fingers.
-
Remove all the buttons that need to be replaced.
-


To reassemble your device, follow these instructions in reverse order.
crwdns2935287:0crwdne2935287:0

Cal Poly, Team 13-2, Banghart Winter 2017 crwdns2935289:0Cal Poly, Team 13-2, Banghart Winter 2017crwdne2935289:0
CPSU-BANGHART-W17S13G2
crwdns2931471:03crwdne2931471:0
crwdns2935297:05crwdne2935297:0